MicroK8S and WSL Managed by Azure Arc -Part IV - Arc Kubernetes
A blog series about my experiences with MicroK8S, WSL, and Azure Arc
In this blog series I am going to discuss my experiences with MicroK8S, installing it on Windows Subsystem for Linux, and how to connect the cluster to Azure using Azure Arc-Enabled Kubernetes.
The blog will be broken up into the following three sections:
- Installing MicroK8s on Windows Subsystem for Linux (WSL)
- Azure Arc-enabled servers: Installing Azure Connected Machine Agent
- Azure Arc-enabled Kubernetes: Connecting my MicroK8S cluster to Azure
Managing MicroK8s Cluster with Azure Arc-Enabled Kubernetes
In this blog I will discuss my experience connecting my newly deploy MicroK8s cluster to Azure using Azure Arc-enabled Kubernetes. In this blog I will go over creating the prerequisites and how to connect this cluster to Azure. This blog assumes we already have MicroK8s installed and running on the WSL instance and that the Azure Arc Agent is installed and connected.
So we are on the final few steps to have deployed MicroK8s on my Windows 10 WSL instance and then having the cluster managed by Azure Arc-enabled Kubernetes. Some of the things I will do in this blog:
- Install both Helm and Kubectl on my WSL instance
- Copy the MicroK8s config to my Kube config location
- Install Azure CLI on the WSL instance
- Then we will configure Azure CLI to connect Kubernetes to Azure Arc
Install Azure CLI
From within the WSL instance I will run the following command to install Azure CLI.
curl -sL https://aka.ms/InstallAzureCLIDeb | sudo bash
Next we will install the Azure Arc for Kubernetes extension using Azure CLI command:
az extension add --name connectedk8s
.Kube Configurations
In the first blog in this series we gave the user specific permissions to allow the user to use MicroK8s commands. For a refresher this is the commands I ran:
sudo usermod -aG microk8s $USER
sudo chown -f -R $USER ~/.kube
I am not sure if I ran the following command in my previous blog. Just to make sure I will run this command to use my host’s kubectl command. I will export the microk8s config into a my .kube directory.
cd $HOME
mkdir .kube
cd .kube
microk8s config > config
The same thing can be done with the following one line command:
microk8s config >> ~/.kube/config
Register Providers on Subscription
I have deployed Azure Arc resources plenty of times on this subscription so I didn’t need to register any of the providers. If this was a new subscription I would have registered the following providers:
az provider register --namespace Microsoft.Kubernetes
az provider register --namespace Microsoft.KubernetesConfiguration
az provider register --namespace Microsoft.ExtendedLocations
Kubeconfig and Cluster Readiness
Here we will install Helm and KubeCtl on the WSL host. We will also configure our host to use the kubconfig file in order for Azure CLI to interact with the cluster.
To install Helm on the host run the following snap command:
sudo snap install helm
To install KubeCtl on the host run the following snap command:
sudo snap install kubectl --classic
Now we need to enable Azure CLI to interact with the Kubernetes cluster running on our WSL host. We will export our config file and use the default context by running the following commands:
microk8s config >> $HOME/.kube/config
kubectl config get-contexts
kubectl config use-context microk8s
Connect MicroK8s Cluster to Azure
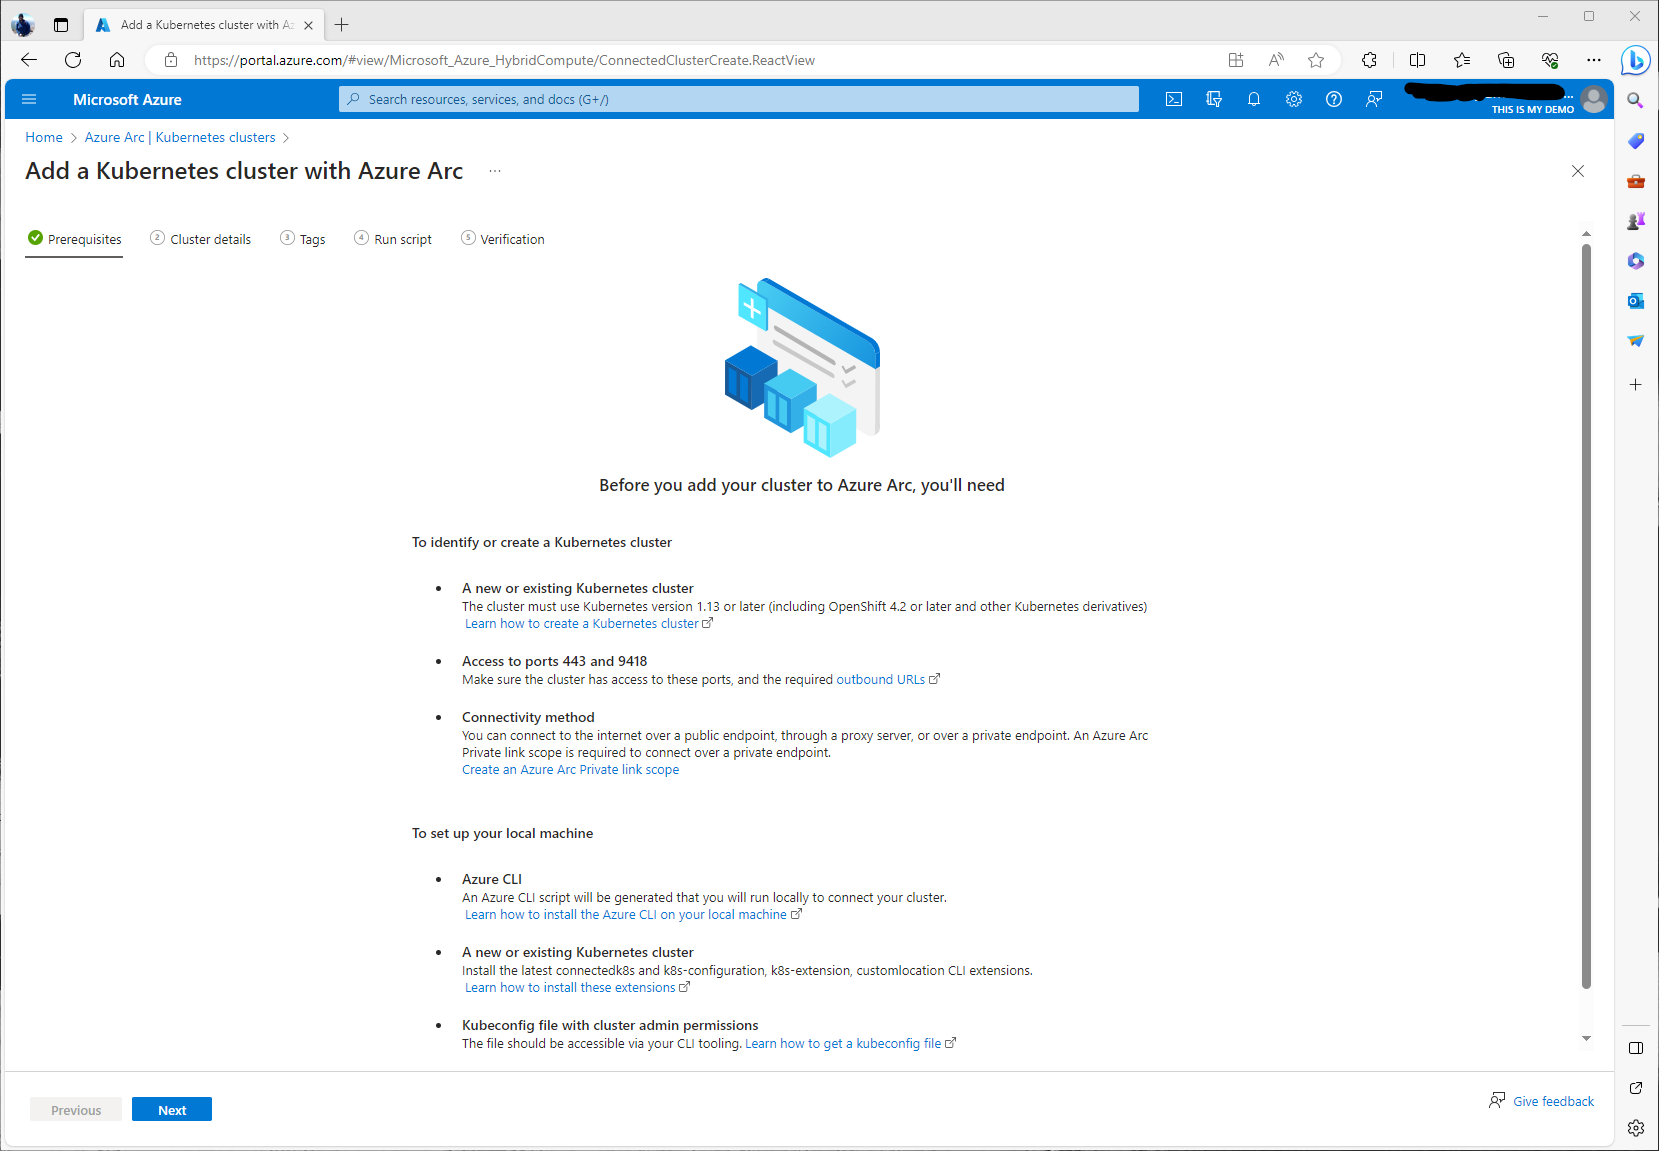
Now we will add our MicroK8s cluster to Azure starting within the portal. The first thing we need to do is go into the Azure Arc blade in the Azure Portal. On the left under Infrastructure, we will click on Kubernetes clusters. In the window to the right, click on add in the menu at the top, and select Add a Kubernetes cluster with Azure Arc.
Some items to call out on this next window is making sure we have Azure CLI installed which we do. That our Kubeconfig file and the user that accesses has cluster admin permissions, and that we already have our Kubernetes cluster deployed. Which all of the above has been done to this point.
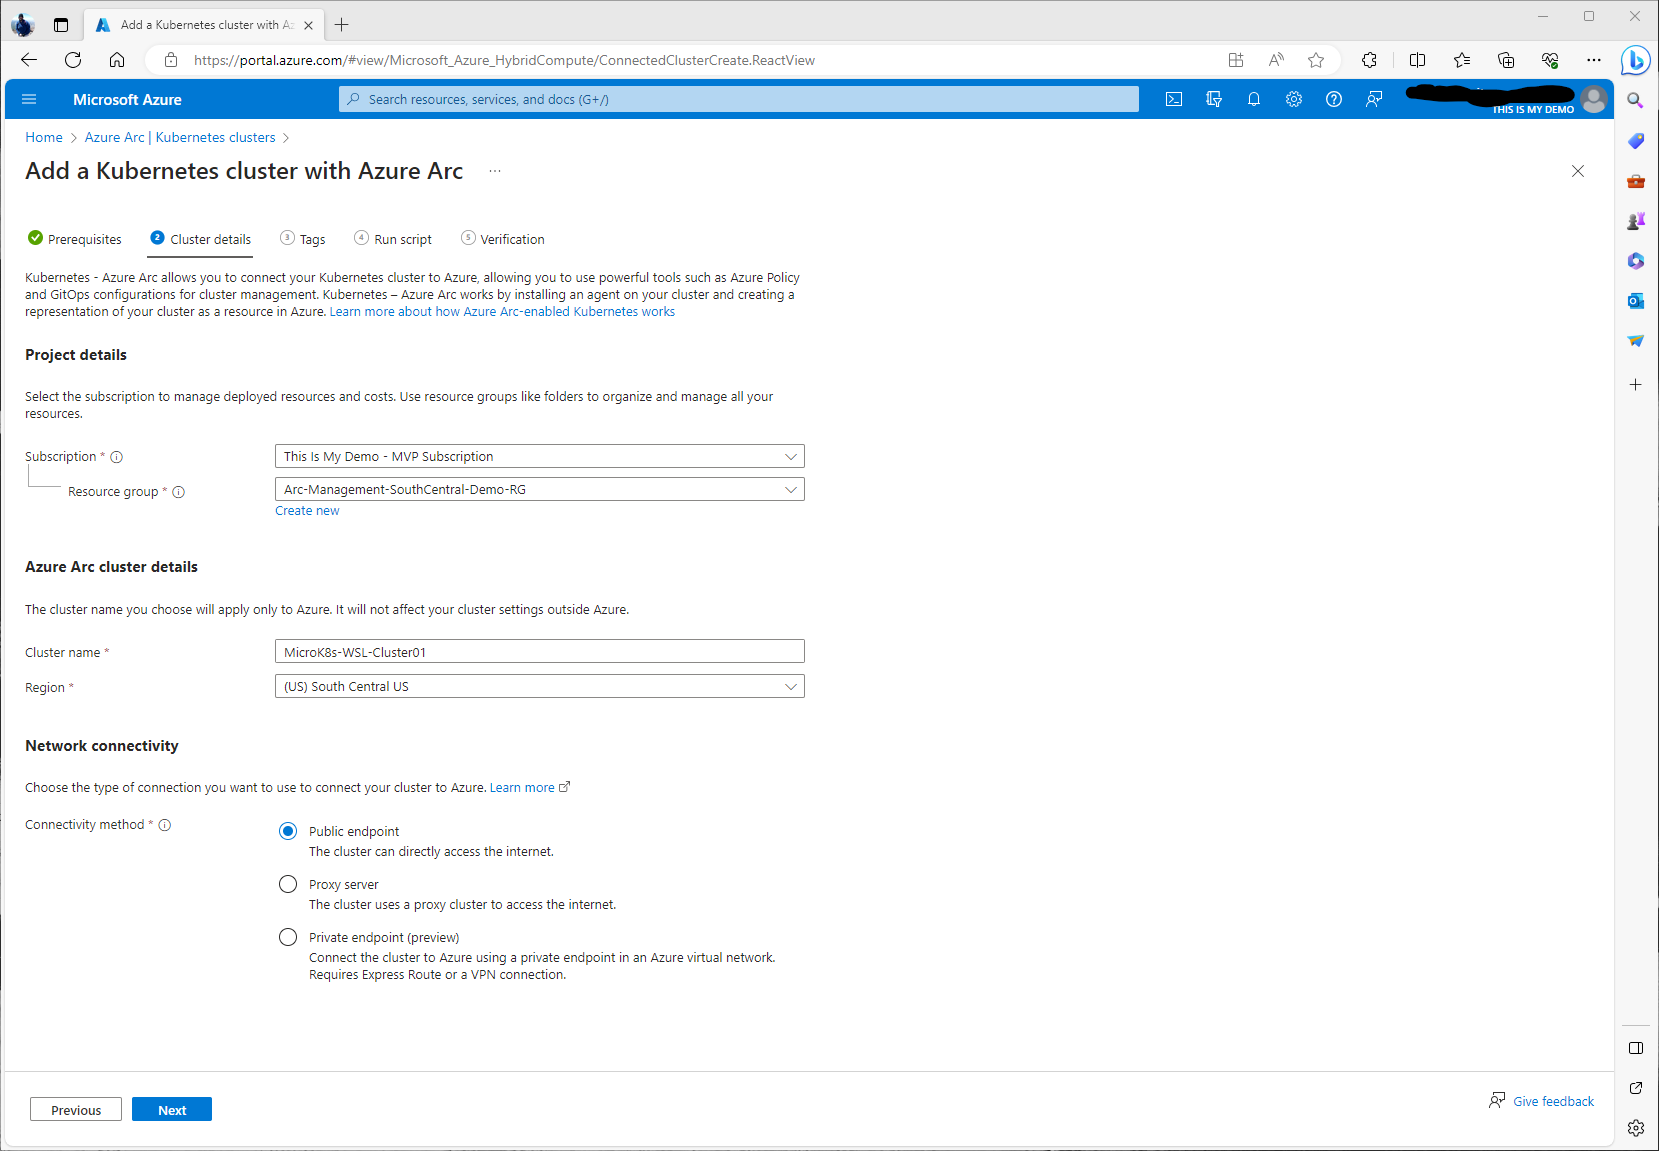
This next window is where we will add the cluster details. The following is the information we will need to provide:
- Subscription
- Resource Group
- Cluster Name
- Region
- NEtwork Connectivity
The subscription and Resource group we used is the same that we used for the Azure Arc agent in my previous blog. As mentioned in that blog, this is just a demo so all my Azure Arc resources will be in the same resource group. This I would not do in a real world situation. For the Cluster name, this will be the name of the Azure Cluster resource that we will see in the portal, etc. It does not need to make the actual Kubernetes cluster name but to make it easier for management, I would in a real world situation try to keep some sort of naming schema that matches our actual cluster names, or at least have the actual cluster name in the name along with something else. In this demo, I just called my cluster name MicroK8s-WSL-Cluster01. Since it will be removed soon it doesn’t matter to me. For our network connectivity, I went with public endpoint. However, I highly recommend moving forward if at all possible to start using Private endpoints for all our Azure resources if they are capable of doing so.
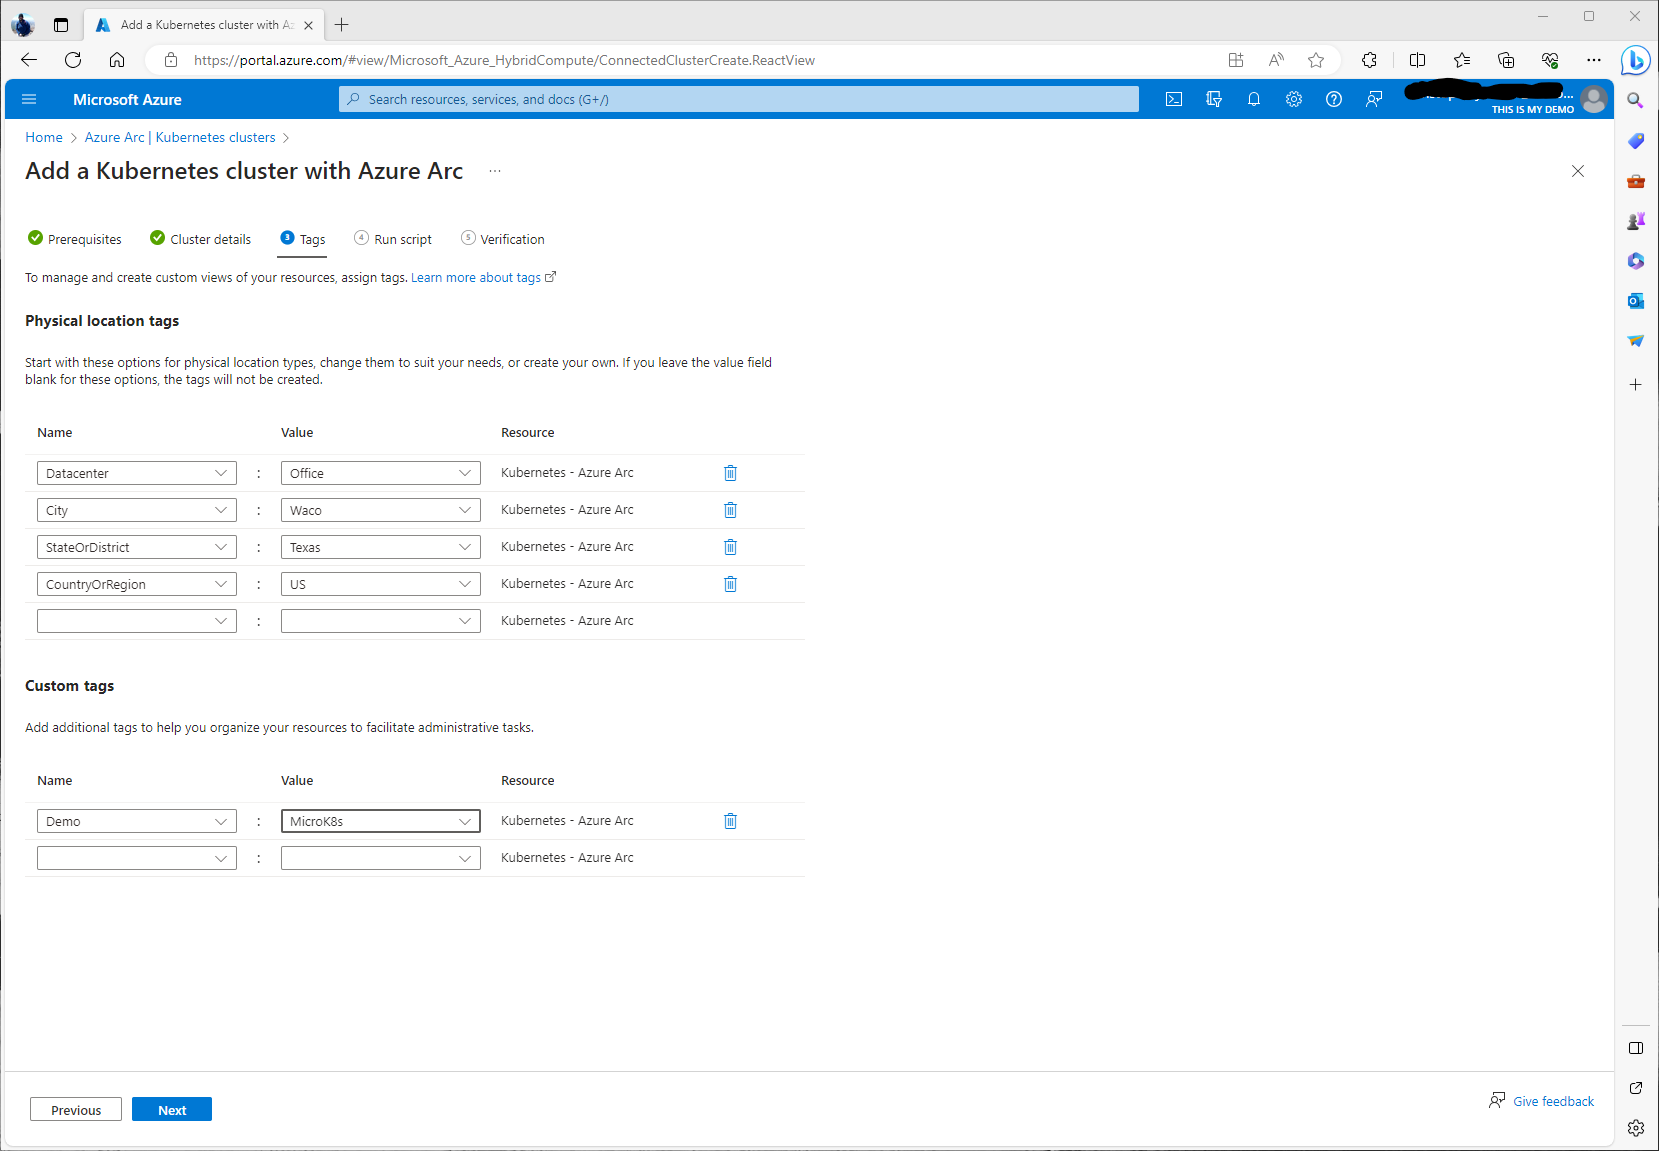
As with the Azure Arc Agent deployment, we have the capability of customizing Physical location tags as well as custom resource tags. I highly recommend using tags for all our Azure resources.
This next section is where we can download or just copy the shell script. I copied it myself to a note pad to use later. At this point we are ready to start running the script on our WSL instance.
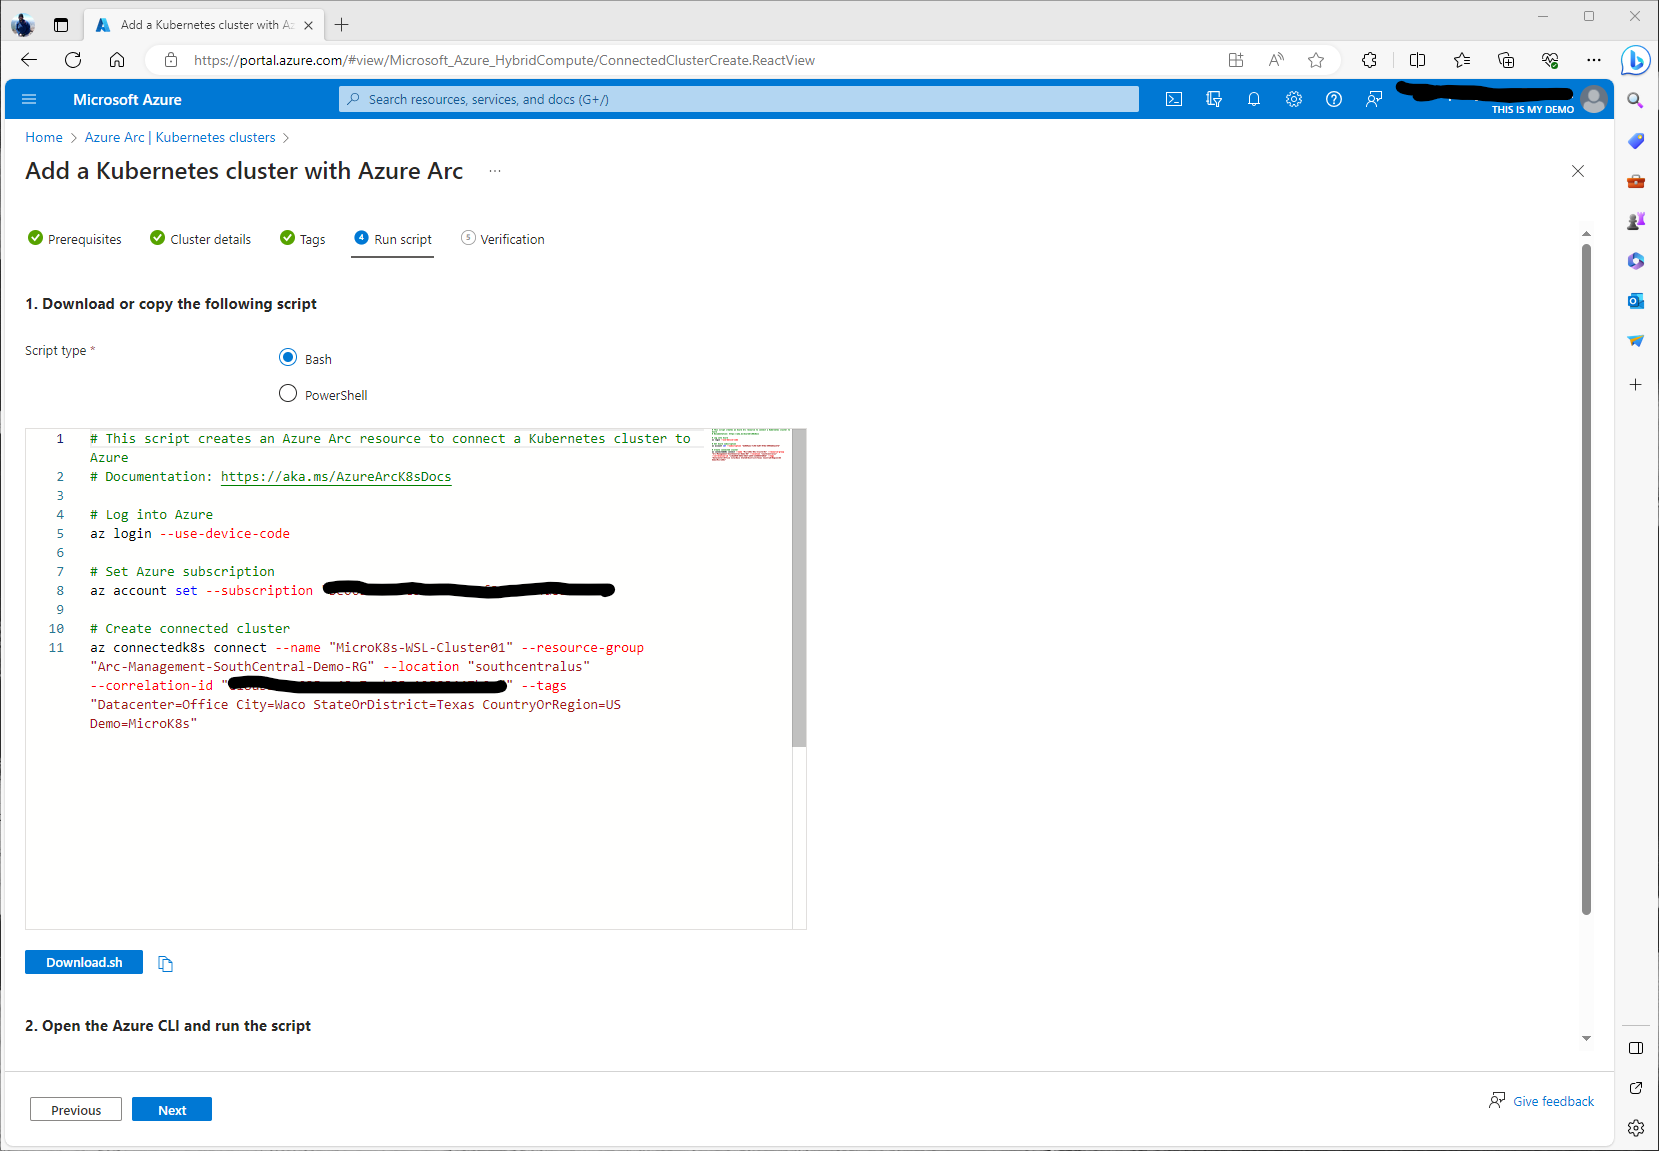
First we need to logon to our subscription via Azure CLI. To do so we ran the following commands from our WSL instance:
az login --use-device-code
Next I needed to set my Azure Subscription since my account has access to many subscriptions within this tenant. We can do this by running the following Azure CLI command:
az account set --subscription [Subscription]
I am now logged in via Azure CLI and ready to run the next part of my script that I just copied from the portal. Here is the script I ran:
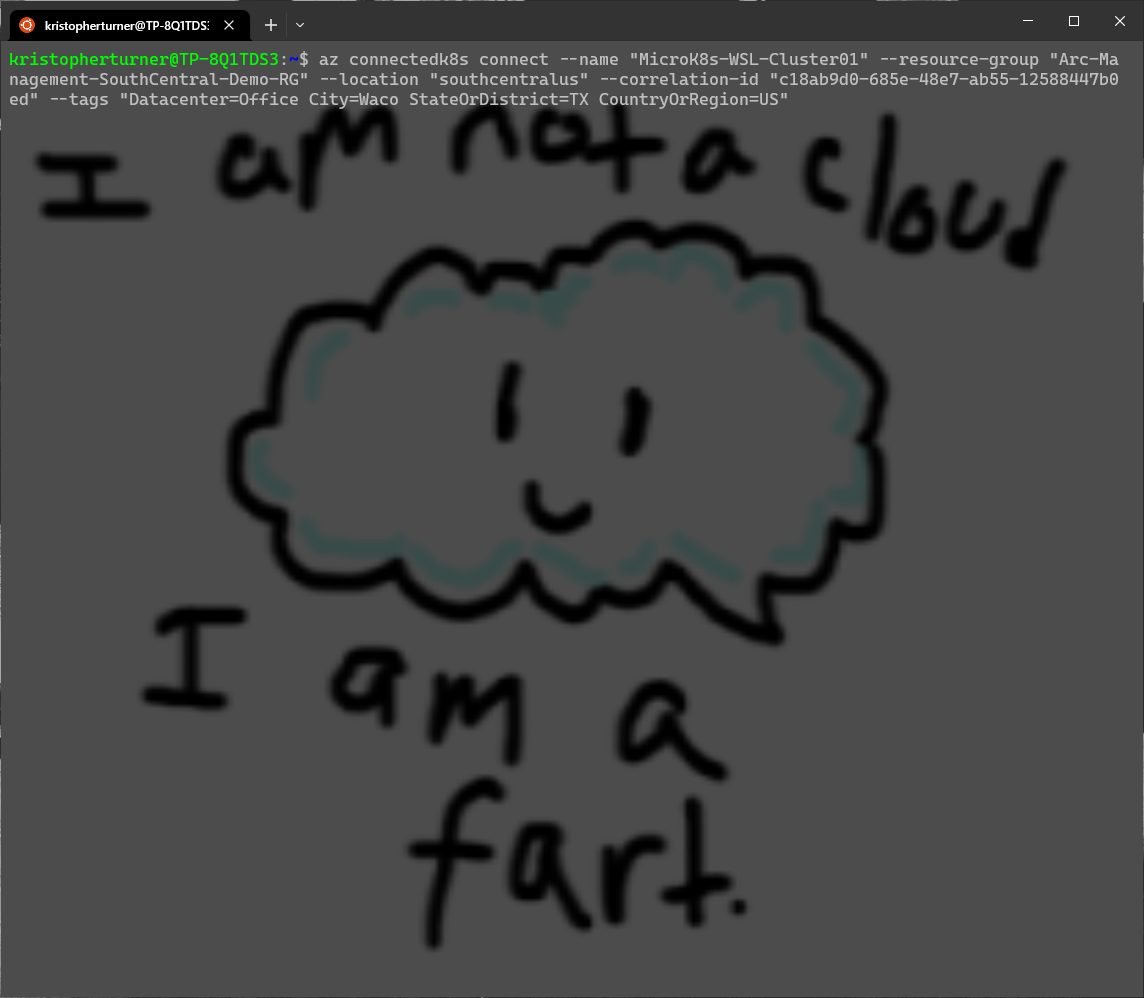
az connectedk8s connect --name "MicroK8s-WSL-Cluster01" --resource-group "Arc-Management-SouthCentral-Demo-RG" --location "southcentralus" --correlation-id "c18ab9d0-685e-48e7-ab55-12588447b0ed" --tags "Datacenter=Office City=Waco StateOrDistrict=TX CountryOrRegion=US"
The next process should take a few minutes or more. I went and got some cream and sugar and a little bit of hot coffee to go along with it at this point.
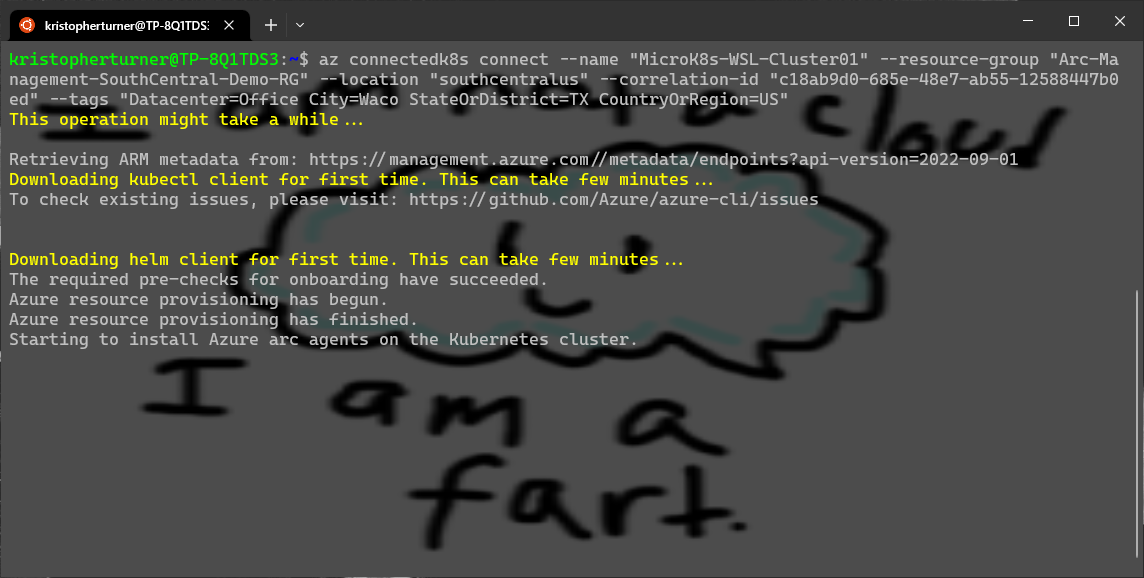
Once the script runs and is completed the cluster information will be displayed and it should have a provisiongState of Succeeded. We can go back to the Azure Portal and click next on the screen we left open. This will verify that the cluster is connected and give us a message with a green check that our cluster was successfully connected to Azure. Even though there is a “create” button , but it doesn’t really seem to do anything. We can click the Go to Cluster button below the Green check toward the top.
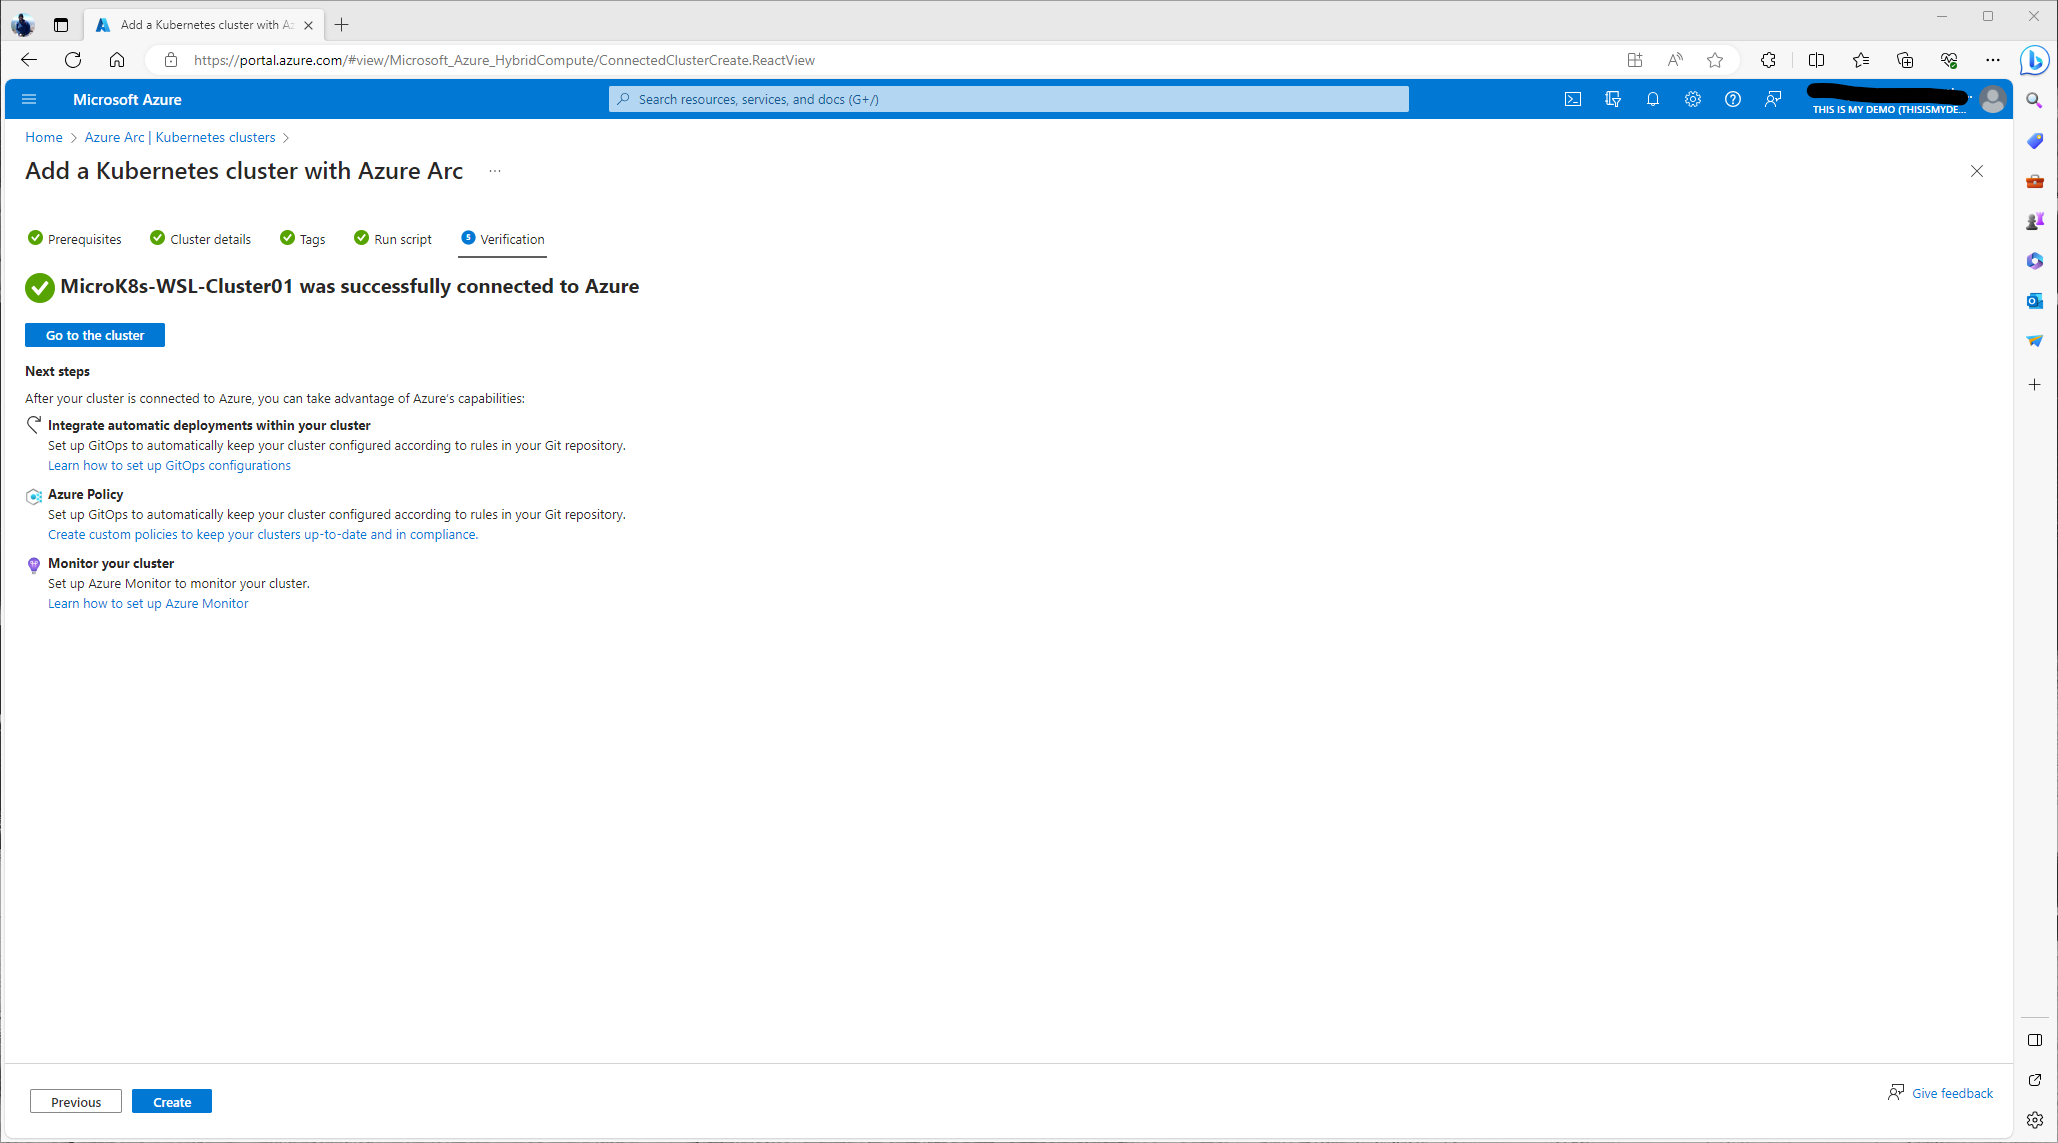
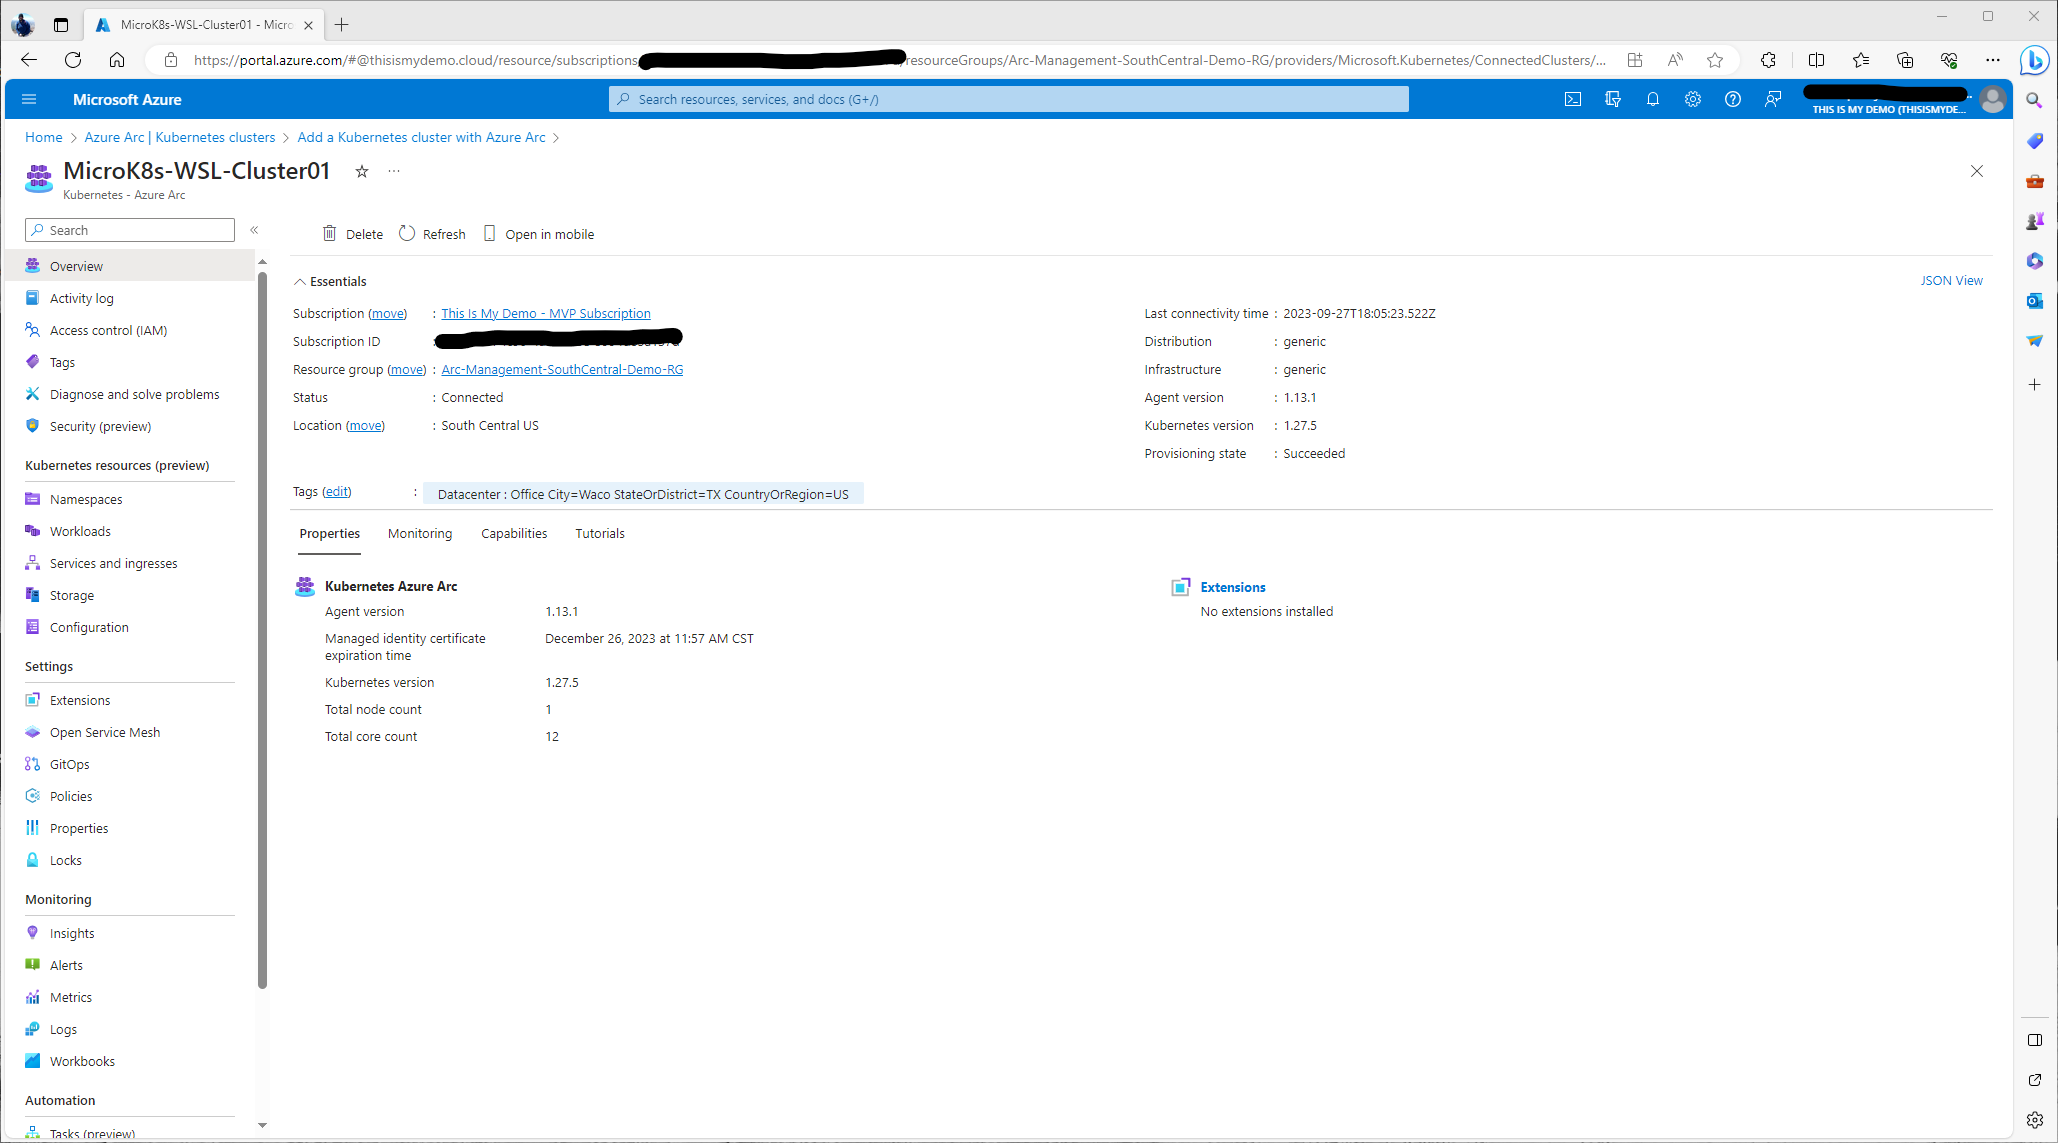
The next window we see is the Azure Arc blade for the newly created connected Kubernetes cluster. Here we will see the overview of our Azure managed Kubernetes cluster. We can also see all the resources available and configuration, include monitoring and automation that we can do with this cluster on the left. There is so much more that we can do at this point. Out of the box the two that I would do is enable Container Insights to monitor the cluster, and to enable Windows Defender and Microsoft Sentinel for this cluster.
In fact, I think there will be a Part V of this blog that will do some of the things we should be doing once we connect a Kubernetes cluster to Azure using Azure Arc. That or an entire blog on its own.
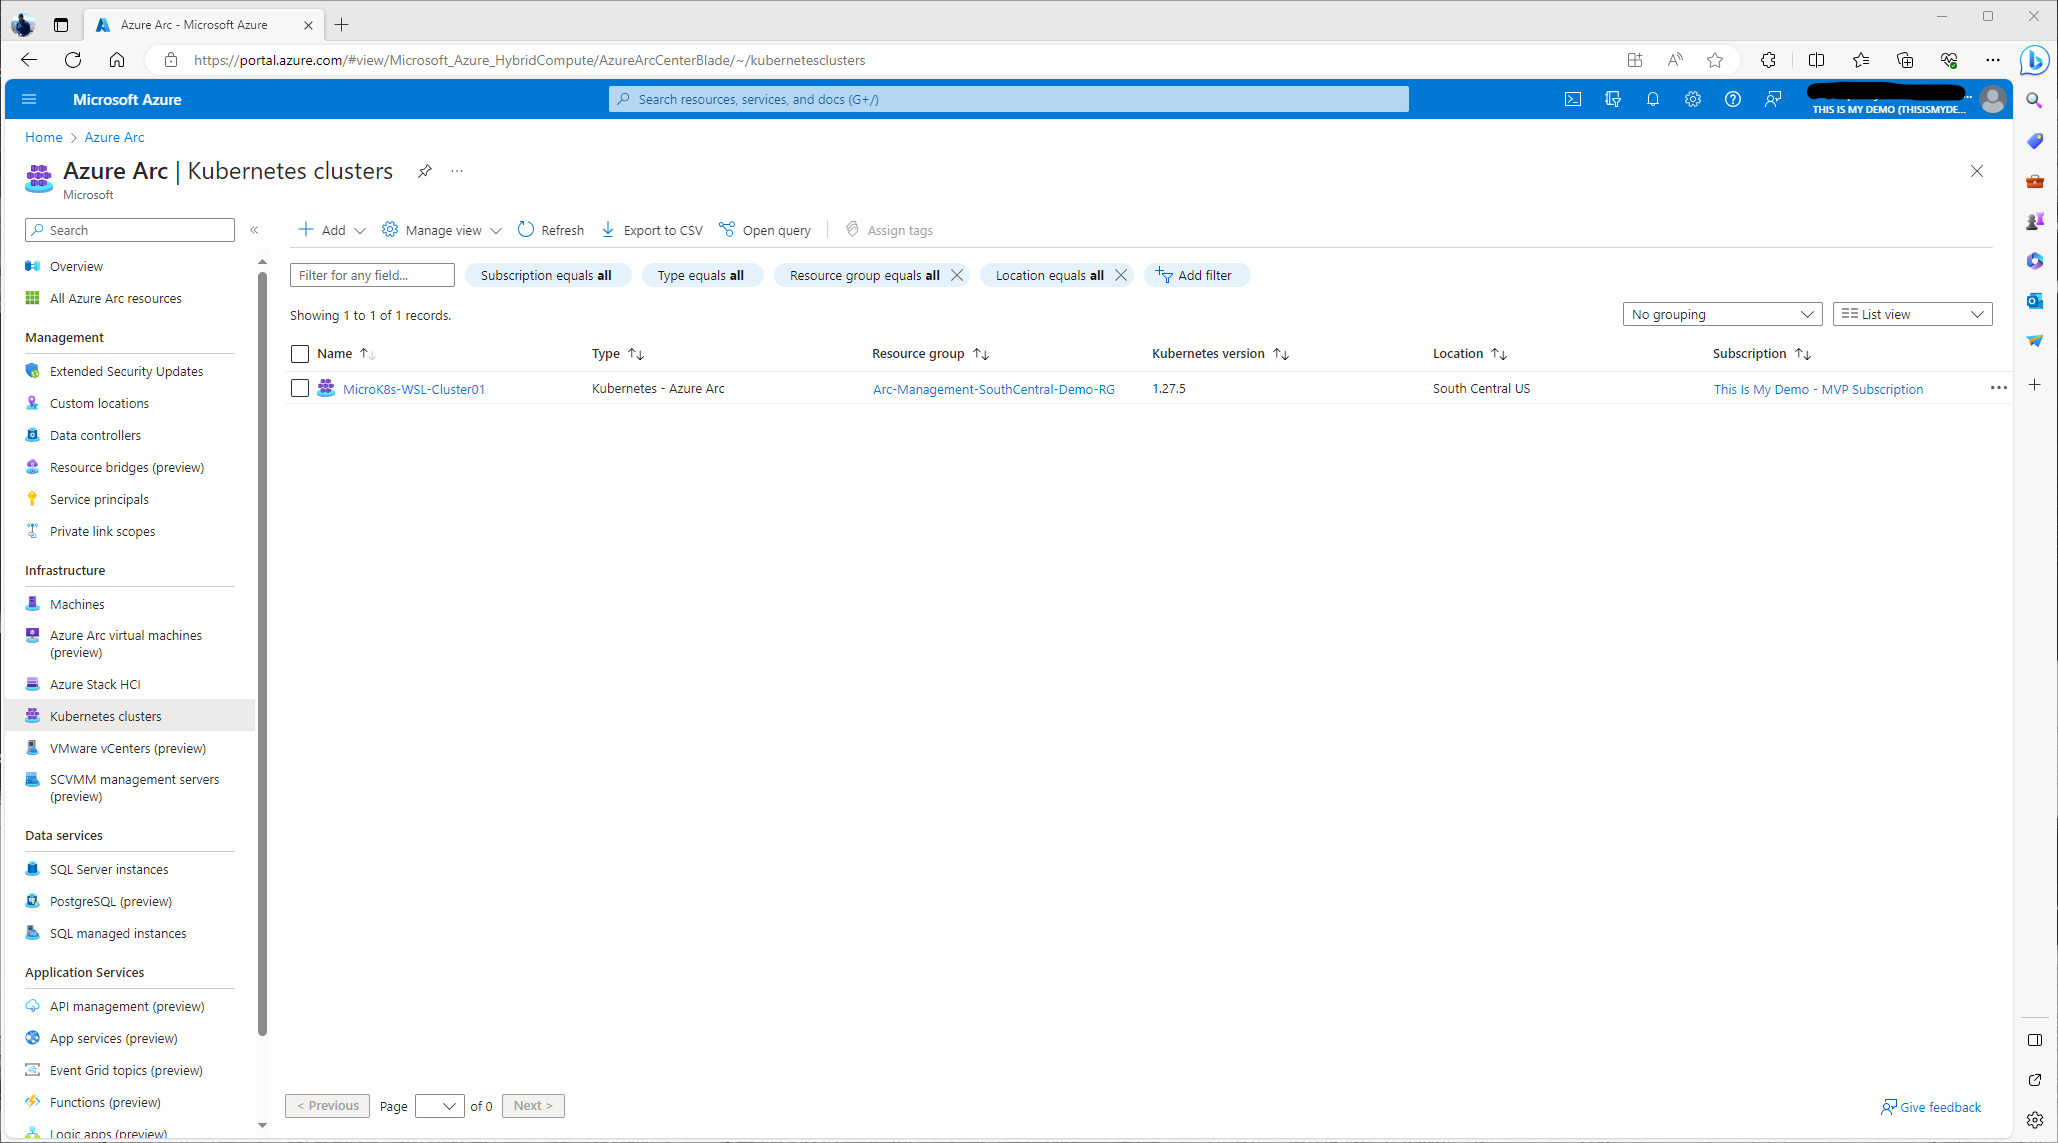
This view is just what we will now see in the Azure Arc blade under the Kubernetes section of Infrastructure.
So, at this point we now have our MicroK8s cluster that is running on an instance of WSL on my Windows 10 laptop, which is managed by Azure Arc-enabled servers, now connected fully to Azure. This cluster can be fully managed by many Azure services now at this point. We can deploy solutions via GitOps, apply configuration policies to meet compliance and regulations via Azure Policy, monitor this cluster using Container Insights via Azure Monitor, and more.