MicroK8S and WSL Managed by Azure Arc -Part III - Azure Arc
A blog series about my experiences with MicroK8S, WSL, and Azure Arc
In this blog series I am going to discuss my experiences with MicroK8S, installing it on Windows Subsystem for Linux, and how to connect the cluster to Azure using Azure Arc-Enabled Kubernetes.
The blog will be broken up into the following three sections:
- Installing MicroK8s on Windows Subsystem for Linux (WSL)
- Azure Arc-enabled servers: Installing Azure Connected Machine Agent
- Azure Arc-enabled Kubernetes: Connecting my MicroK8S cluster to Azure
Azure Arc-Enabled Servers - Installing the Azure Connected Machine Agent (Azure Arc Agent)
In this blog I will discuss my experience installing the Azure Arc agent, also known as the Azure Connected Machine Agent in in order to manage this WSL instance within Azure. In this blog I will go over creating the prerequisites needed to install the Arc Agent on Windows Subsystem for Linux (WSL)
Azure Arc Service Principal
So I started with creating a new Azure Arc Service Principal that would be used to onboard my WSL instance. There are a few ways to do this but I am going to do it in the portal for this blog. From the Azure portal go to the Azure Arc blade and the under Management, select Service principals. From here we will create a new service principal.
Here in this section I will fille in the following fields:
- Name
- Scope assignment level
- Subscription Name
- Client Secret Description
- Role Assignments
For the name, I selected something that I would know what this service principal is. For my scope assignment, I am going to assign this at the subscription level. We could just assign this SPN at the resource group level if needed for more granular control. The subscription, is selected for the current subscription. Last but not least, the Role Assignments. Here we have three choices: Azure Connected Machine Onboarding, Kubernetes Cluster - Azure Onboarding, and Azure Connected Machine Resource Administrator. I selected all three but in a production environment to have more control over access we should create separate service principles for each.

When we click Create the next window will give us the Client ID (AppID) and the Client Secret. Make sure we record these and place them in a safe area for future use.
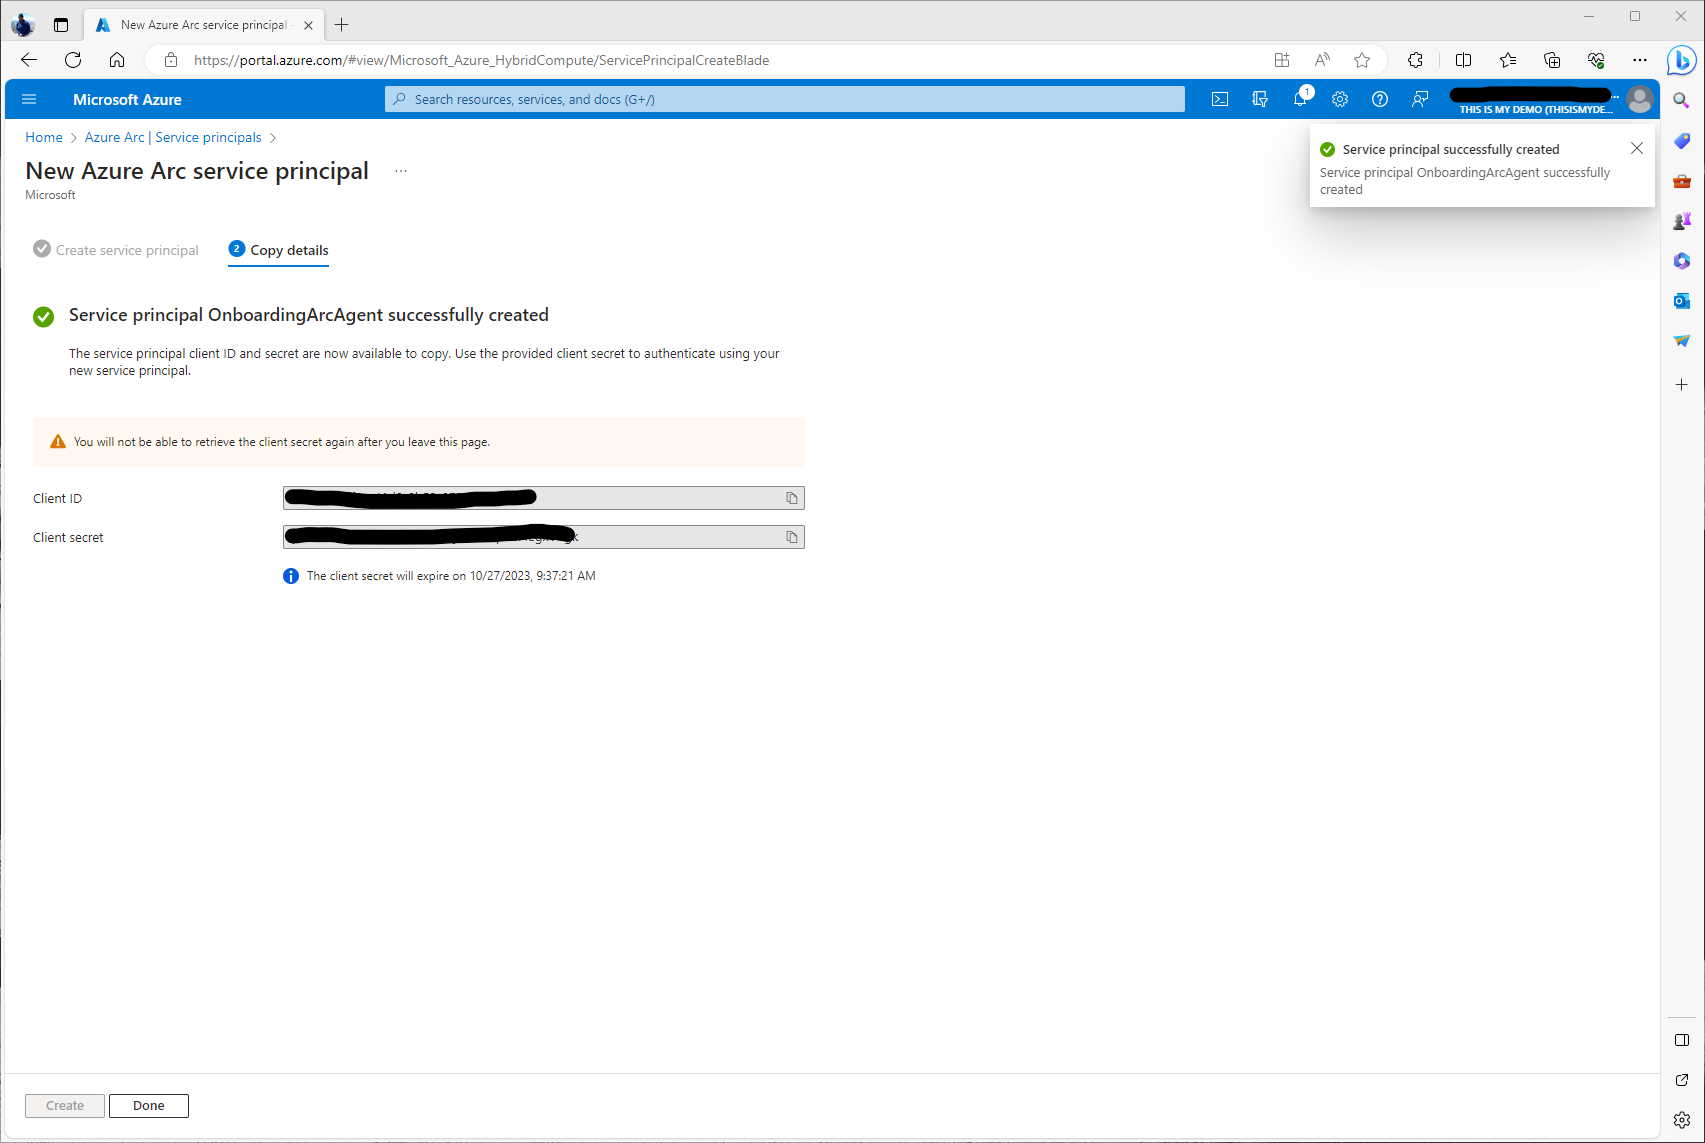
Now that the Service Principal has been created we can go back into the Arc Blade under Service Principals and we will see our newly created SP.
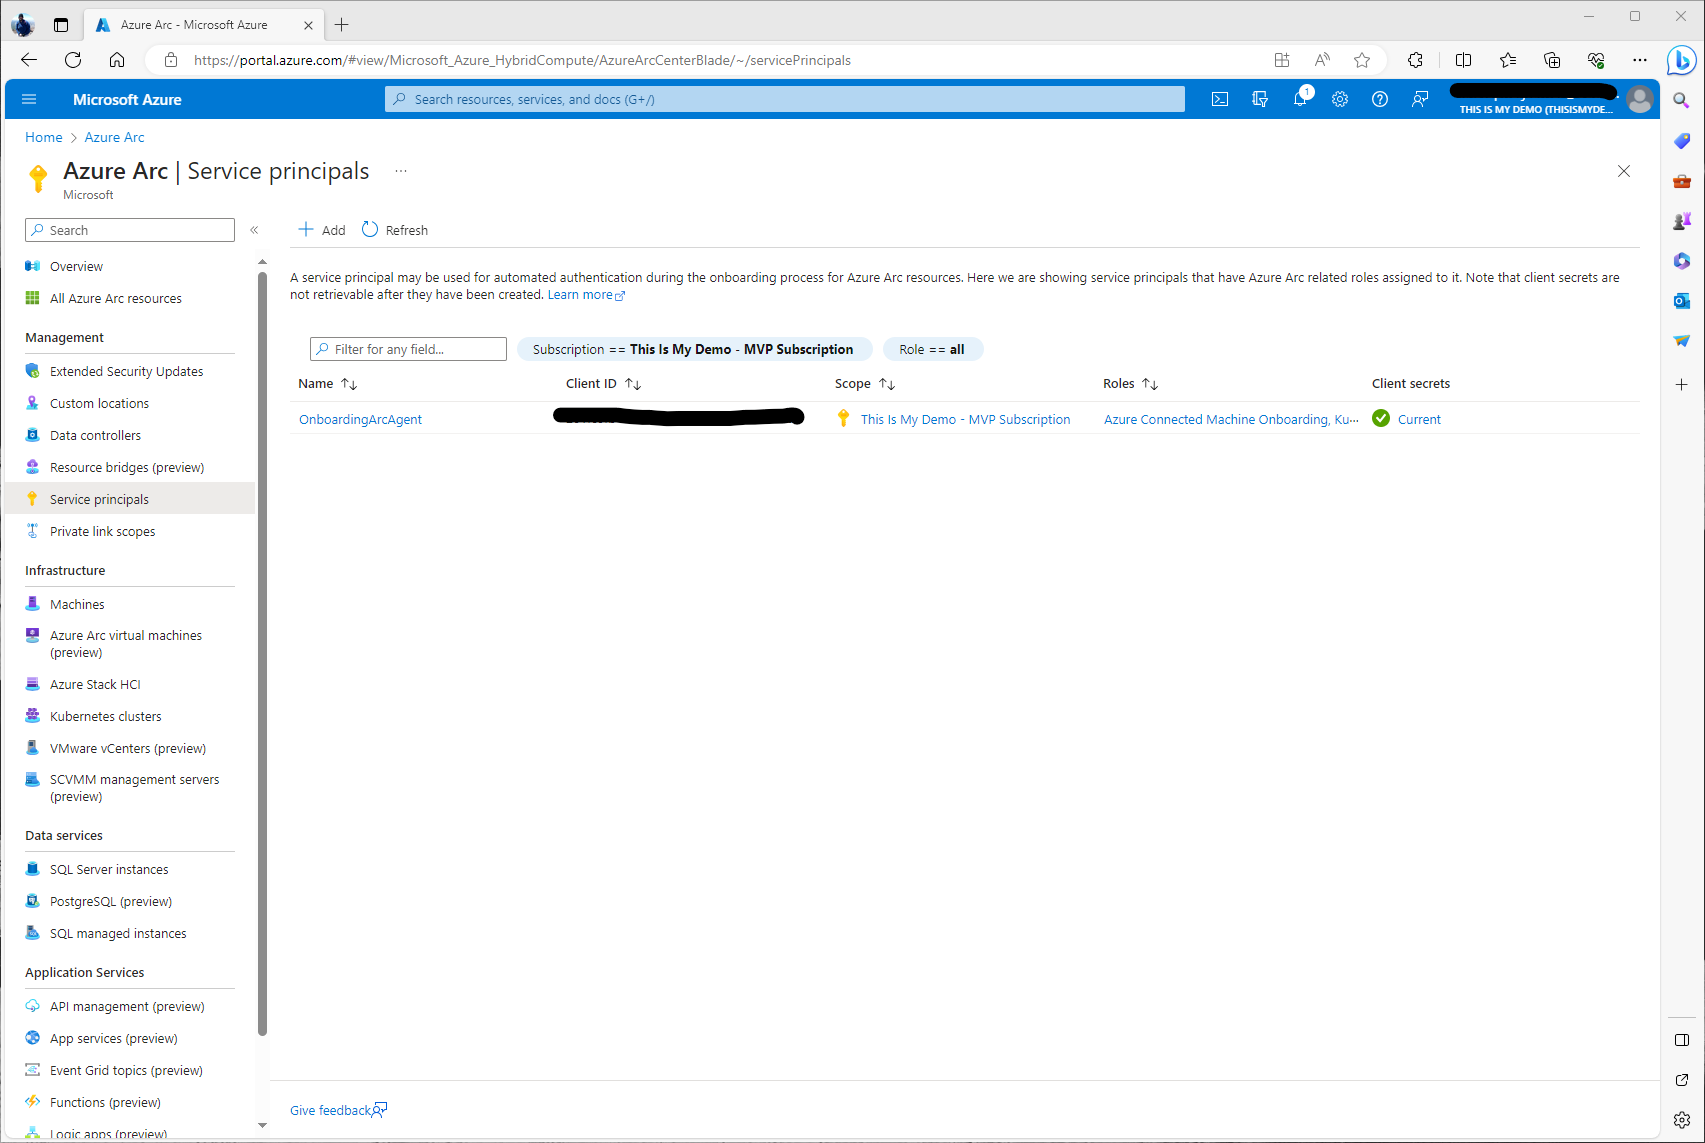
Now we are ready to move forward with the creation of the Azure Arc Agent onboarding script.
Register Azure Resource Providers
We already have registered all the needed resource providers in the past. However, if this is the first time we are deploying any Arc related resources the following commands will register these resource providers for us.
az account set --subscription "{Your Subscription Name}"
az provider register --namespace 'Microsoft.HybridCompute'
az provider register --namespace 'Microsoft.GuestConfiguration'
az provider register --namespace 'Microsoft.HybridConnectivity'
az provider register --namespace 'Microsoft.AzureArcData'
Create the Azure Arc Agent Onboarding Script
From the Arc Blade, under Infrastructure we will select Machines. To the right, we will than click on Add/Create at the top of the menu bar and select Add a machine. The next screen we will have three options. I have selected Add a single server at this time. For one offs and for demos this is acceptable. However, I wouldn’t want to do this one at a time for 100’s of machines. This is where I would select Add multiple servers, we would then use the onboarding service account, and a different script to onboard our machines using tools like COnfigMgr for Windows servers or Ansible or something like that for Linux.
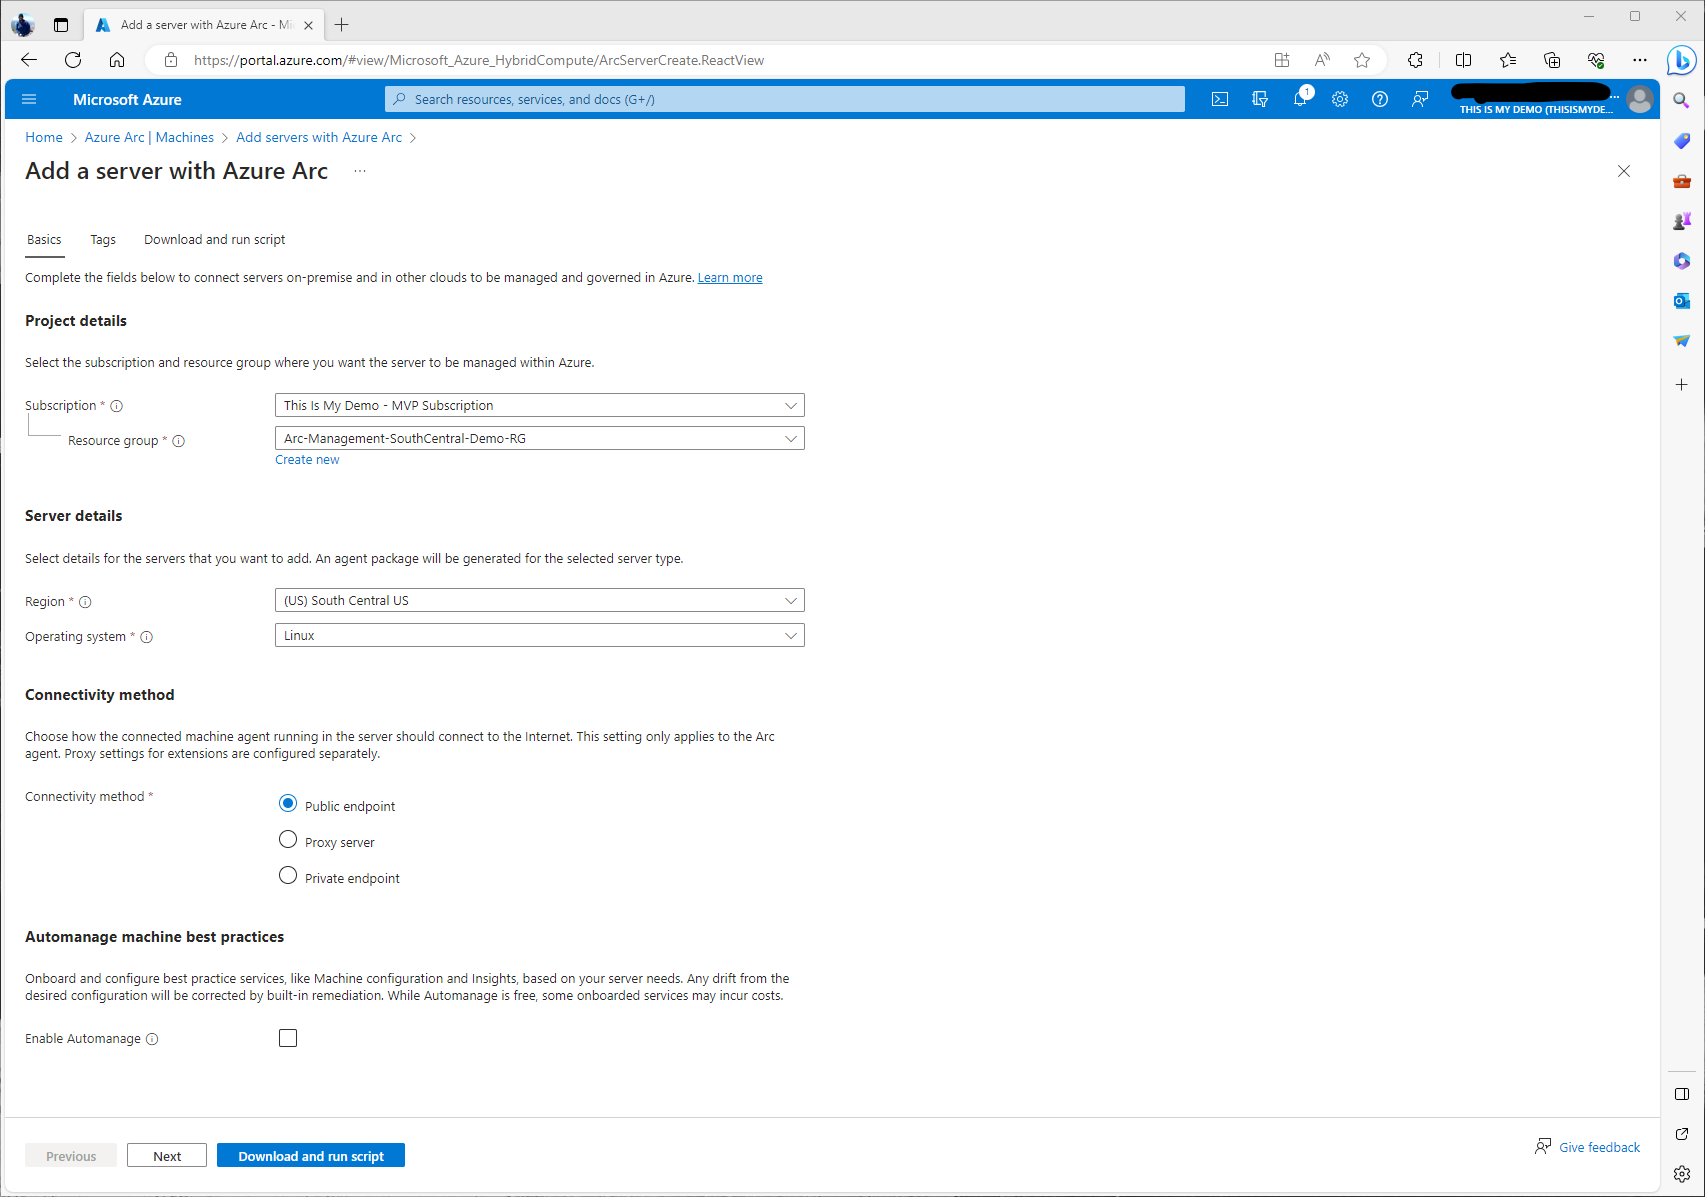
Here we will fill in the following fields:
- Subscription
- Resource Group
- Region
- Operating System
- Connectivity Method
The subscription and Resource group fields should be selected where we would want the Azure Connected Machine resource to reside. For this demo, I have only created a single resource group for all my Azure Arc Resources. In production or a none demo environment, I would have many resource groups all based off of criteria like environments, or locations, etc. This will help with assigned resources via RBAC and other Azure services like Azure Policies, etc moving forward. The next important area I will call out is the Operating system section. Since this is a Linux box we need to make sure we change that to Linux. We will leave Connectivity method default for Public Endpoint. Moving forward, I highly suggest we start using Private Endpoints to help secure our environment.
This section is important for many reasons. Tagging Azure resources has many benefit and in any environment should be mandatory to have tagging. Here we will tag these resources based off of physical location. I will also add a custom tags to allow others to know this is a demo environment, and who owns this resource, etc.

We now have our onboarding script ready. We can either download this script and run it on the Linux machine or as I will do in this demo, just copy and past each section as I go.
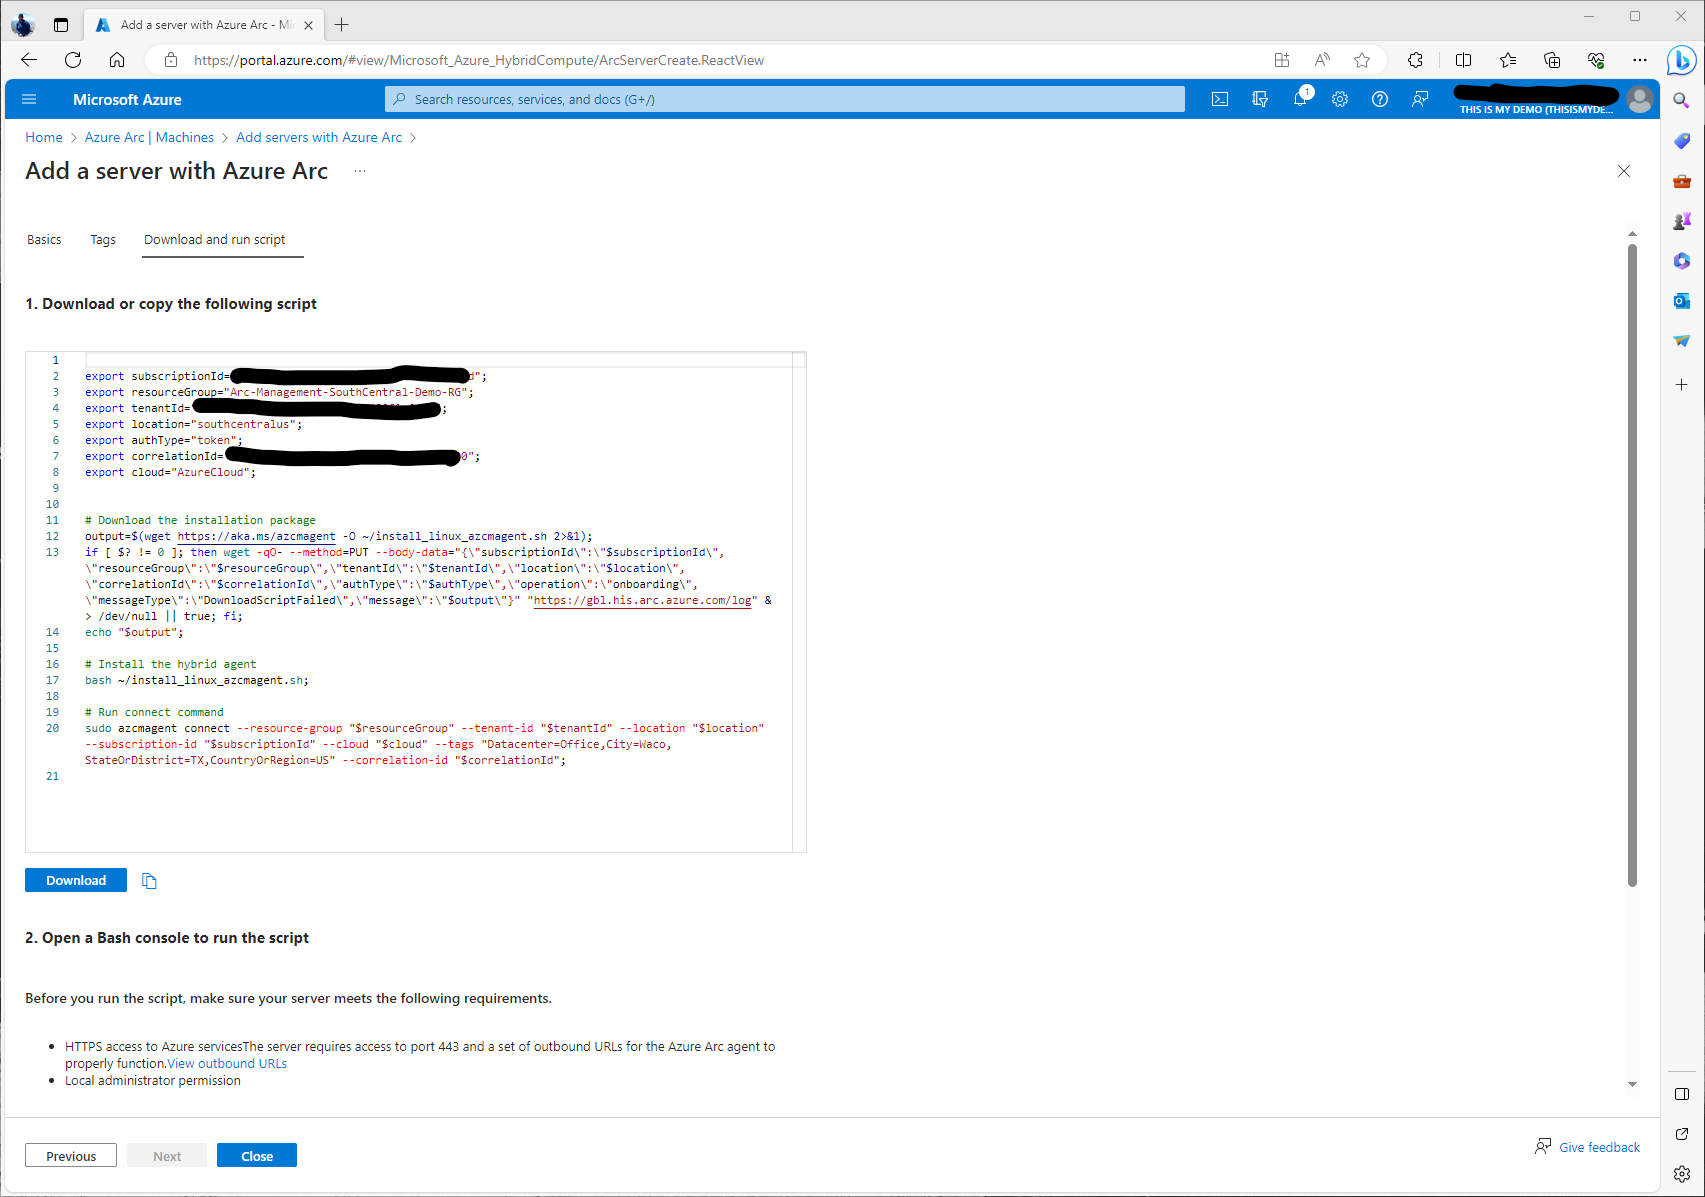
So now we are ready to install the agent. This will happen in our next few steps.
Install the Azure Arc Agent
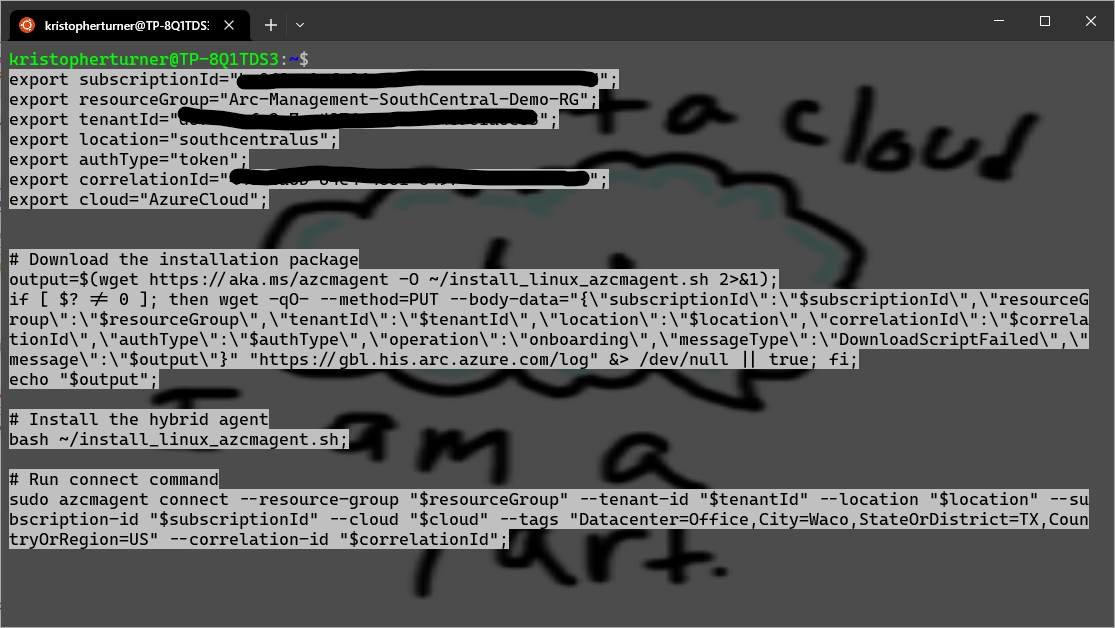
Since I am running my Linux environment on my Windows 10 laptop as WSL I can do this directly from my Windows Terminal when I launch my Ubuntu profile. In a real world solution I would use another tool to deploy to more than one server. I basically just copied and pasted the entire script into my bash terminal.
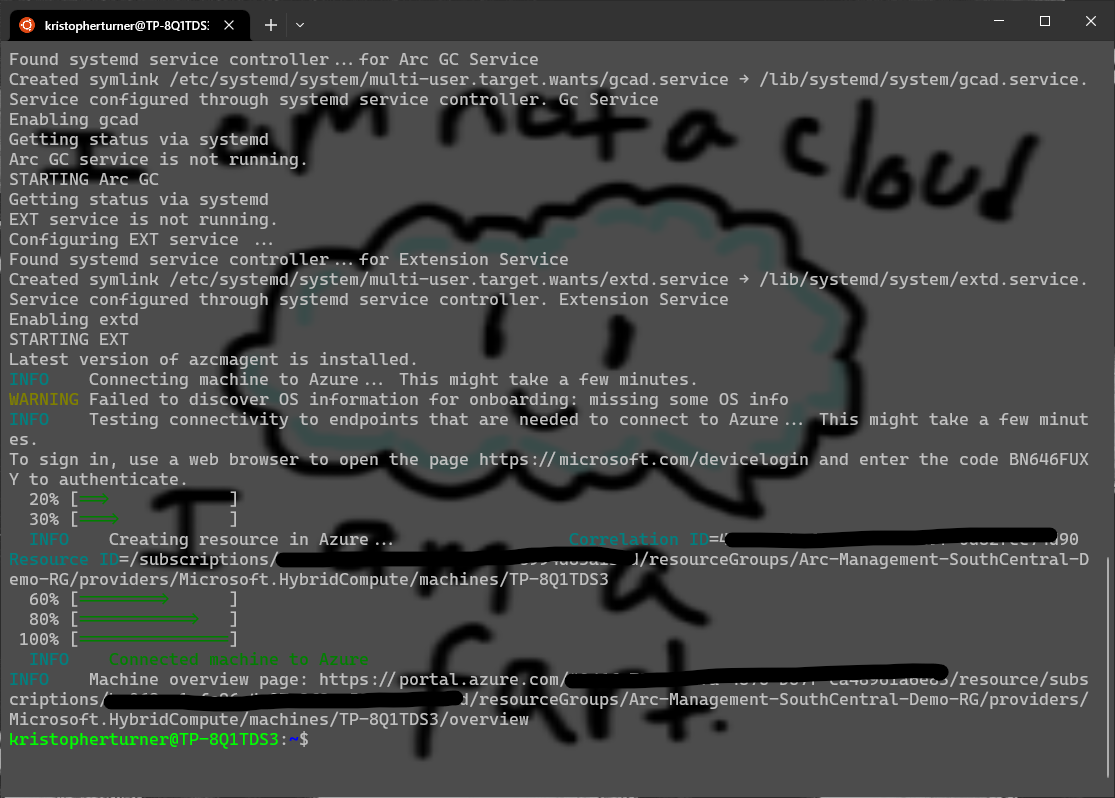
After about 2 or 3 minutes the Arc agent will have been deployed.
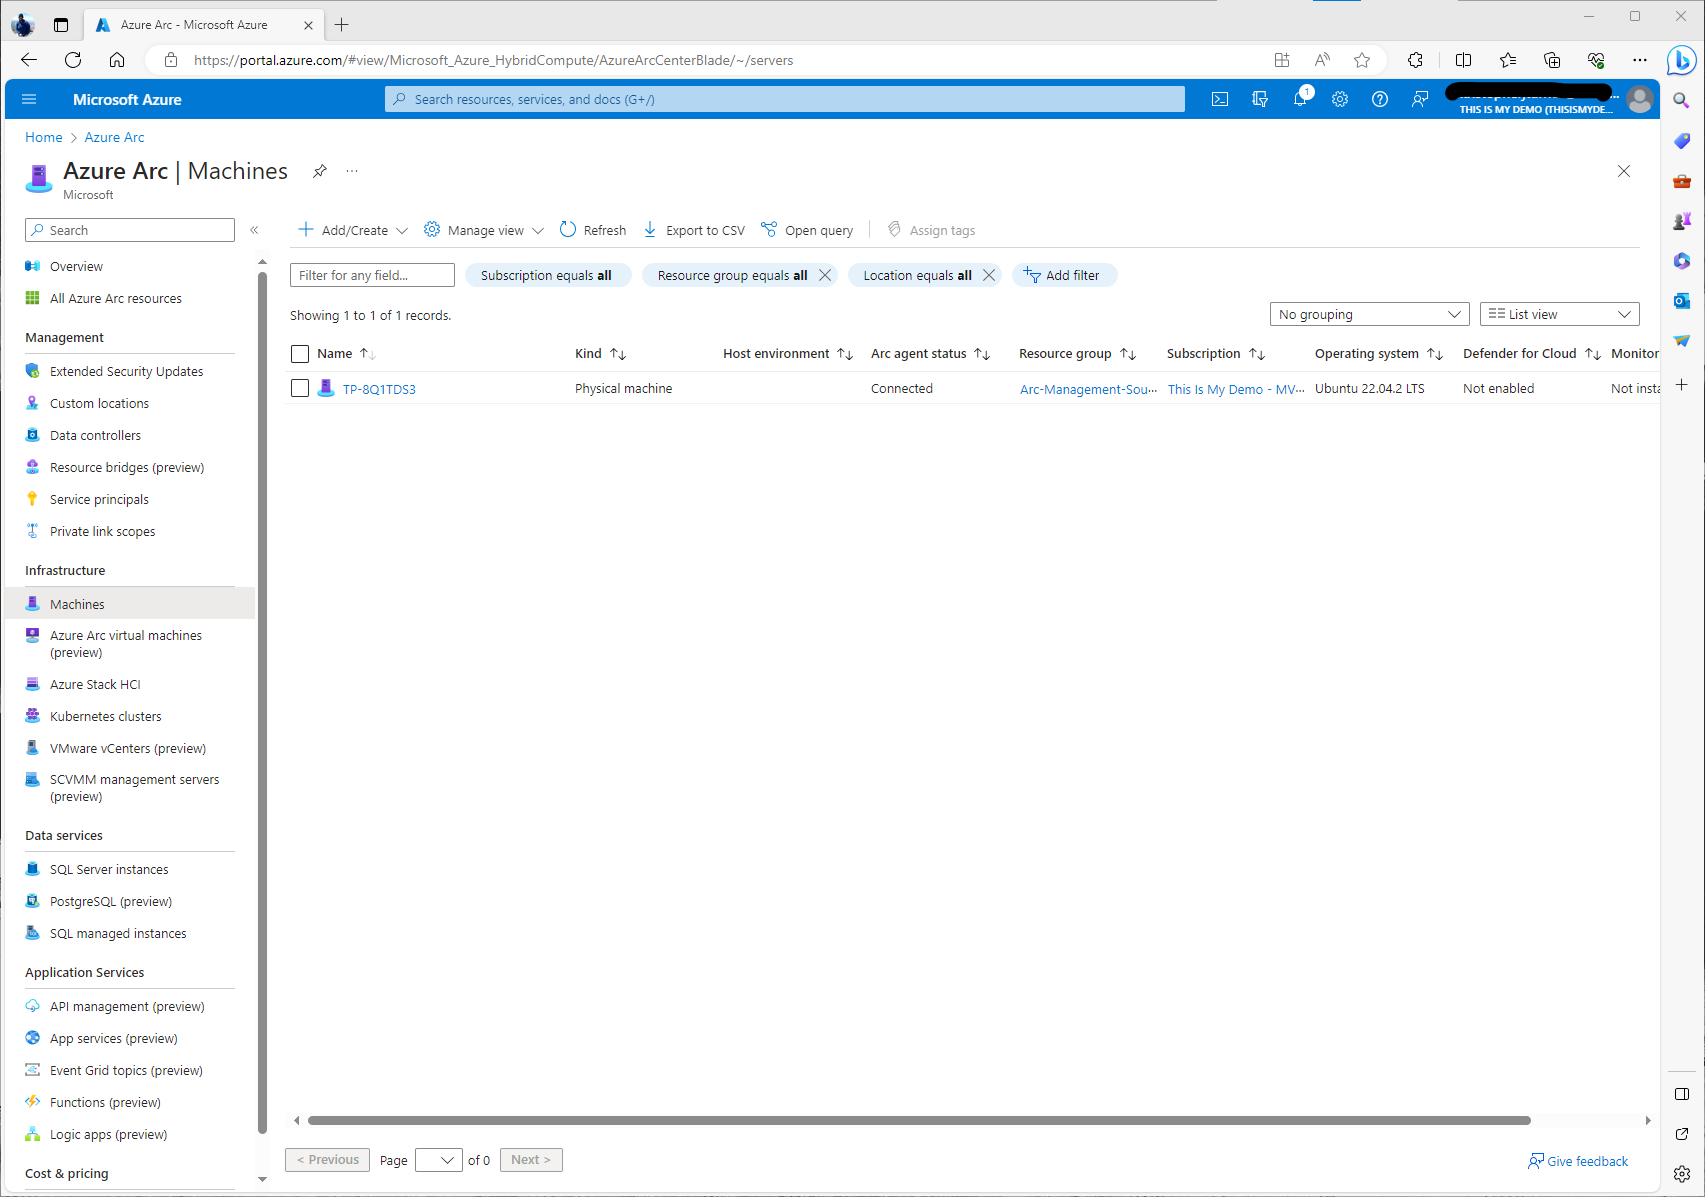
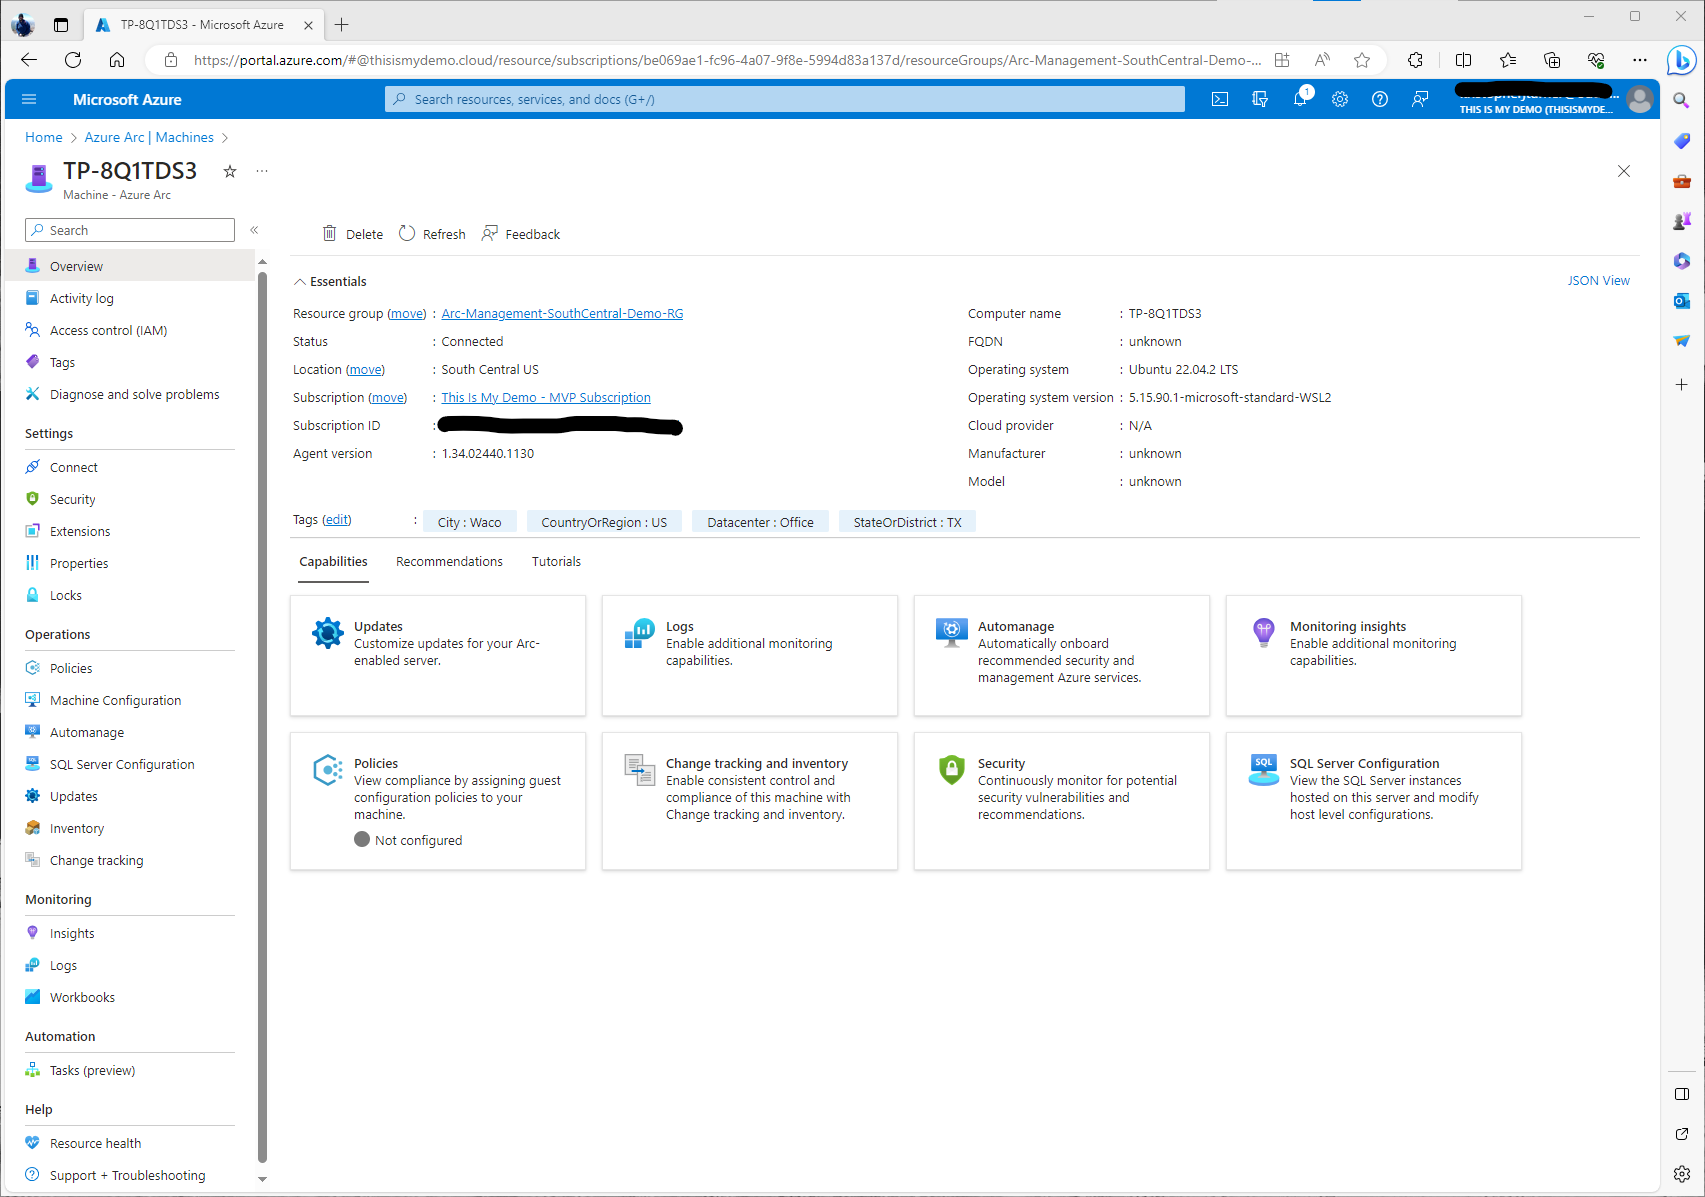
We now can go to the Azure Portal, back to the Azure Arc blade and select Machines under Infrastructure. Give it some time, maybe 5 to 15 minutes and our newly manged Linux server will now show up and should have a status of Connected.
If I click on the resource we can see more information about this Azure connected machine. From here we can do a lot more than I am going to do for this blog. Azure Arc-enabled servers is a power tool that will allow us to have one management tool to manage all our on premises and multi-cloud resources. From Update management, to Azure Policy there is so much we can now do to manage this device as if it were an Azure VM itself. However, that is another blog series and also some content I have done at various users groups.
At this point we now have installed the Azure Arc agent and the WSL instance is now being managed by Azure as an Azure Resource. In my next blog I will explain how to connect this Kubernetes cluster to Azure using Azure Arc-enabled Kubernetes. I do want to stress, there is so much we can do with resources managed by Azure Arc that was never touched in this blog. So much more! We also have only talked about Azure Arc-enabled servers as well. There is so much more to Azure Arc. We will see later the capabilities of Azure Arc-enabled Kubernetes, but I highly suggest looking at all the Azure Arc solutions.