Azure Stack HCI - Part II - Deploying A Single Node Cluster
This is a series of blogs about my experiences with Azure Stack HCI
In this blog series I plan to blog about everything I know about Azure Stack HCI. So, it should be a very short blog series. Just kidding. Again, I tend to blog about subjects that I am currently working on or will be currently working on. So, Azure Stack HCI is fresh on my mind again these days.
Note: After reading this blog a few times myself I have decided to write another blog but adding more details around areas I did not bring up in this current blog. More details into how to get hardware setup for a single node with either physical hardware or even an Azure VM. More information on how to configure storage and more. I figure the more advanced one would be better to follow when moving into scaling out the single node cluster to two or more nodes in my future blogs.
So Part III will be a continuation of this blog with more advanced and in-depth topics.
Part VI is going to be about scaling out a single node cluster.
In most cases when deploying Azure Stack HCI you can deploy clusters various ways. One of the easiest is to deploy a cluster using the Windows Admin Center (WAC). However, in the case of deploying a single node cluster, we will need to use our trusted friend PowerShell.
Why a one node cluster and what do I need to consider because I am only running a single node cluster? I will talk a little about that at the end of my blog in the section “Why a one node cluster? First, lets get into it by talking about my infrastructure, configuring the environment and deploying the cluster, and then getting this cluster registered with Azure. ($$$ for Microsoft)
Deploying My Infrastructure
The first step was to get my infrastructure deployed. The problem is I don’t have any infrastructure to deploy a four node let alone a single node cluster. So I followed Dell’s own Matt McSpirit and his Hybrid Jump Start to get everything going. To jump straight to it, you can go to the Deployment In Azure module and just get kicking.
Even though this blog is about deploying a single node server I still followed most of his instructions, at least to get the Azure VM deployed and have a pre-built AD infrastructure and 4 future Azure Stack HCI nodes waiting for me. This saves a lot of time because, well I don’t have a lot of time, and I am also technology lazy and don’t want to do it myself.
From the Github repo I just clicked Deploy To Azure and filled in the necessary fields. I did keep some of the default settings but the following I did change:
- Virtual Machine Size: I changed to Standard_E32s_v4
- Azure Stack HCI Nodes: I changed from 2 to 4
- Azure Stack HCI Node Memory: I changed to 48.
- Data Disk Size: I changed to 128 GB
- Data Disk Type: I changed to Premium_LRS
I also changed the time the machine will shutdown each night from 22:00 to 20:00. (That is 8PM for my fellow Texans.) I also changed the time zone to the only time zone that matters, Central Time (Texas Time!)

Deployment kicked off and took about an hour overall for everything to deploy.


While I waited, I did go into the VM resource to configure an alert to be emailed to me before my VM auto shutsdown. This comes in handy a lot. In order to do this, we just go back to the Virtual Machine resource in the resource group created, click on that resource, and on the left blade under Operations, there is a option called Auto-shutdown. We click on that and to the right, add an email address to the Email Address field.
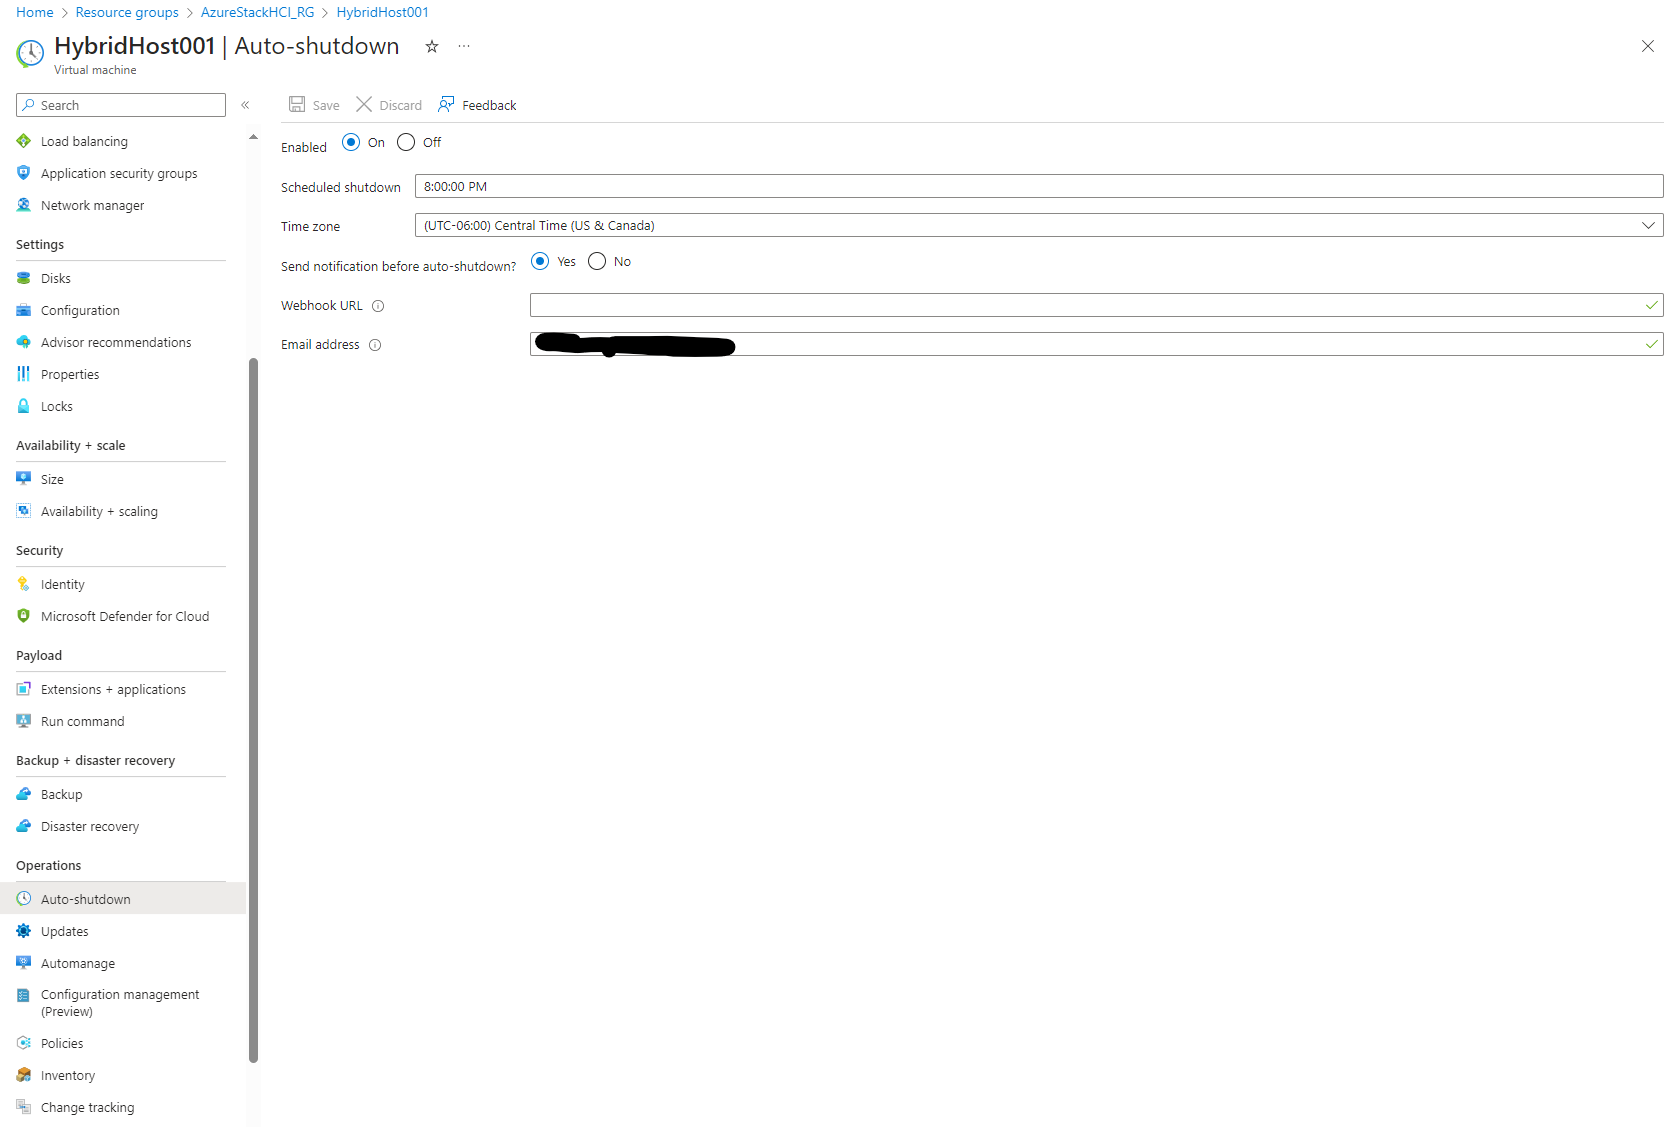
Click save and now, while we are working hard late at night, we will be reminded that our machine will shut down soon. I always forget adn in the middle of working it always shuts down.
So now my infrastructure is deployed and I am now ready for the next step, to configure my environment and get ready to create my single node cluster.
Setting Up My Environment
At this point at least for this blog I step away from Matt’s Github repo. However, I will be back!
First and foremost, we want to login to our Host server and make sure everything is running. The default user and password for this environment is listed in Matt’s GitHub site but the main host user name and password is what you entered in at before deployment.
The next thing I did since I need to use PowerShell to deploy the single node cluster and we can’t deploy a single node cluster using the Windows Admin Center (WAC), I enabled Remote Desktop on my first node: AZSHCI1. This is a lab, who cares about security?
It had been some time since I did this so I had to Bing to find a solution. The following website was one of the first I found so I used it to refresh my memory.
https://theitbros.com/how-to-remotely-enable-remote-desktop-using-powershell/
From the Server Manager on my Host I added all my computers so I can manage each one from there as well. I initiated a remote PowerShell session from the console and then typed the following PowerShell commands to enable Remote Desktop on my server.
Set-ItemProperty -Path 'HKLM:\System\CurrentControlSet\Control\Terminal Server'-name "fDenyTSConnections" -Value 0
Enable-NetFirewallRule -DisplayGroup "Remote Desktop"
Next I remote desktop to my first node, exited the sconfig console and went into a PowerShell session. From here I needed to enable a few Windows Features. The following PowerShell script was ran:
Install-WindowsFeature -Name "BitLocker", "Data-Center-Bridging", "Failover-Clustering", "FS-FileServer", "FS-Data-Deduplication", "Hyper-V", "Hyper-V-PowerShell", "RSAT-AD-Powershell", "RSAT-Clustering-PowerShell", "NetworkATC", "Storage-Replica" -IncludeAllSubFeature –IncludeManagementTools
A quick reboot late, and it is quick. Windows Core running on a VM almost reboots in secs. Now we are ready to create our cluster. The following PowerShell command was used:
New-Cluster -Name AzSHCI-Cluster -Node AZSHCI1.dell.hybrid -NOSTORAGE
Then we enabled our cluster storage on that node:
Enable-ClusterStorageSpacesDirect -CacheState Disabled
Bingo, we now have a single node cluster running. However, there are a few more things that must be done. This we could have done via PowerSHell, but I went back to the Windows Admin Center to do the rest.
Registering Our HCI Cluster
This is where we go back if needed to Matt’s GitHub site and start following it again. From here we will add that cluster to WAC, then register that HCI cluster with Azure. First, we also need to sign in to Azure with the Windows Admin Center.
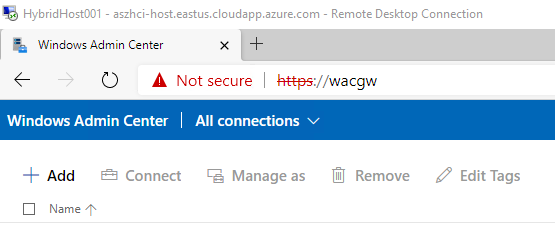
Here we go back to our host that we deployed. On the desktop, there is a RDP link to the DC running on this box. Connect to this server using the Dell\LabAdmin creds that are provided in Matt’s Repo. Once connected, open up Edge and navigate to https://wacgw and ignore the certificate alert.
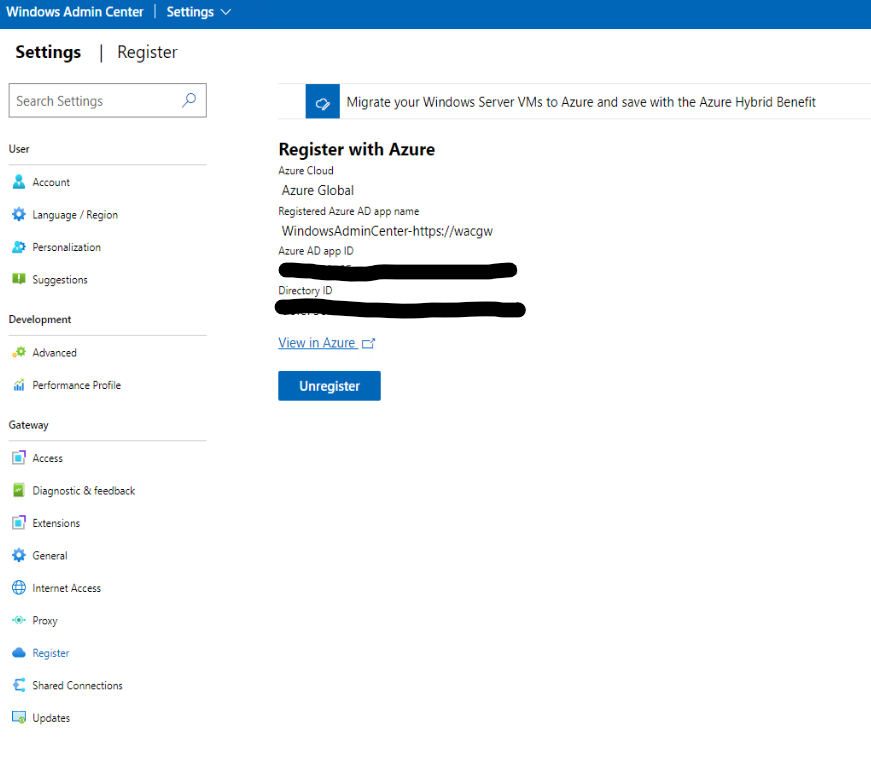
The first step is to sign into our Azure Account from WAC. This is where we create our Azure Active Directory application if we haven’t done so yet. Just to note, in a production or real life scenario, you most likely would follow better security practices and have created specifics roles for this application before hand. Matt’s Hybrid Jumpstart does walk you through creating this application via PowerShell and create roles for it as well. For this blog I went the fast and simple route had and the WAC registration create it for me. I also stole this next image from his site because I yet again forgot to get a screen shot.

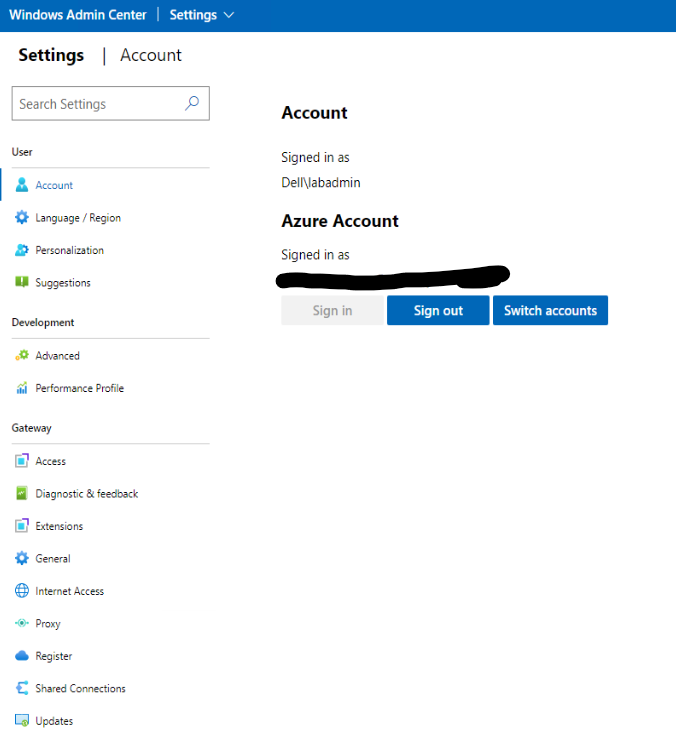
Once registered and signed on, under settings ywe should be able to see that we are now registered with Azure and connected.
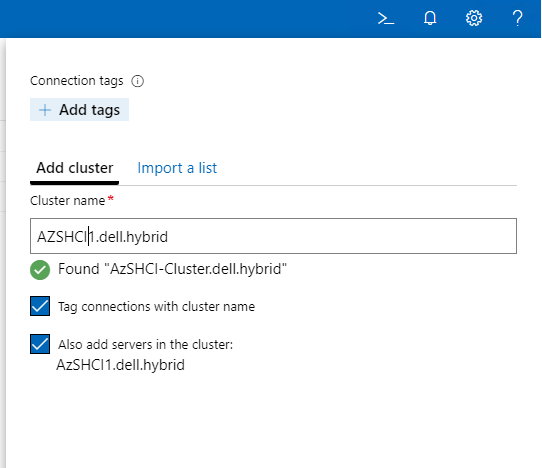
Next we need to add our cluster to WAC and then we will register that HCI cluster using WAC. First, go to all connections in the top left and click Add. Under Add or create resources I selected Add under Server clusters.
Since we already create this single node cluster we do not need to click on Create New. We would only have done that if this was a two node or larger cluster we had planned.
We are now ready to Register this cluster with Azure. Here we can pick up with Matt’s Hybrid Jumpstart in module 2 section 3 about registering with Azure.
I went the route of registering my cluster using the Windows Admin center. It is farley straight forward. However, in the world of automation it would be good to try this out a few times using PowerShell as well.
When we first open the cluster up in WAC we should see that the cluster under Arc is not connected. I however forgot to grab a screen shot here so just assume you see the image below but it says Not Connected.

The next blade that pops up to the right is an Azure Stack HCI Registration. Here you will select the subscription and Azure Region, then select the Resource group this cluster and it’s resources will be registered to. Click register and wait for a few minutes.
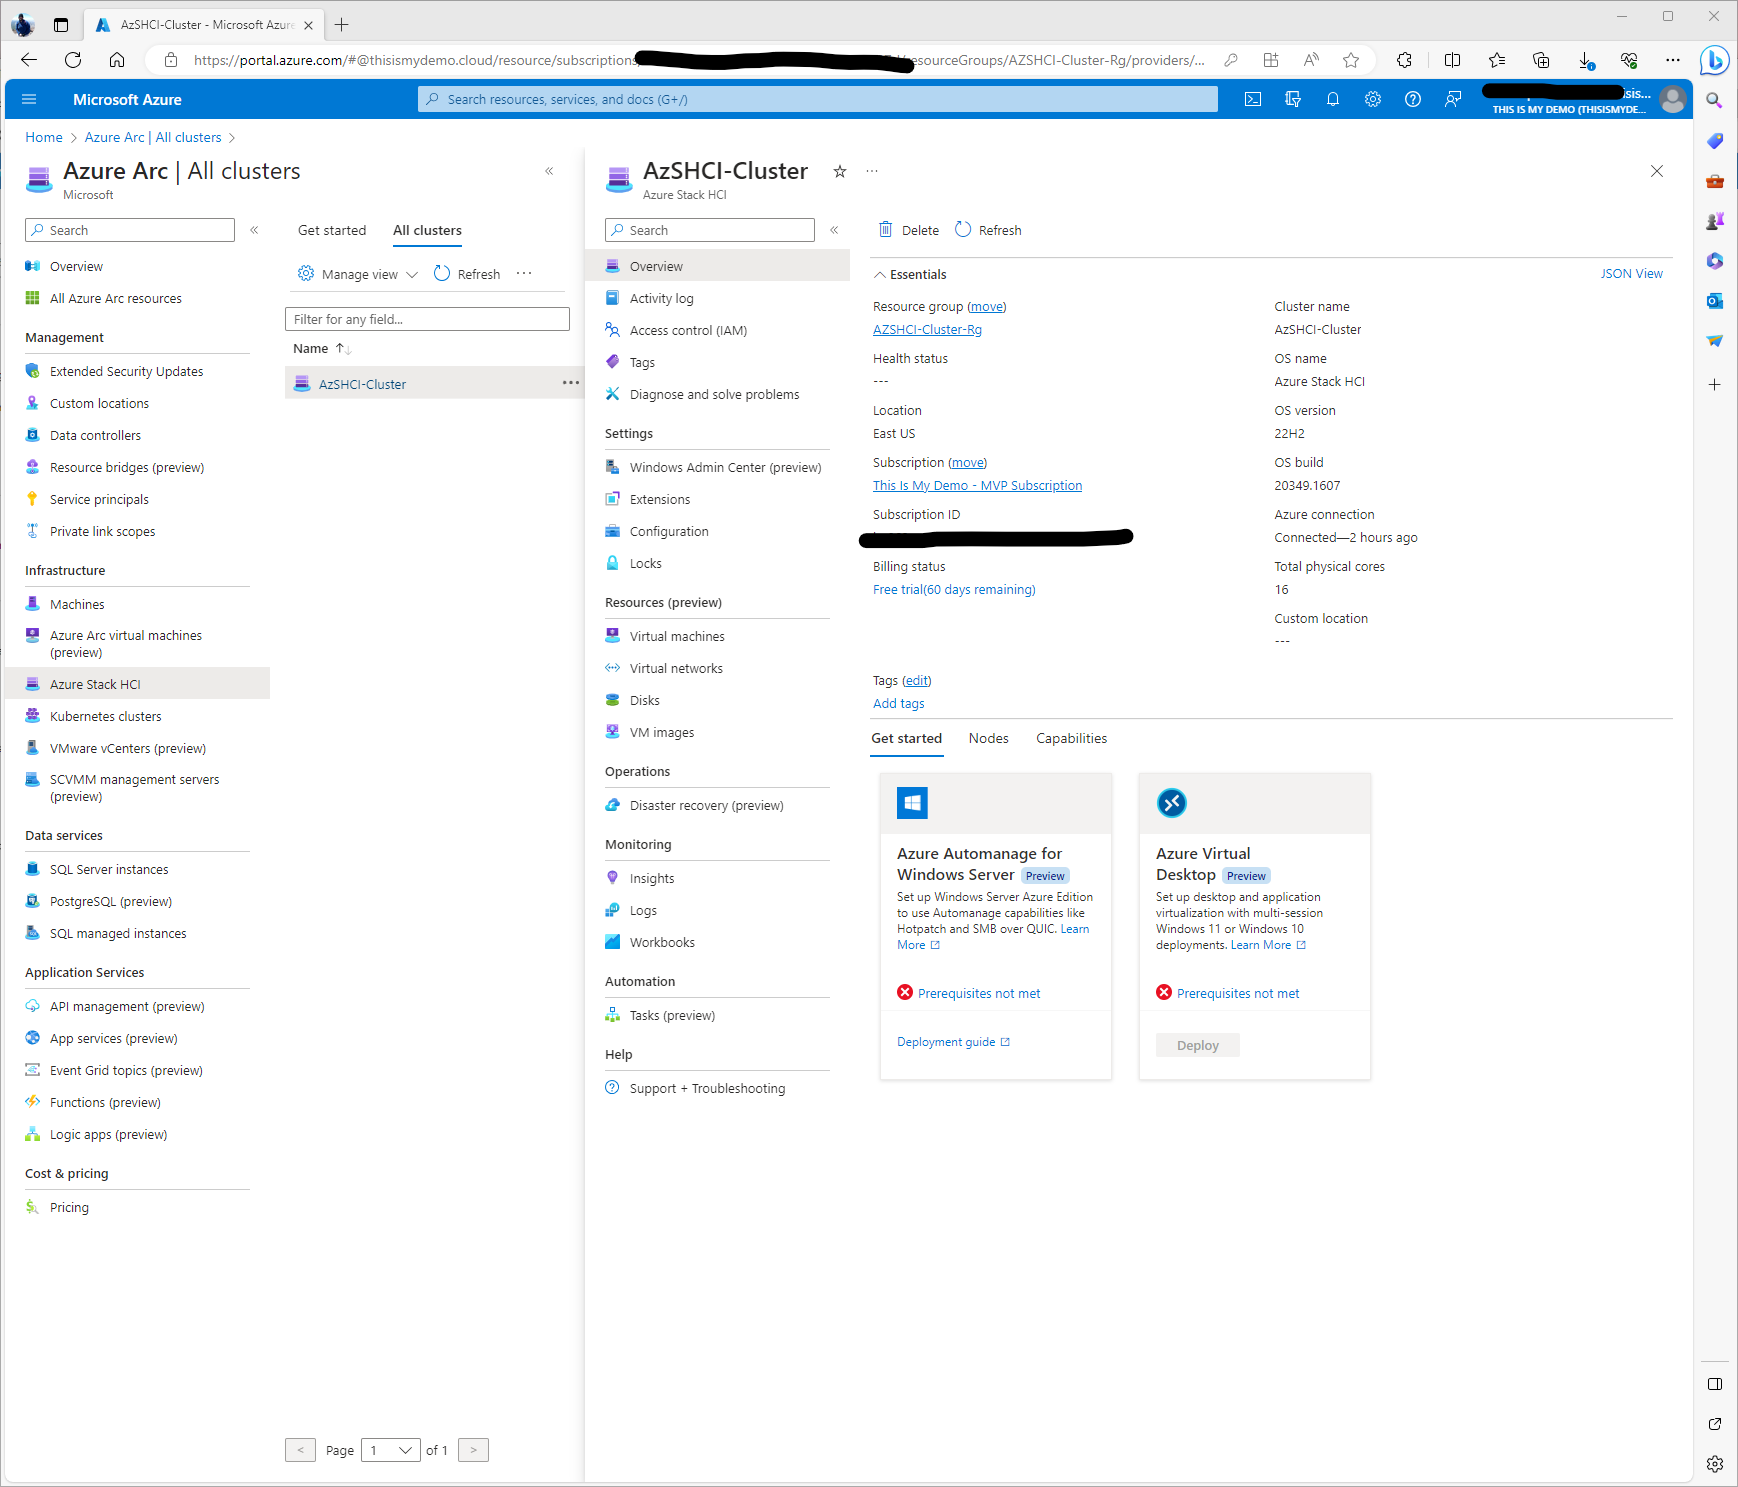
I can now go into my Azure Portal and see my resources.
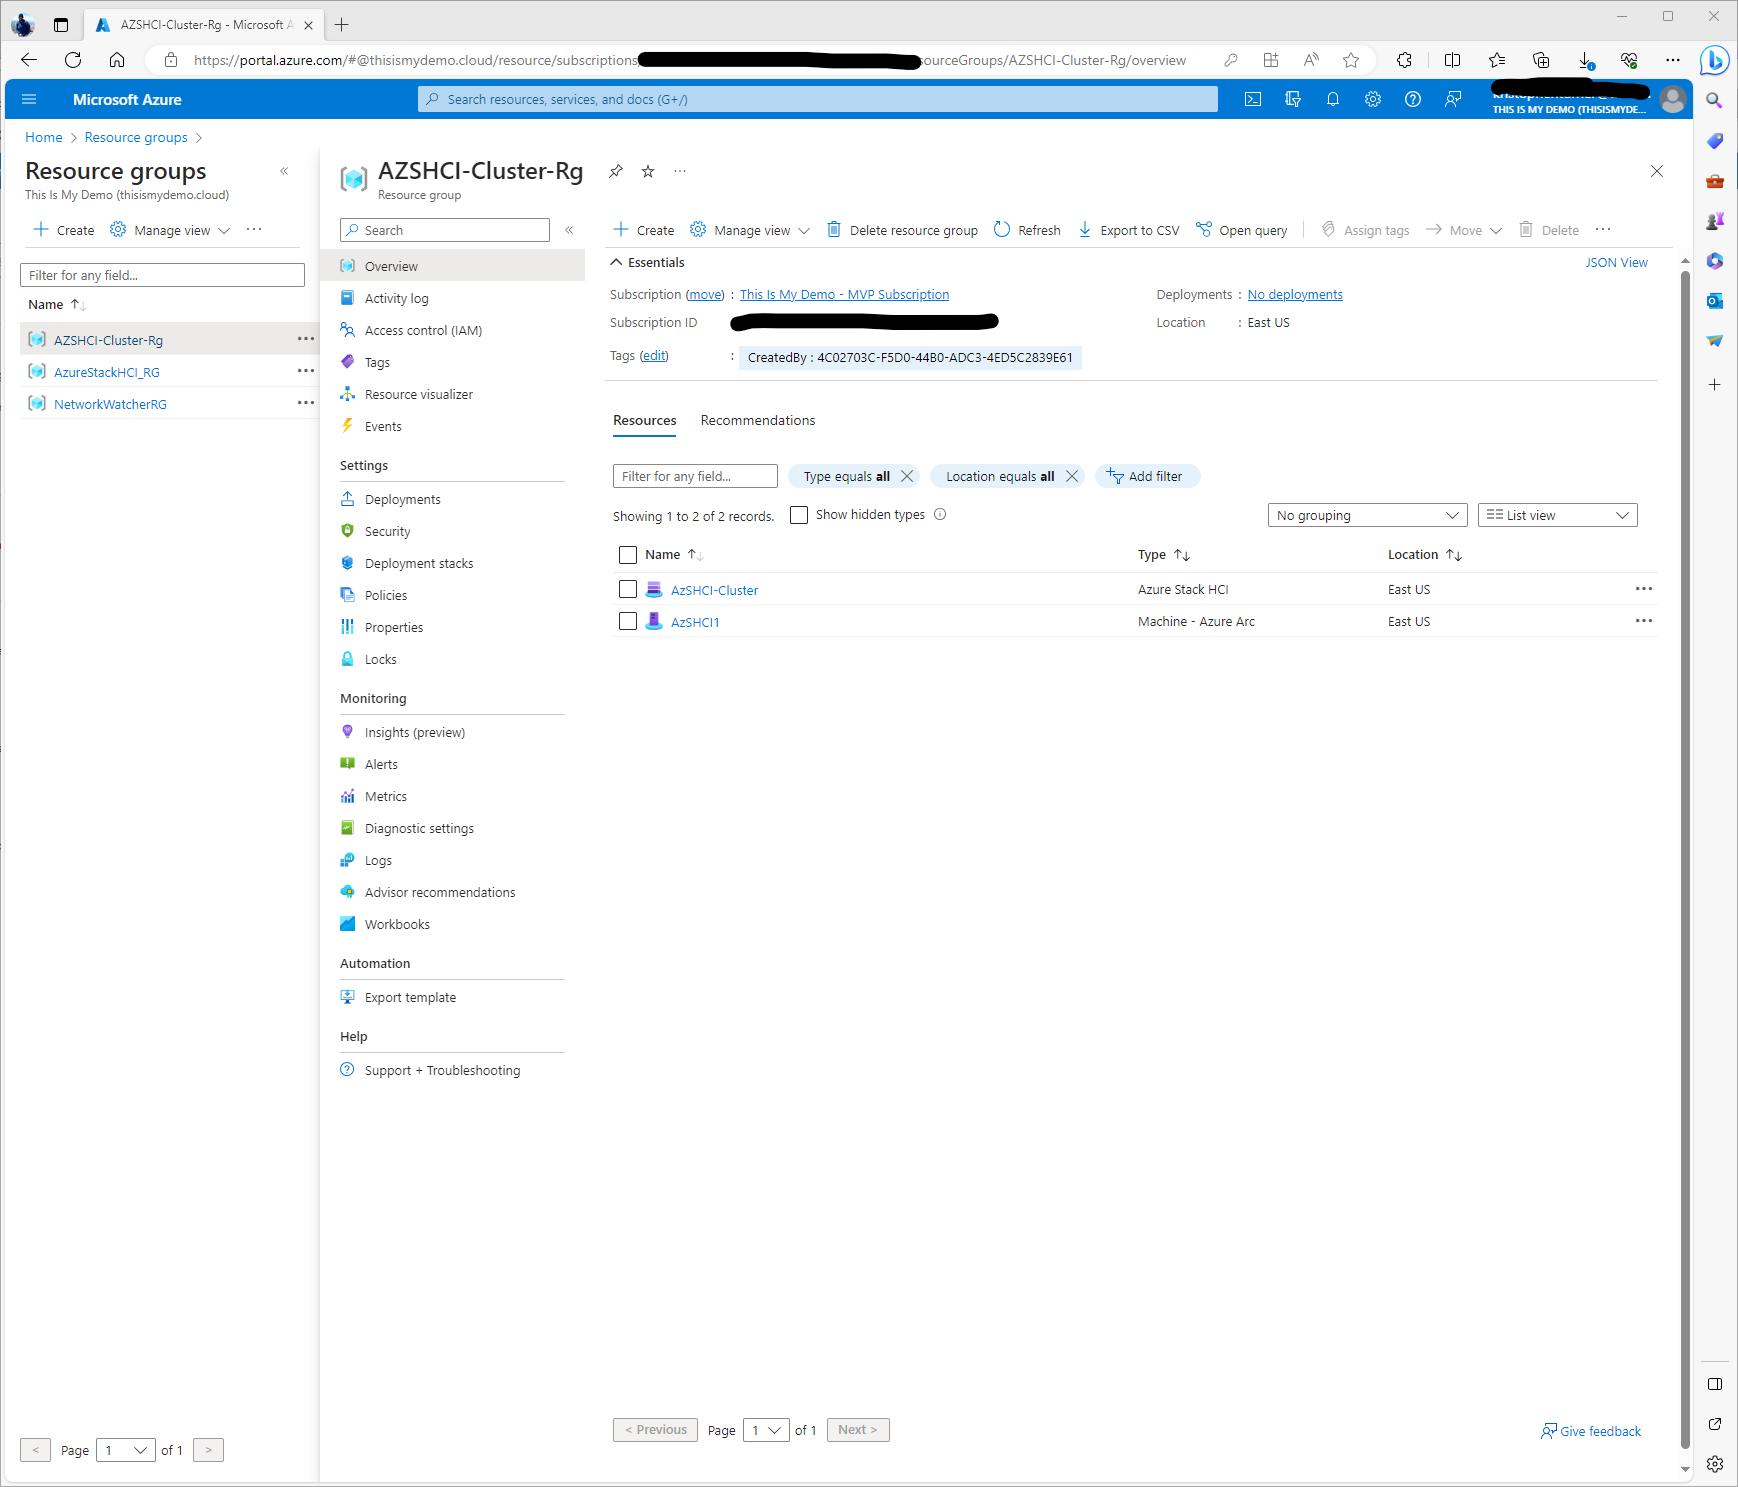
If we go to the Azure Arc blade we will be able to see our cluster resources..
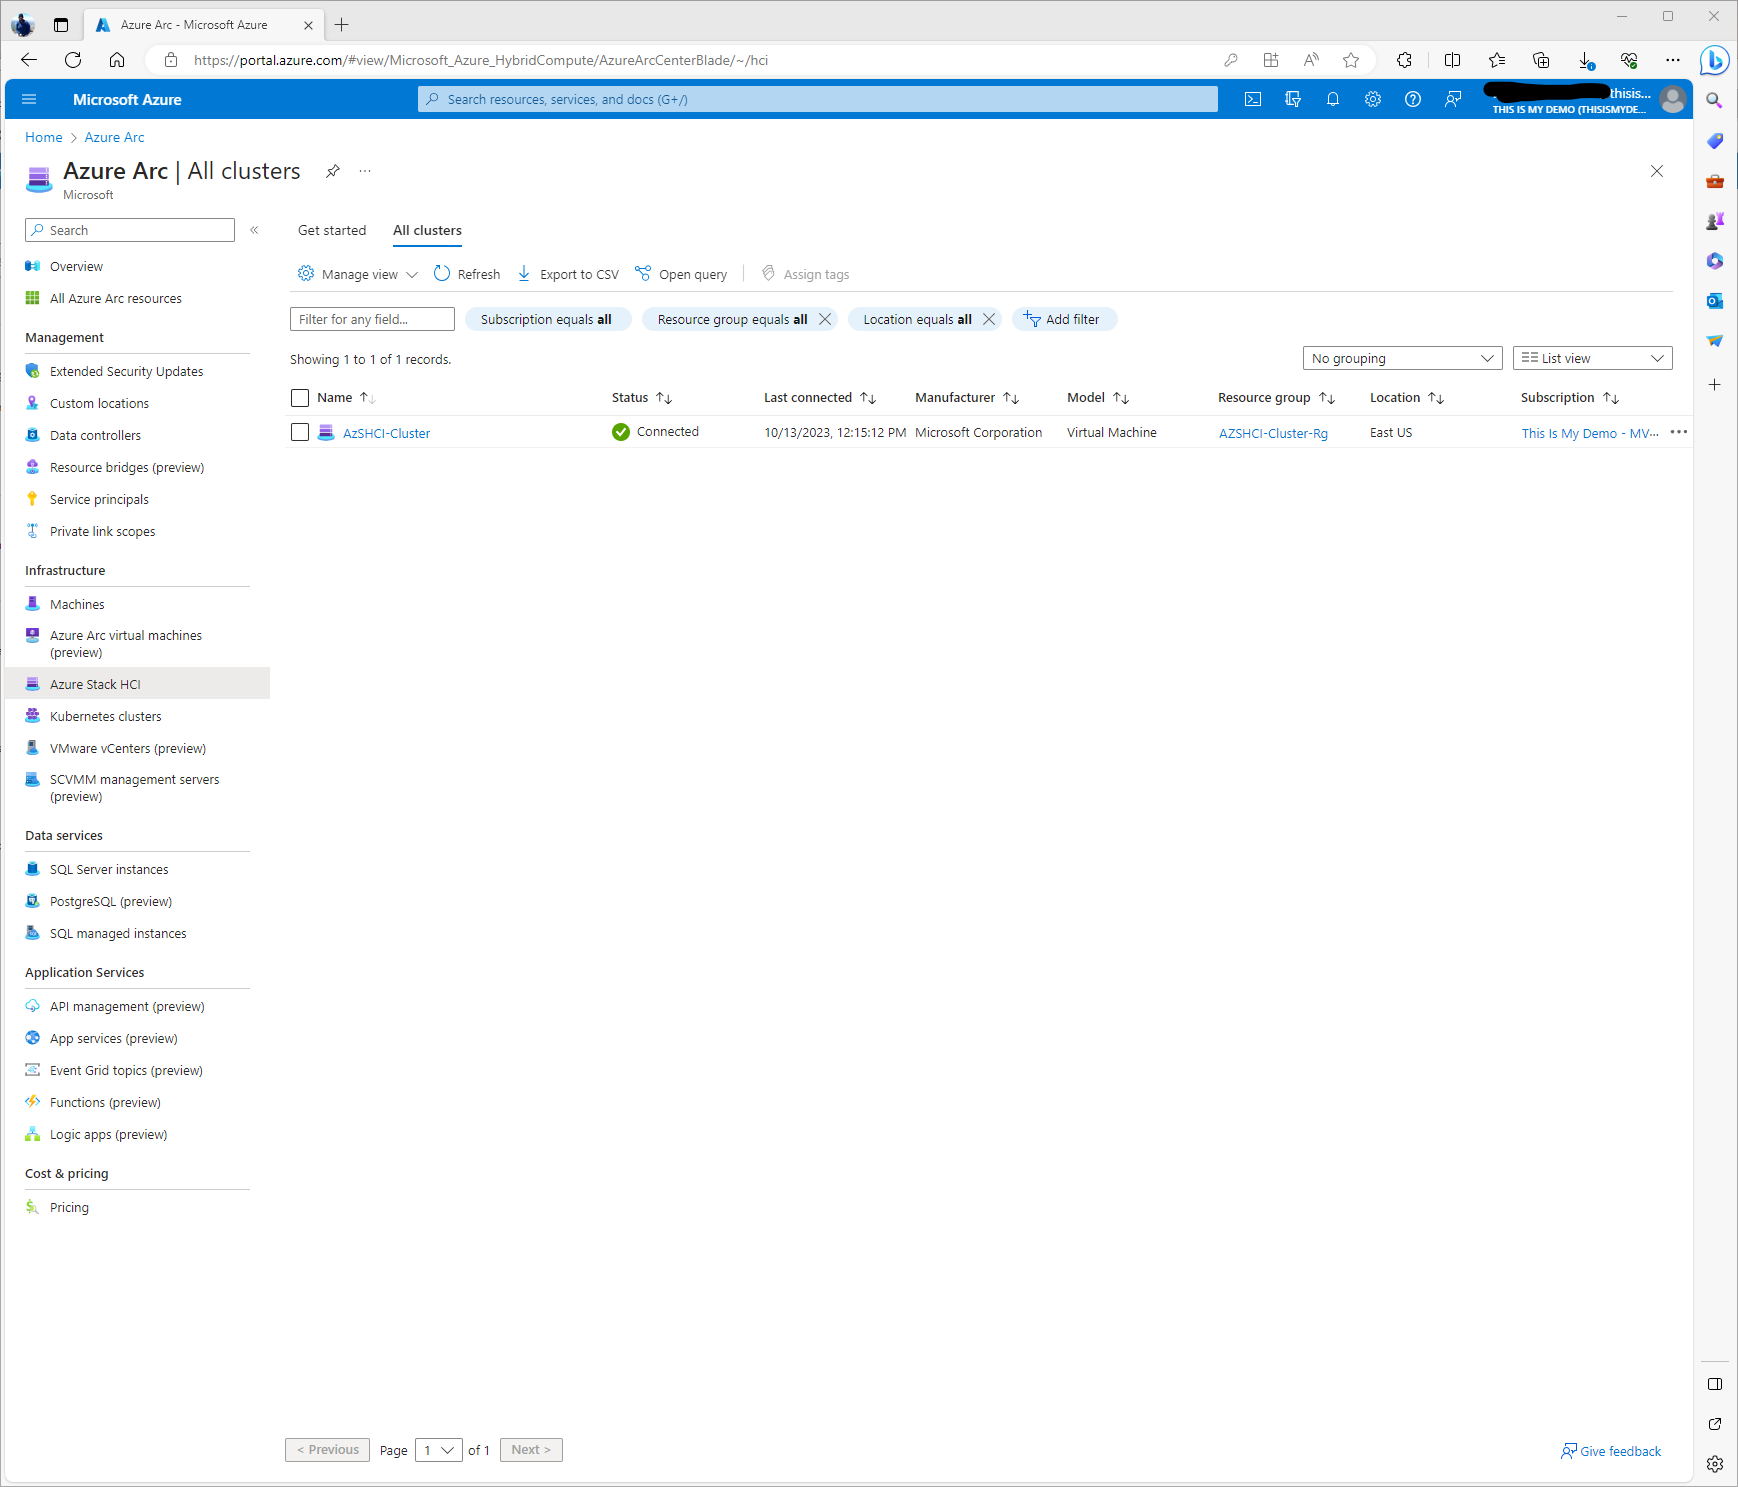
Clicking on that resource will give us even more details about our HCI Cluster now managed by Azure Arc-enabled Vm’s for Azure Stack HCI.
This is just the beginning of the journey for this cluster. There is so much more to do and so much more we can do but again, this blog was about deploying a single node cluster. Also, this was the easy button to get a cluster up and running. If this was on physical hardware and something geared towards production there is a lot more planning involved. Also, the deployment process to get the OS on the nodes as well as configure the networking etc is a lot different.
Why A One Node Cluster?
There are use cases for a single node cluster. Dell makes a nice little certified server for HCI and Edge related workloads. In fact, they are the only Microsoft Partner with the First and only Azure Stack HCI offering in the Premier Solution Category, their newly released Dell APEX CLoud Platform for Microsoft Azure solution. However, this is a single node blog so let’s stick with the smaller single nodes, which Dell does make. These single node solutions would be great for those remote locations, Edge solutions like in a back of a truck running AKS and some sort of AI solution to monitor and maintain railway lines, pipelines, pipelines, etc. Help assist with fire management for our forrest, etc. Remember, there is no HA for any workloads running on this cluster. If the box dies, it dies. I hope we had a good backup? But for some use cases, this may be enough, to run that edge application remotely. This bring up why we would want at least a two node cluster for HA, not just for the VM workloads, but also for storage resiliency. But to add to that high availability and storage resiliency we need to go even bigger, three or more nodes.
With a single node cluster we will need to update these clusters differently than we would a multi node cluster. Stretch clusters are not supported in a single node cluster configuration. (Now that should be obvious.) When updating, we need to consider that the box will go down during updates, so the workloads will go down as well.
When we compare a single node cluster to a multi-node cluster, we have most of the same capabilities in both. For example, this is a full software defined data center in a box. (SDDC). This is storage spaces direct, just with limited mirroring options, it does support Software defined networking, has native Arc integration, and more. AKS, AVD, ASR, etc is all supported on a single node. However, that single node better be a beefy box.
I am not saying that there is no use for a single node cluster, it just needs to be in a place where the workloads are not critical. The great news, is you can always scale out this cluster!!! Just add water??? ;)
Form here we can talk about scaling out this cluster from a one node cluster to a two node cluster then scaling out to a three node or larger cluster. What happens to storage, and more.
So my next blog I think is going to be about scaling out to a two node cluster. We will see.
