Azure Arc and VMWare Oh Yeah
Drinking the Microsoft and VMware Kool-aid with Azure Arc
I drink the Microsoft Kool-aid and have for many years. What you may not know is years ago, many years ago, I use to drink the Vmware Kool-aid and would attend VMUGs and was certified for VMware. This was about the version 4 days when vSphere was fairly new and there wasn’t much more to Vmware than vCenter and ESXi servers. I jumped ship to the dark side, mainly because I started working with SMS 2003 and Configuration manager 2007 after a little bit of time working with Altiris Deployment Server and Notification Server. Yes, I am that old. This was pre-Symantec days of Altiris as well. However, Symantec bought them and I also got certified as something or something with Symantec. I forget, but I still have an awesome chess set from Symantec with all the piece being a server rack or something in a data center except for the pawns, they are old CRT monitors.
Anyway, this blog is about VMware and Azure Arc. Yes, I am writing a blog about something other than Microsoft products. I do that once in a while. This blog will follow my experience with Azure Arc-enabled VMware VSphere and how to manage VMware vCenter resources with Azure Arc.
So here is the break down of this blog:
My Environment
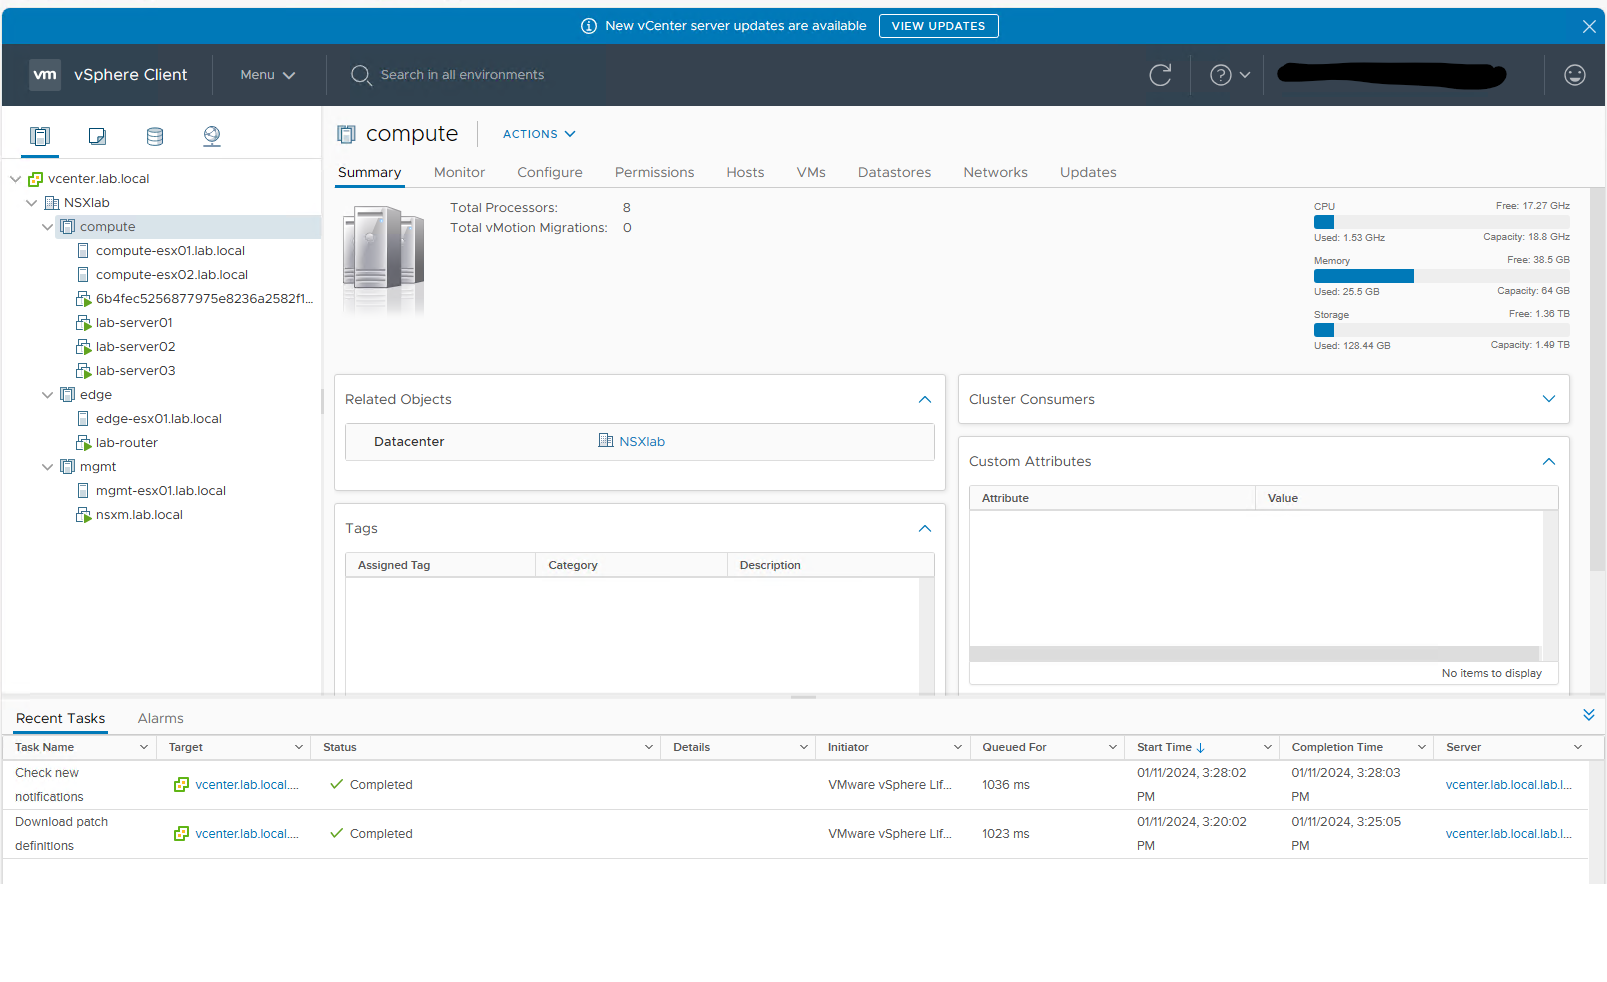
For all my Azure Stack HCI labs I always turn to MSLAB which is a great way to spin up a working 1 to 4 node Azure Stack HCI cluster either in a nested Azure VM, on premises running on Hyper-V, even on VMware VM’s if you have to do it that way as well. I didn’t really know where to start so looking on Bing I really couldn’t find something similar to what MSLAB had for AzSHCI. I went the route of trying to spin up a host VM in Azure were I could deploy a test VMware environment myself. However, after a few attempts at deploying VM sizes that supposed to support virtualization in East US region and failing to be able to install Hyper-V, I started to look more into it and saw that I was biting a small piece of elephant off and had a lot more to chew. In other words, this was going to be a long process and I wanted something simple. That is when I asked my boss if we had any vCenter’s and a few ESXi servers in our lab that I could use. He mentioned to talk to a co-worker about it. I quickly found out that he had an entire cloud environment configured that could build out an entire VMware environment. From switches, to routers, to ESXi host, and vCenters. It took less than 15 minutes to get my environment up and running at at a point where I could start documenting my journey with Azure Arc-enabled VMware vSphere.
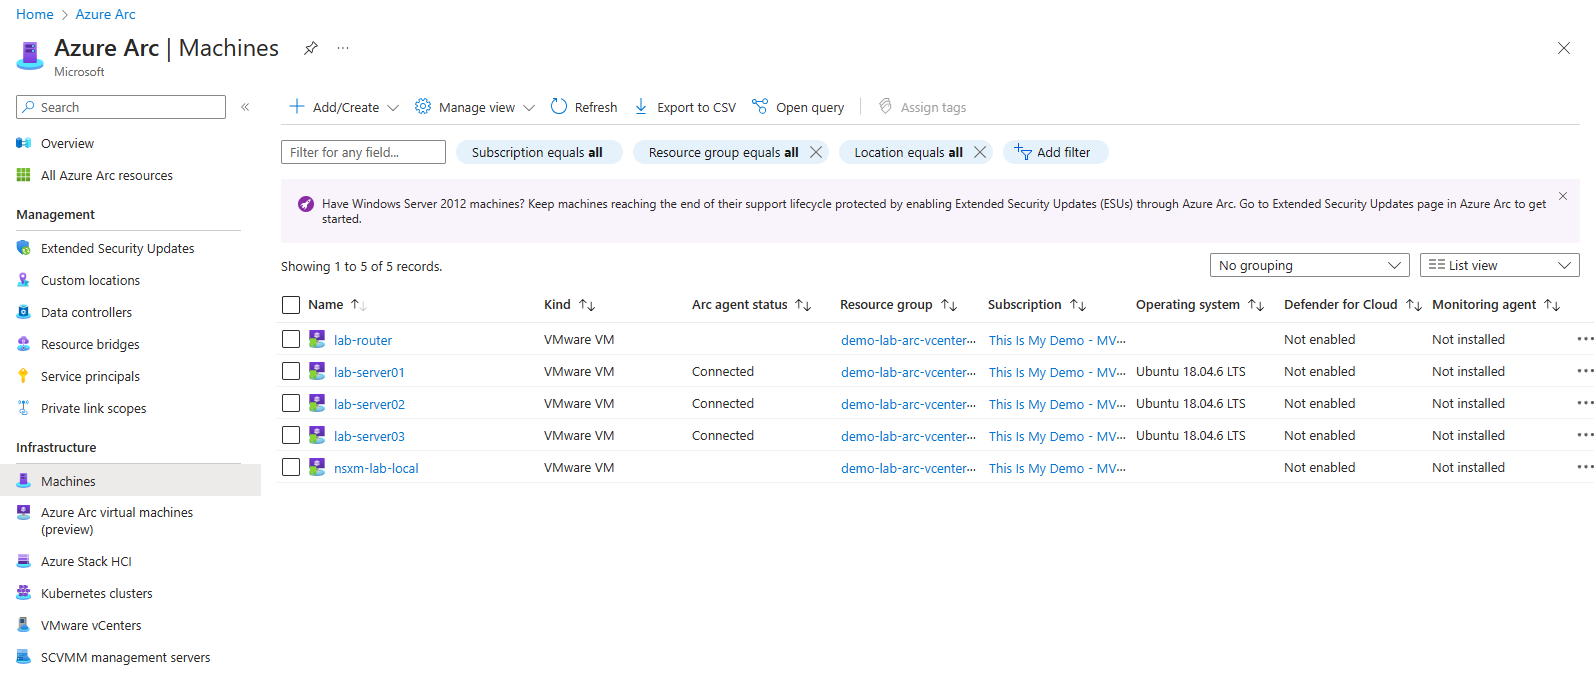
In a nut shell, this is my demo environment I will be working with.
Planning
Planning was straight forward and all of what needs to be considered can be found in the Planning Documentation found on Microsoft Learn.
I will call out a few things:
- Require a vSphere account with privileges to read all inventory and to deploy and update VMs.
- Minimum virtual hardware requirements for the Resource bridge:
- 16 GB memory
- 4 vCPUs
- External switch for internet access and firewalls configured with URLs needed.
- Azure Subscription with either Owner, Contributor or Azure ARc VMware Private Clouds Onboarding role.
- vCenter 7 or 8
- 3 Static IP addresses outside the DHCP scope if DHCP is used.
I suggest reading the document shared for more information on what URL’s need to be accessible and other items that may be important to a deployment.
Deploy
Download the onboarding script
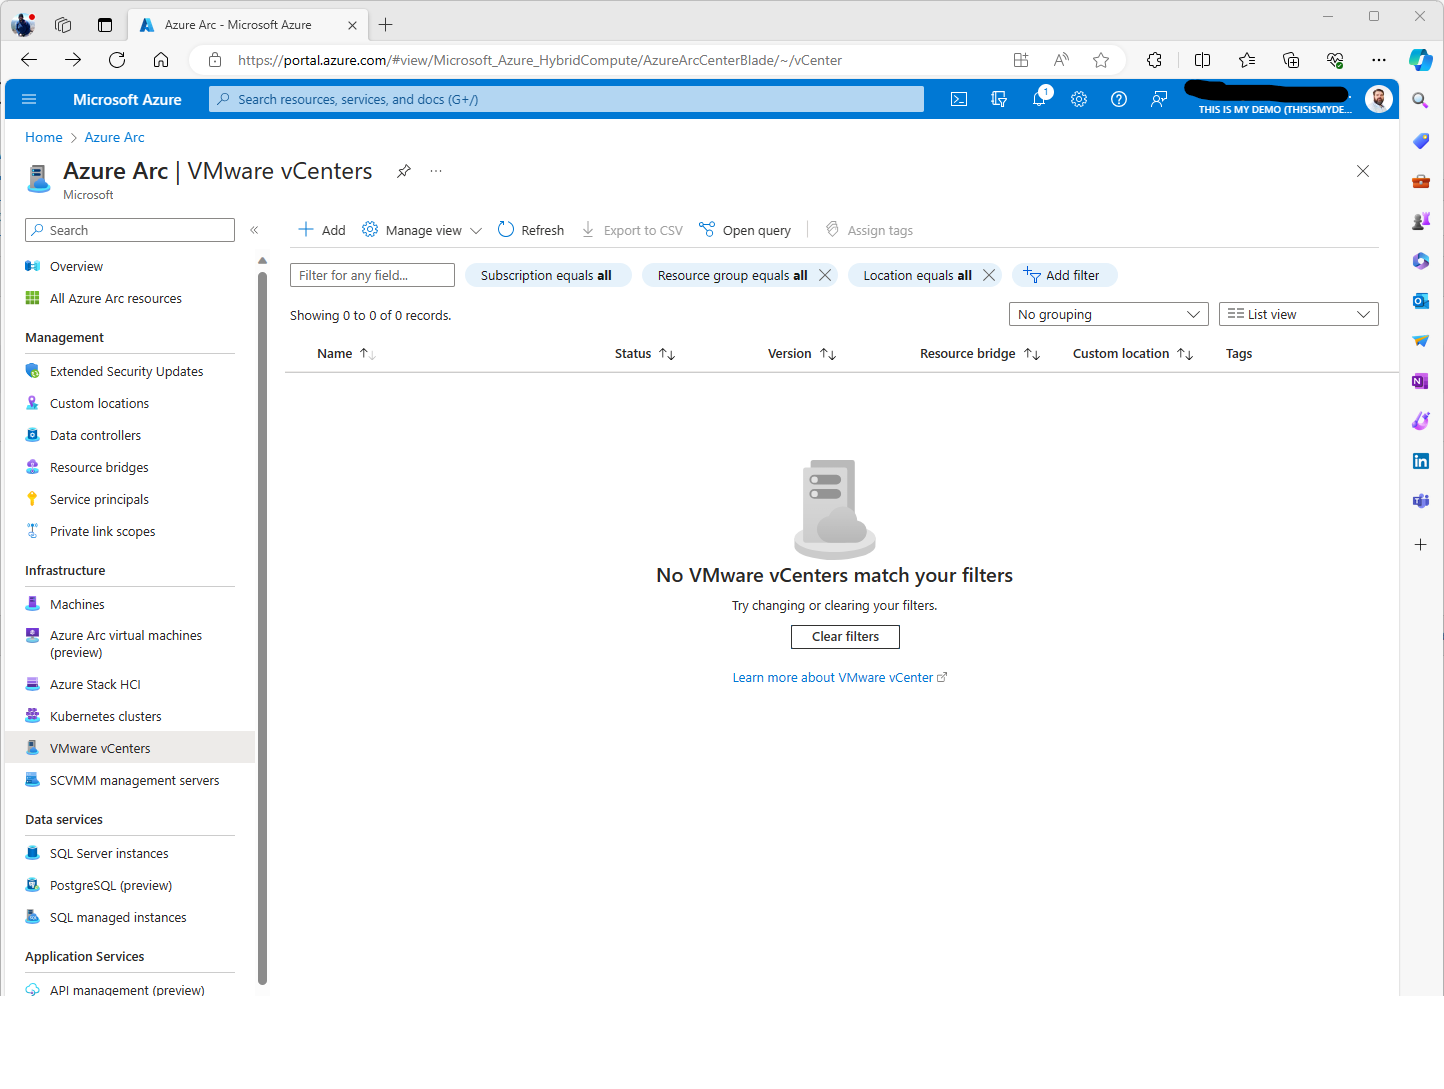
The first thing we need to do is create and download the onboarding script. This is done in the Azure Portal and than go to Azure Arc, then clicking on the VMware vCenters section under Infrastructure.
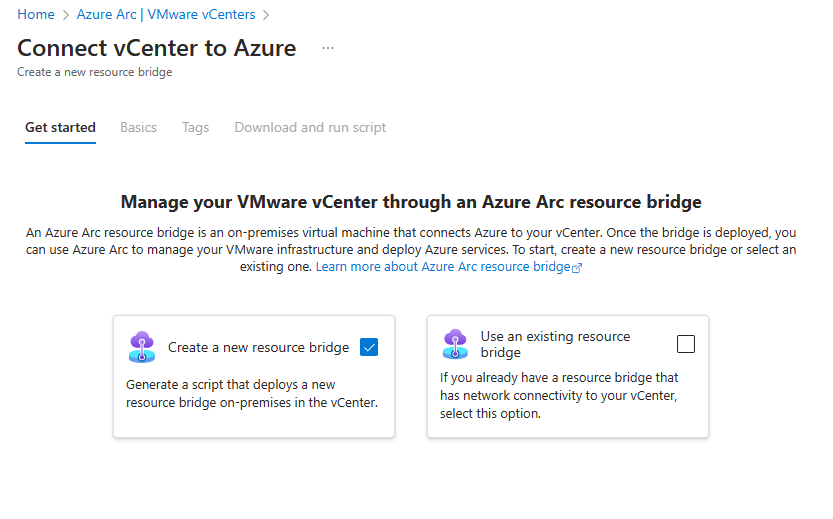
From here click on the Add button at the top menu and the next screen will present the option to create a new resource bridge or use an existing resource bridge. In my case, I do not have a resource bridge already deployed to this location so I will choose Create a new resource bridge.
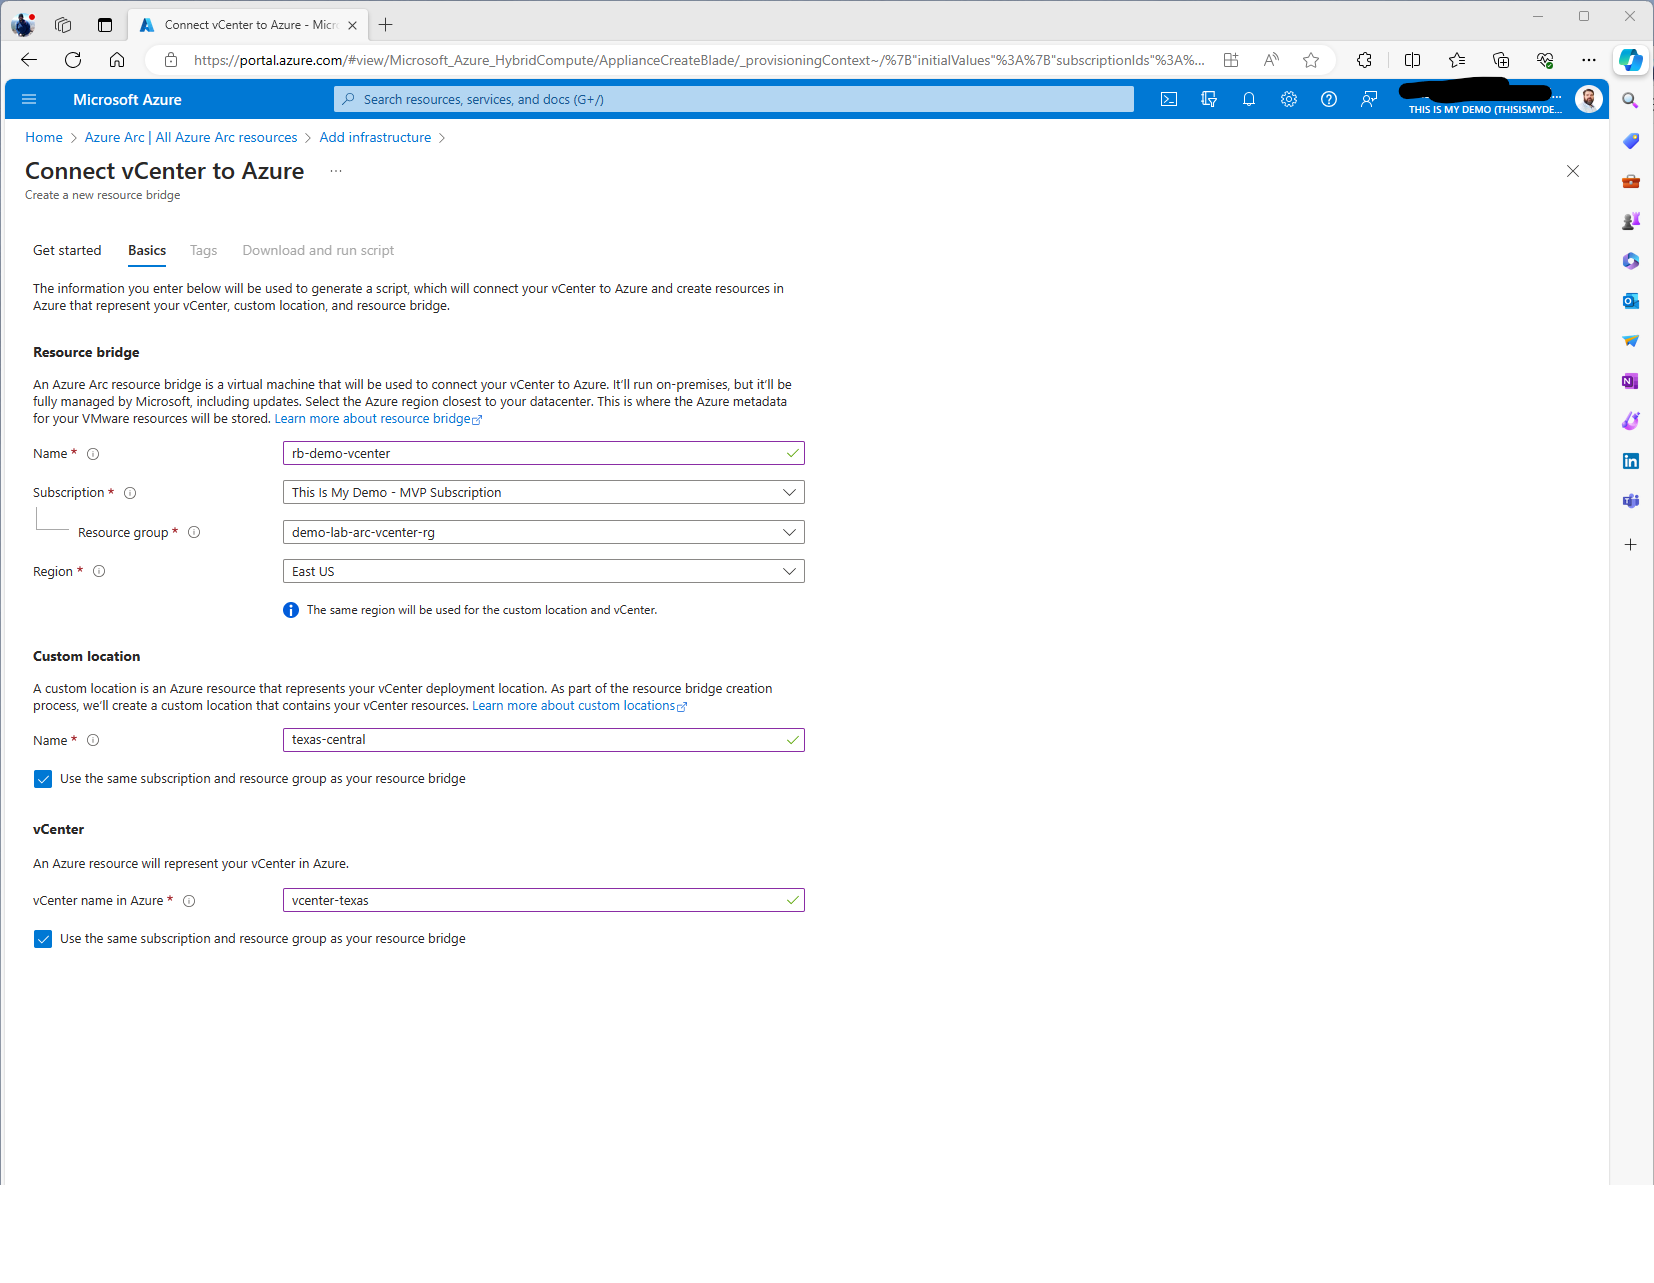
On the next screen, we have the option to name our resource bridge, designate the subscription it will be assigned to and the resource group along with the Azure Region. We also will have the same options for Custom location and vCenter resource as well if we wanted to separate these resources for various reasons. For my purposes I will keep everything together at this time in the same resource group and same subscription.
The naming can become important if we deploy a lot of these types of resources. For my resource bridge I named it after its purpose. Since its purpose was a demo for vcenter that is what I named it. In reality, I would have at least included the location of the resource bridge. The same with the custom location, this is to identify the location that can be used to deploy workloads to. So in my case, I live in Central Texas, I created the name texas-central for a custom location. The name of the vcenter, I would keep it as close to the name of the vcenter that the resource bridge is going in.
Next is tagging. Here it gives us some prefilled physical locations and then the ability to add custom tags.
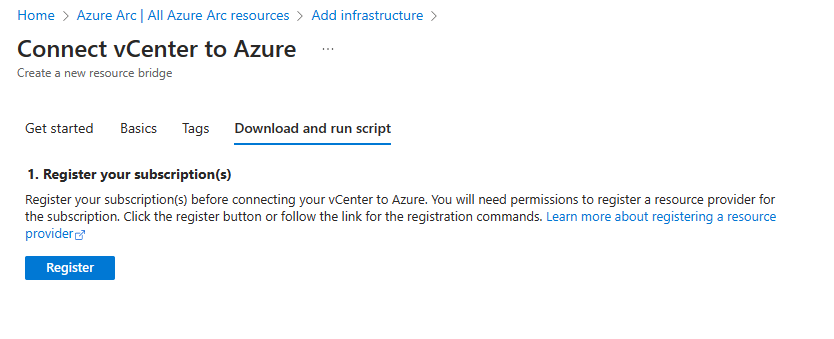
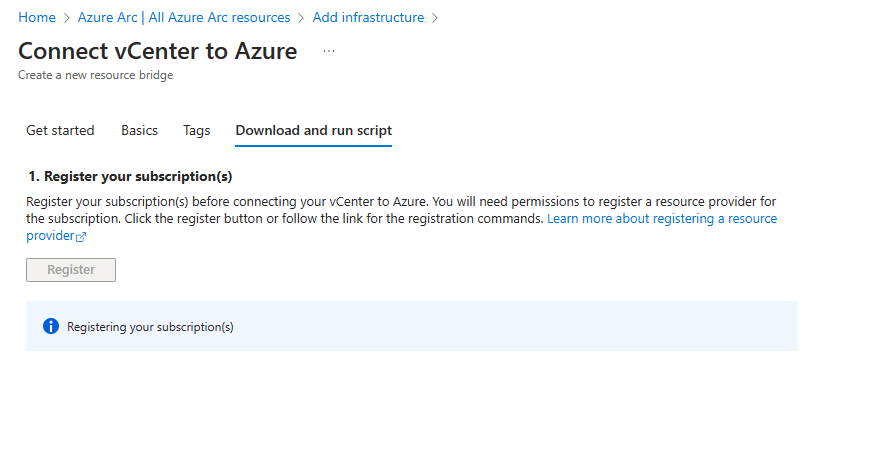
Next, if we haven’t already registered the resource provider for the subscription, we will need to click on Register and wait for about 2 minutes or so.
Finally we are ready to download the deployment script. Click on download script and we are now ready to run that script.
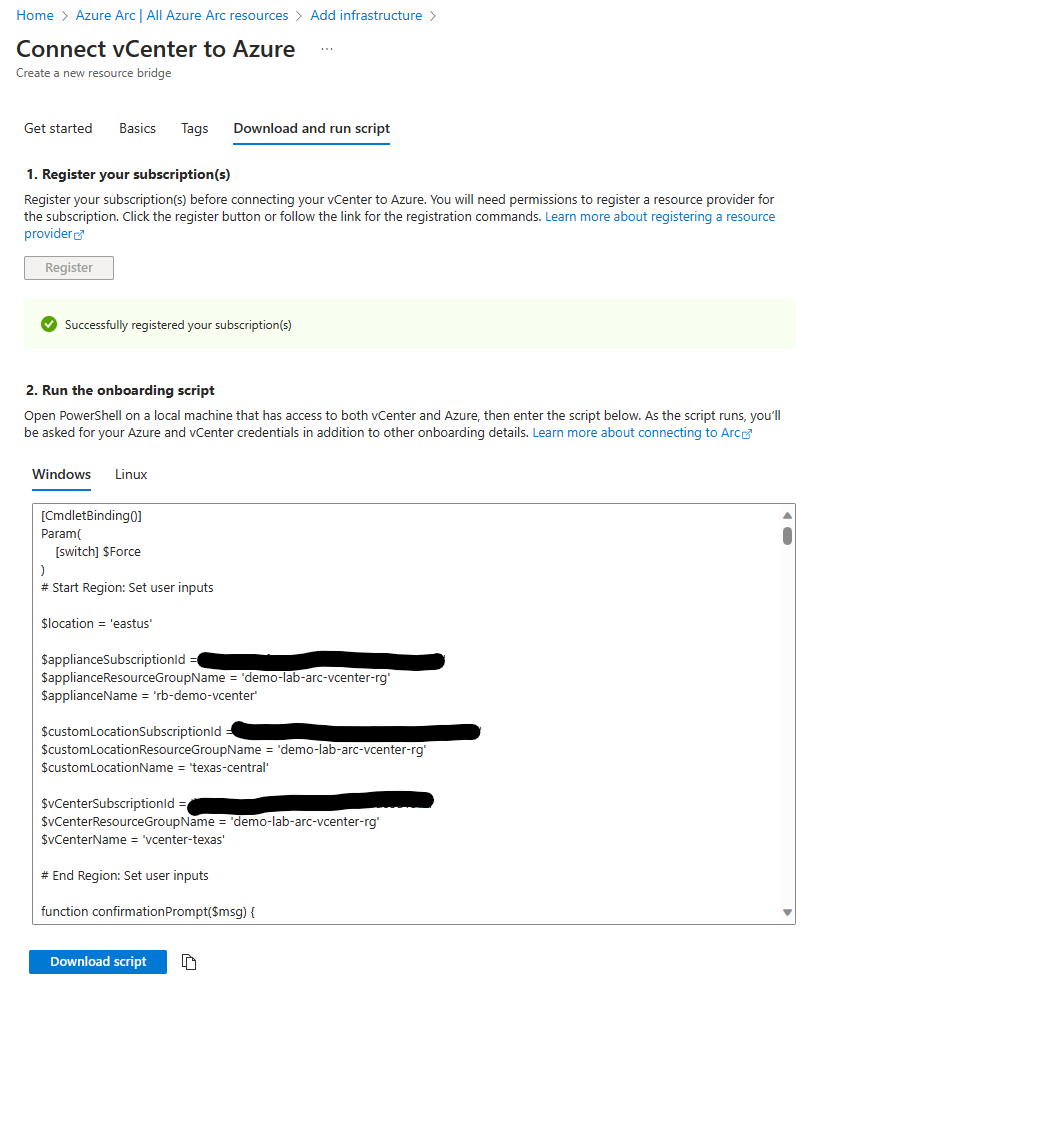
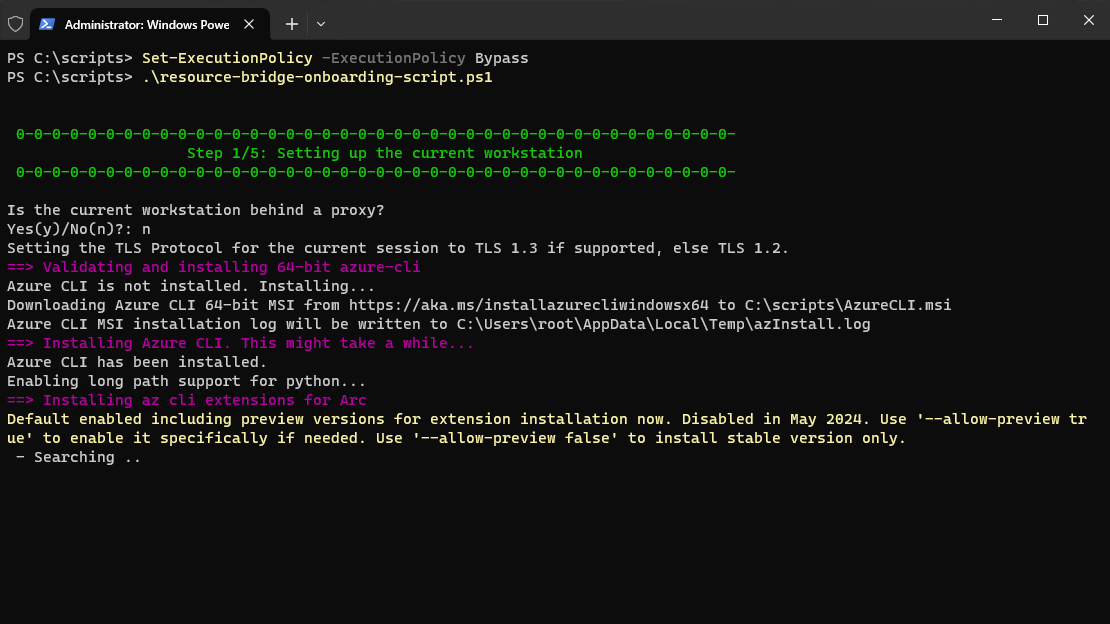
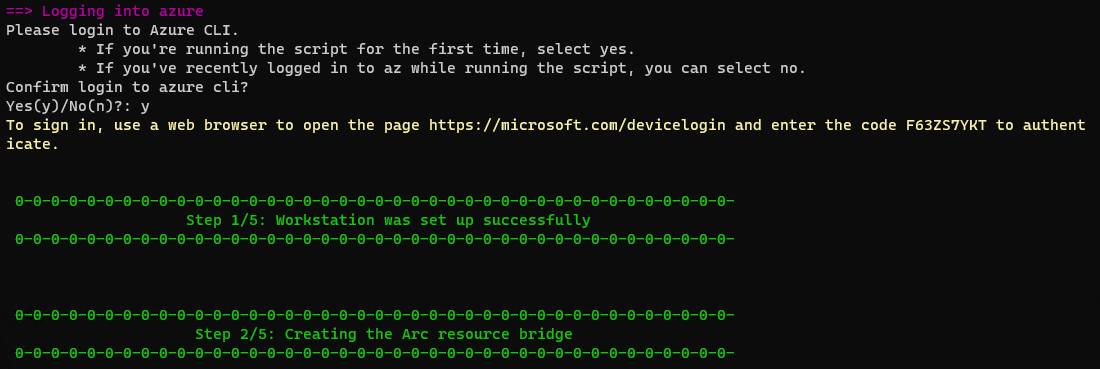
Running the onboarding script
From a machine that has access to your vCenter server we will want to verify that we have the rights to execute this script using PowerShell. Then we will want to run the following script:
resource-bridge-onboarding-script.ps1

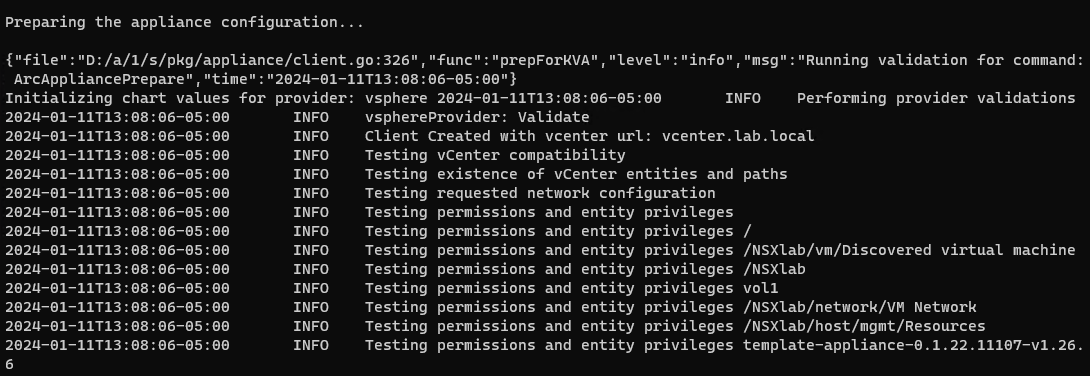
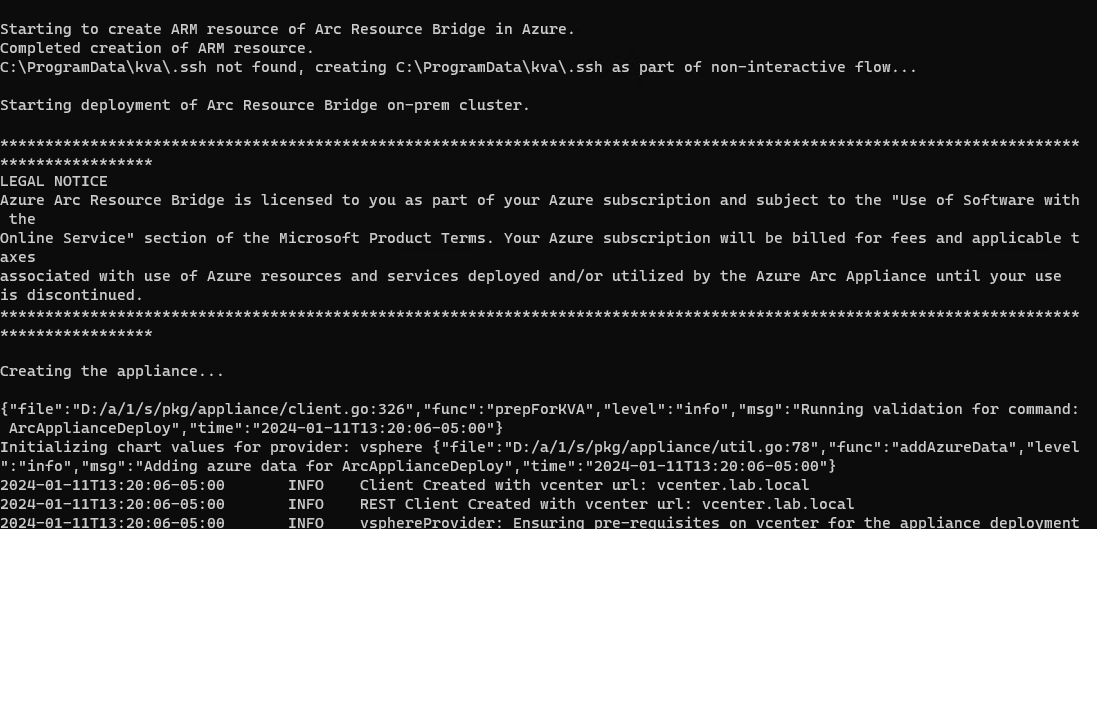
When the script runs it will prompt us to login to our Azure Subscription, download the ova files needed, copy them to the datacenters that we select and then proceed to deploying the Resource bridge, and the other resources that are needed.
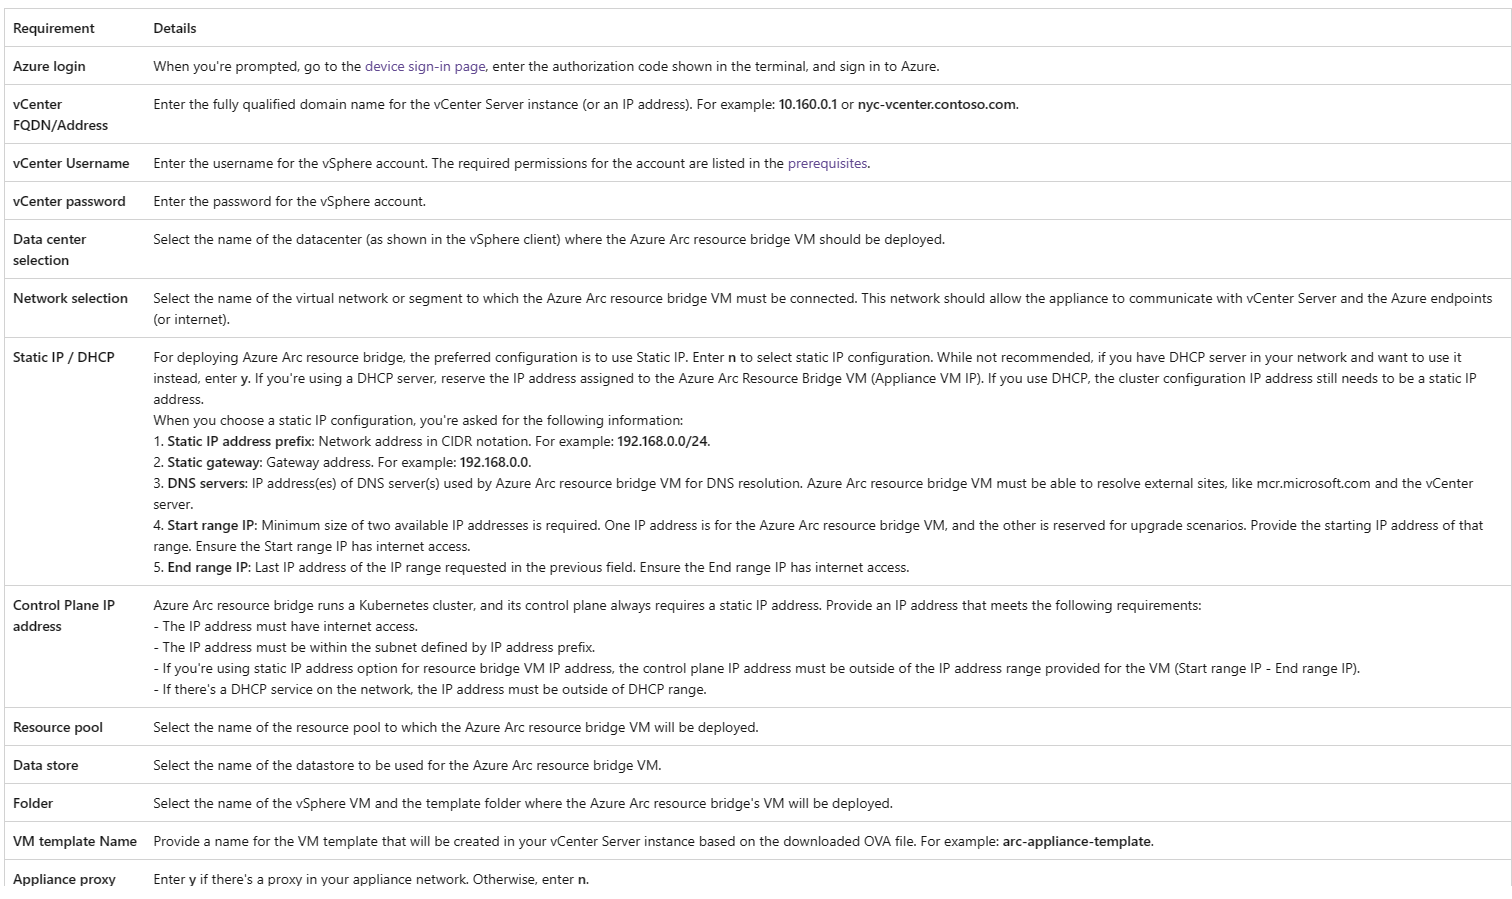
In this section it will ask for several inputs.

From here the rest is a waiting game. Time to get some coffee and hug my wife.
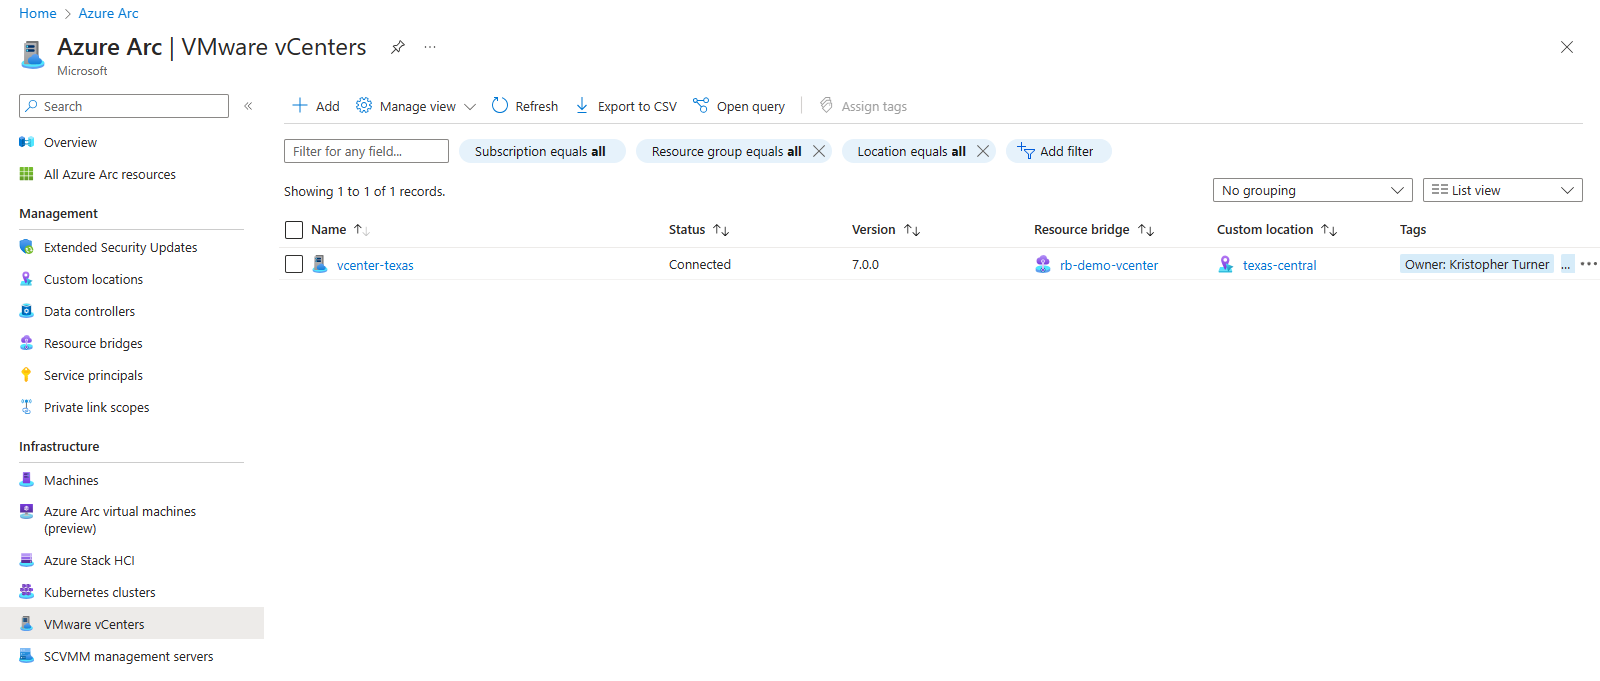
And finally we have a successful connected vCenter to Azure!

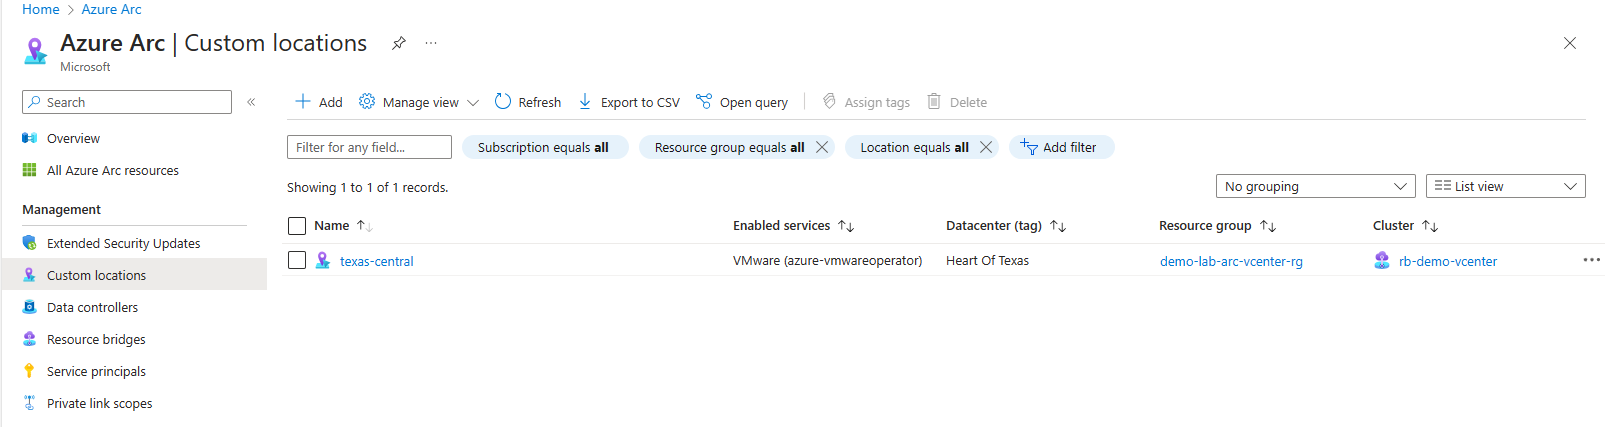
We now should see a new custom location resource in Azure.
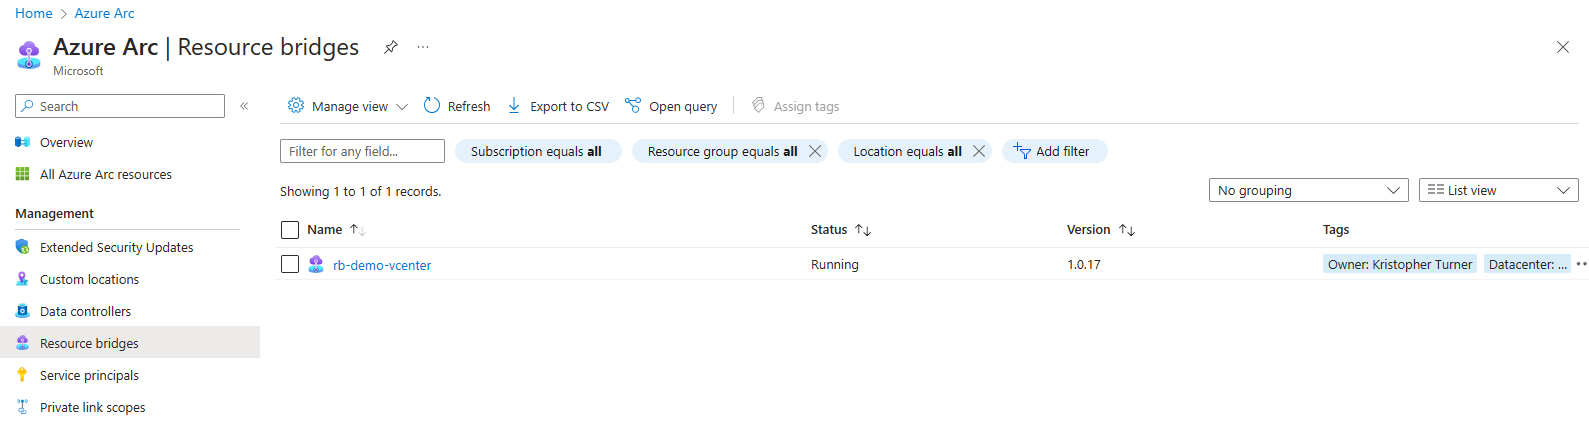
We should also see a new resource bridge resource
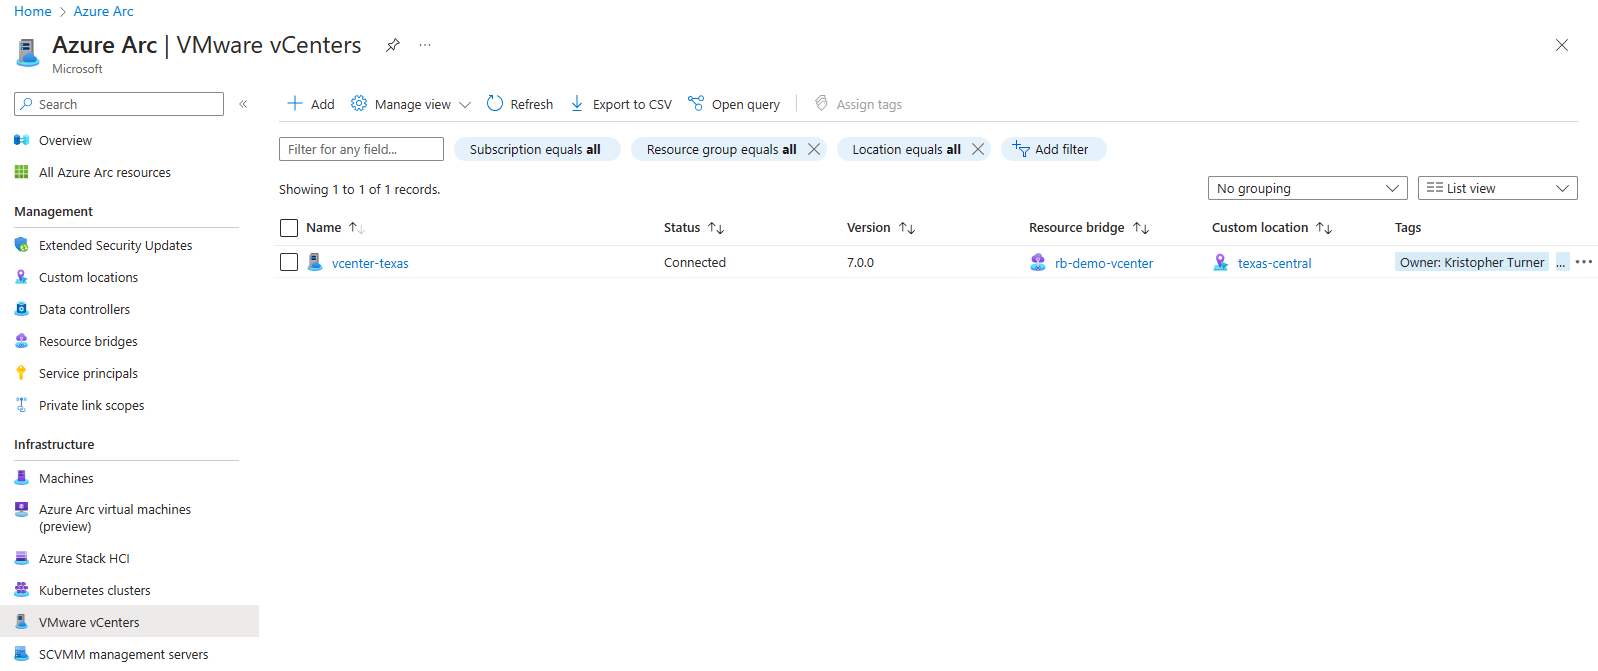
We will now have our vcenter resource available.
Enable VMware Resources
The next step we will need to enable all the VMware vCenter resources in the Azure Portal.
Navigate through your virtual machines (VMs), resource pools, templates, and networks within the vCenter resource inventory. In Azure, you have the option to choose and activate various vCenter resources. Activating a vCenter resource in Azure results in the creation of a corresponding Azure resource. This Azure resource can then be utilized to allocate permissions or perform various management tasks.
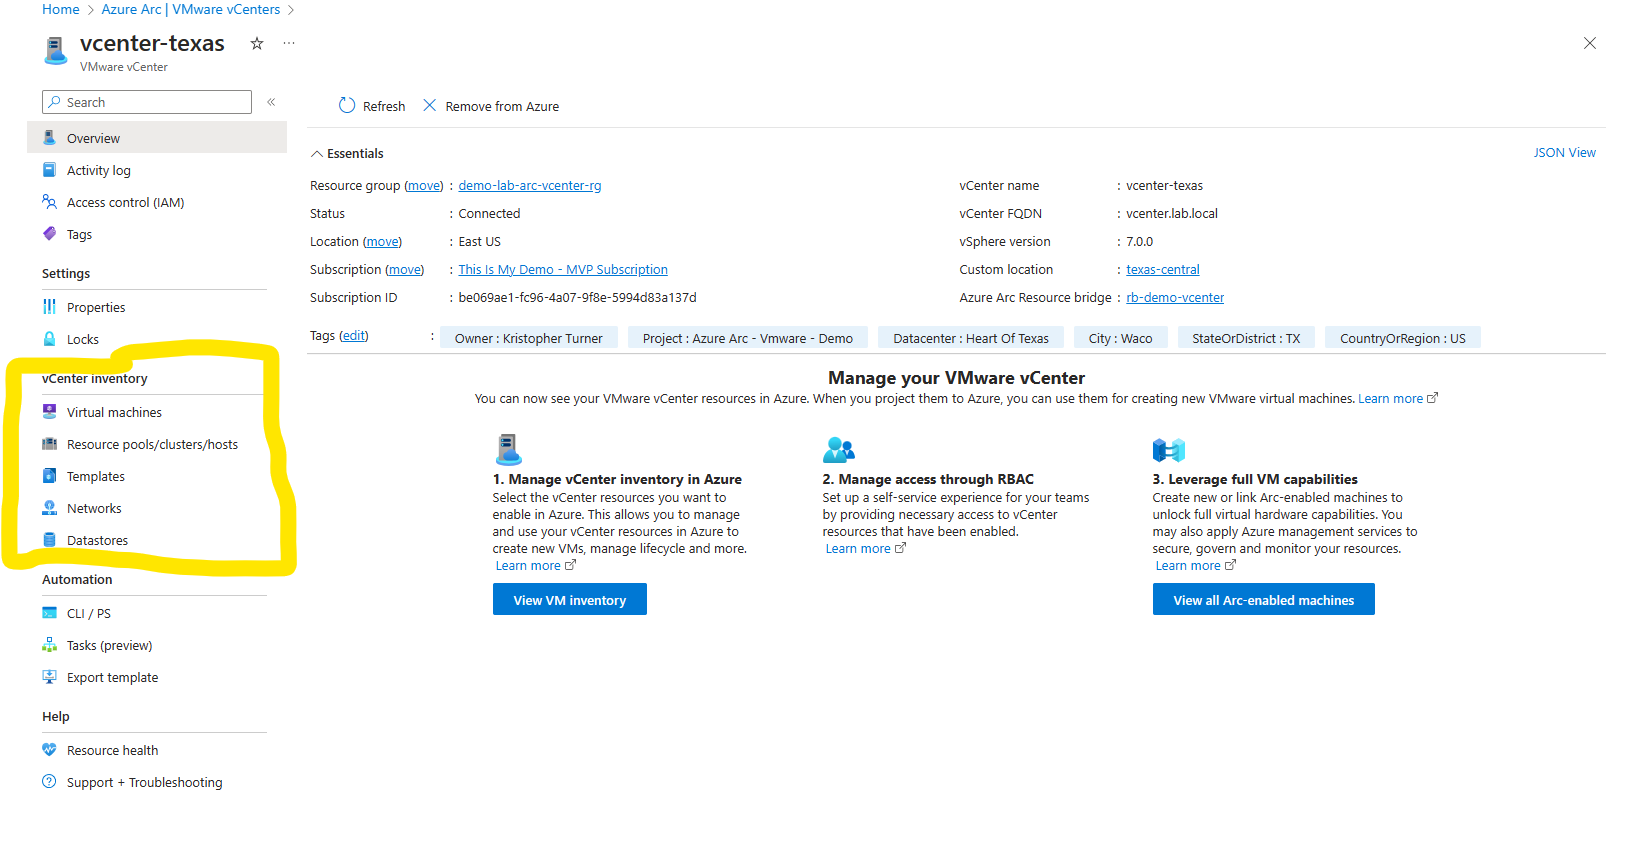
We can do this by opening the vCenter blade on the Azure Arc center and selected our newly connected vCenter resource.
Once we have our vCenter resource open, we will go to vCenter inventory, here we will find our virtual machines, resource pools/clusters/host, Templates, Networks, and Datastores that are all managed by this vCenter.
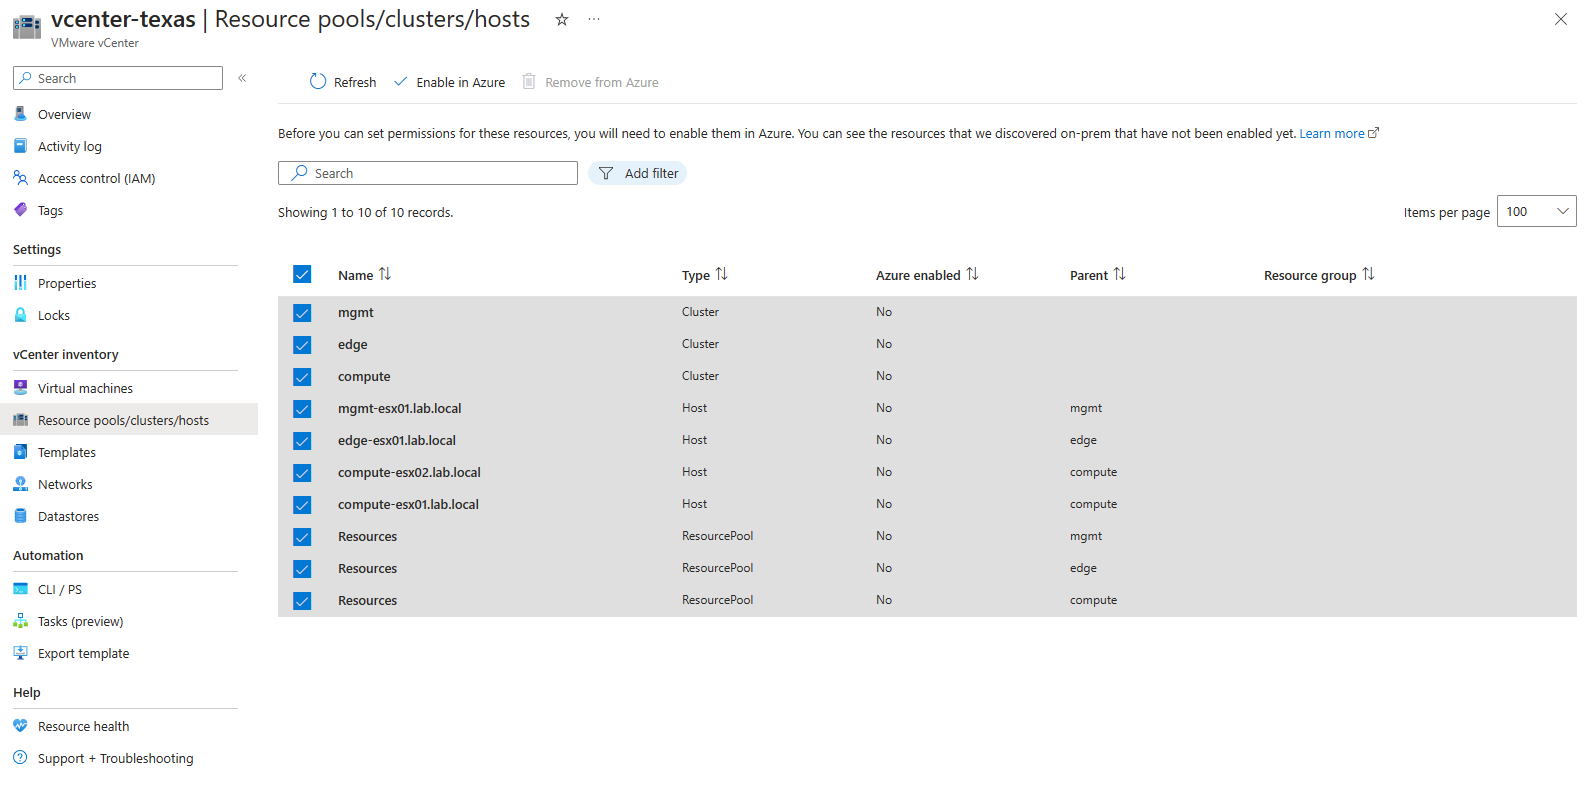
Resource Pools, Clusters, Host, Networks, Datastores and Templates
The first thing I did after following the Microsoft Learn Documentation on Enable VMware vCenter resources in Azure, is enable my resource pools, followed by my clusters and host, then datastores, networks and finally my templates. One thing to note that is noted on the documentation is that your templates need to have the vmware tools installed otherwise they will be greyed out.
I will enable everything since this is a demo lab by following the following steps:
- Open your web browser and access the vCenters section within Azure Arc Center. Proceed to the inventory resources section.
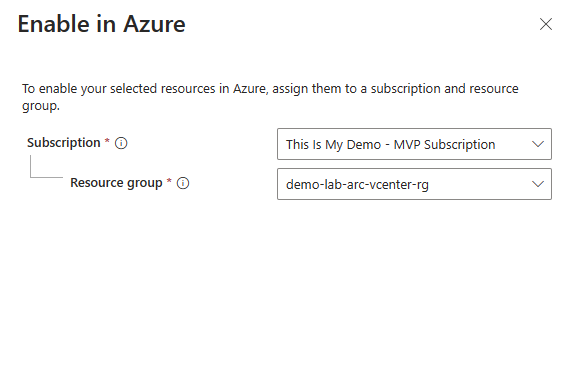
- Choose the resource or multiple resources you wish to activate and click on the ‘Enable in Azure’ option.
- Pick your Azure Subscription and Resource Group, then click on ‘Enable’.
- This action initiates a deployment process in Azure, establishing Azure counterparts for your VMware vSphere resources. It enables fine-grained control over access permissions to these resources using Azure’s role-based access control (RBAC).
- Follow these instructions again to enable additional network, resource pool, and VM template resources.
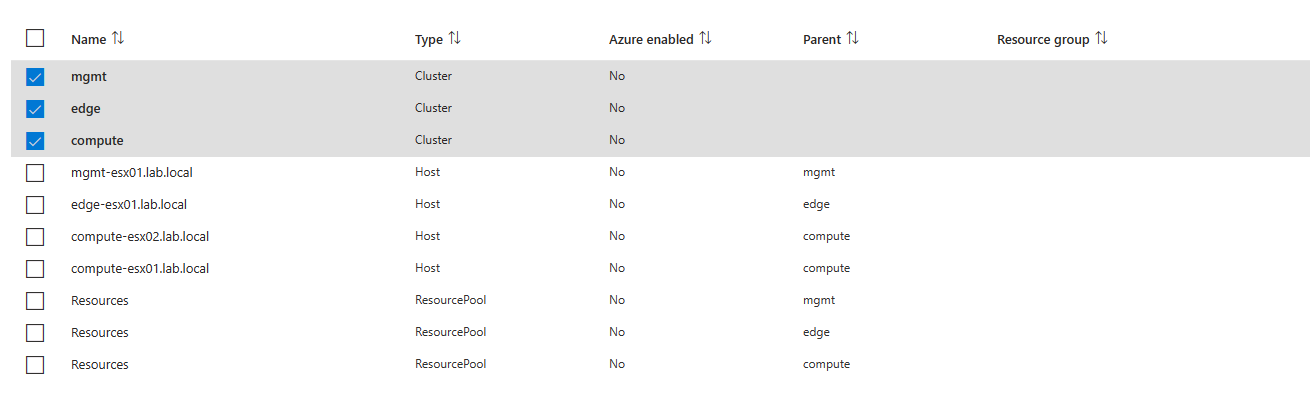
So following the steps above, we will choose the resources we wanted to enabled.
Then I assigned them the subscriptions and resource group these resource will be assigned to in Azure. For my demo I put everything in the same resource group.
To be honest and transparent, the first time I clicked enabled I got this error. After all this is a blog about my experiences so I need to add my goofs as well.

The error looked to say that there was resources defined multiple times in the template. When I went back to the screen that showed my resources, I did notice that only the first three resources needed to be selected since everything under them would be a child object. If I just wanted resource pools or host, I would select them separately.
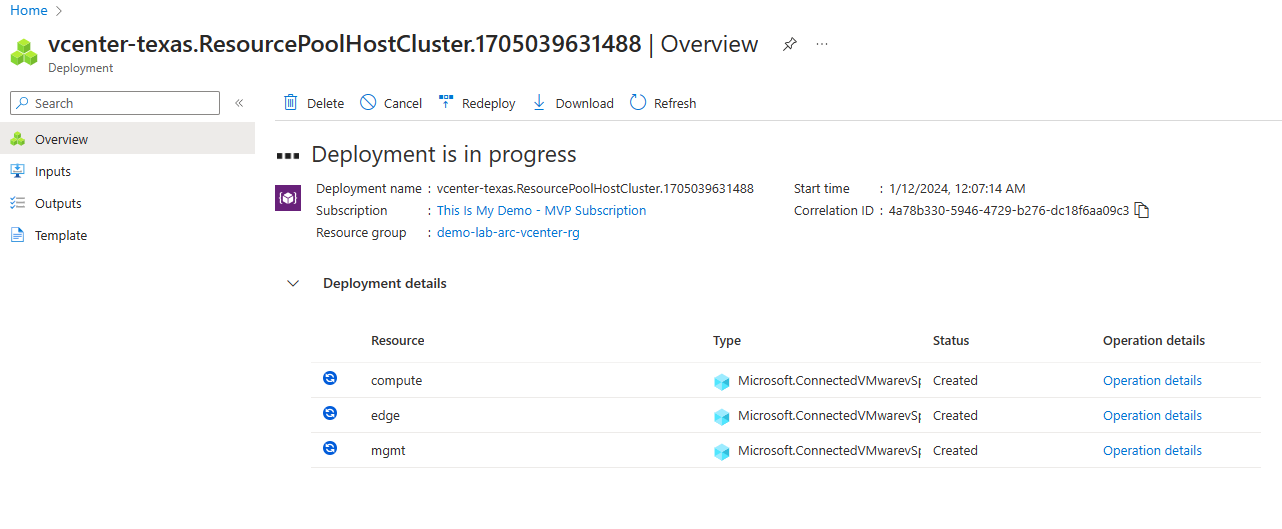
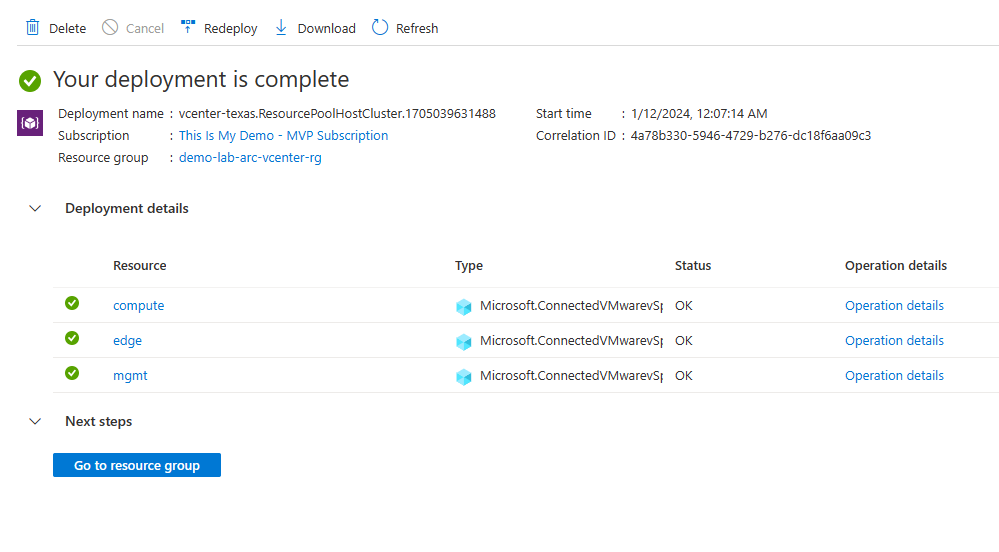
After clicking enabled the deployment kicked off.
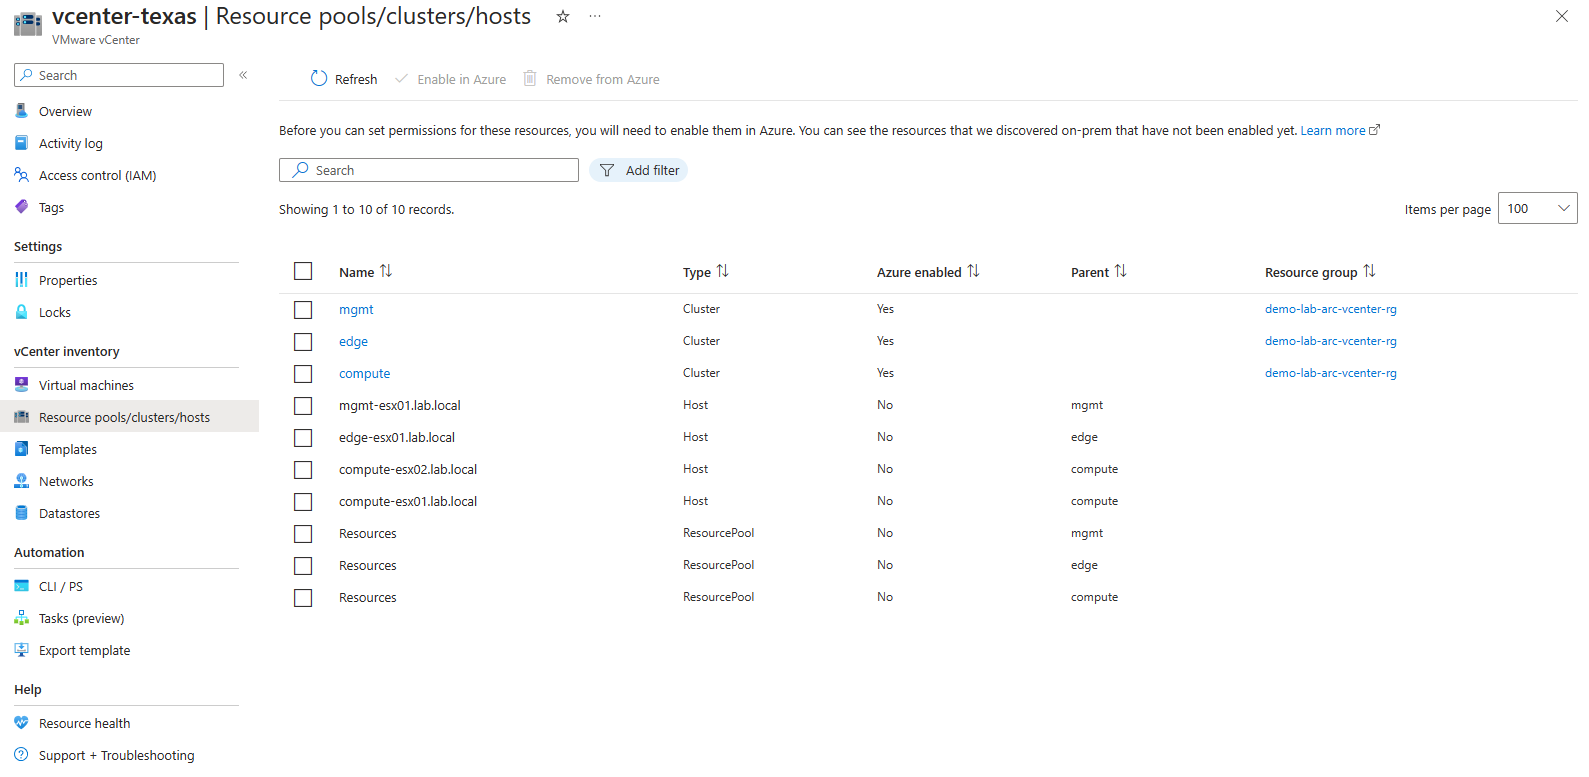
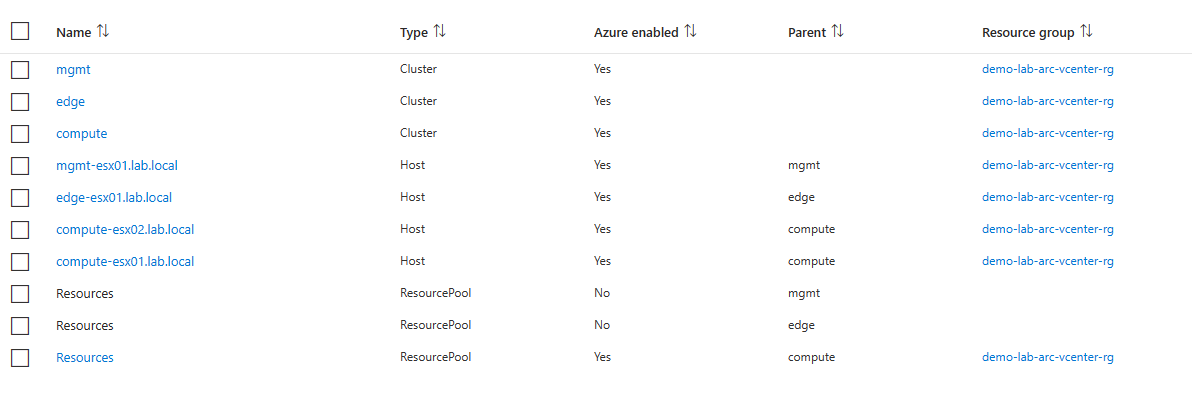
We go back into the Resource pools/clusters/host blade and now my Clusters show Azure enabled. I do have questions about why the other resources didn’t get Azure enabled. I will look into that because I would have thought they would be.
Out of my curiosity, I went back to that blade, and select just the host and hit enabled. It worked. Then went back again and selected just the resource pools and enabled them. However, with the resource pools I had to do each one, one at a time. But only one would enable. So I actually decided just to enable the compute resource pool at this time. I keep getting errors that that resource pool already exist. It worked that way. Not sure why it didn’t when all of them was selected.
I went back to Templates, Networks, and Datastores and enabled all those resources as well. I really don’t think I needed to enable all my networks but I did. I would assume all I needed to enable were the networks that my workloads would run on. The same with the templates, enabling only what template we will use for deployment but I enabled all of them. Datastores as well, I did all of them, but in reality, I would only need the datastores that attached to my compute resources and not my mgmt resources.
Existing Virtual Machines
Enabling existing machines is the same process as above except there is a few more question that will be asked before we can hit enable.
Just like before,
- Open up the vCenter blade on Azure Arc Center and open our vCenter.
- We will then click onn the VM inventory resource blade and then select any VM we want to enable.
- We will select our subscription and resource group.
- Now, this step is optional but we can install the guest agent now or later. If we do it now we will need the admin user and password for that machine.
- Then finally we will click Enable.
So I followed those steps:
The one thing I do want to call out. If you don’t enable machines for guest management you will not be able to do the following on those VM’s:
- Start, stop, and restart a VM
- Control access and add Azure tags
- Add, remove, and update network interfaces
- Add, remove, and update disks and update VM size (CPU cores, memory)
- Enable guest management
- Install extensions (enabling guest management is required). All the extensions that are available with Arc-enabled Servers are supported.
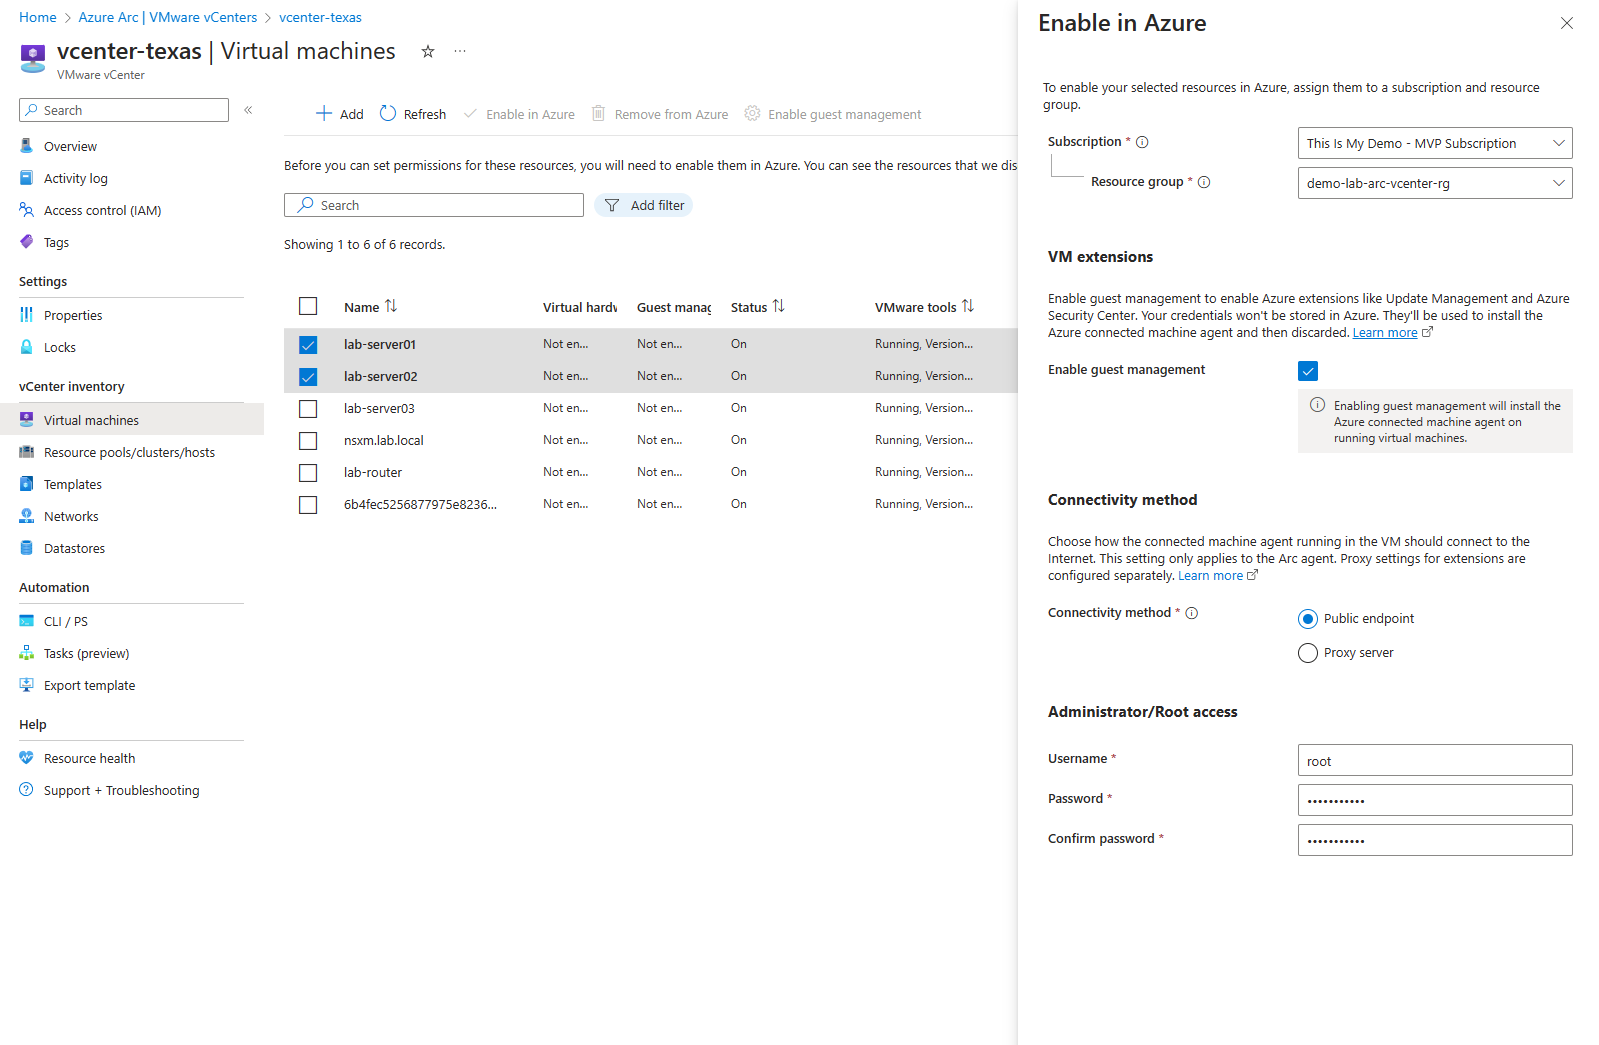
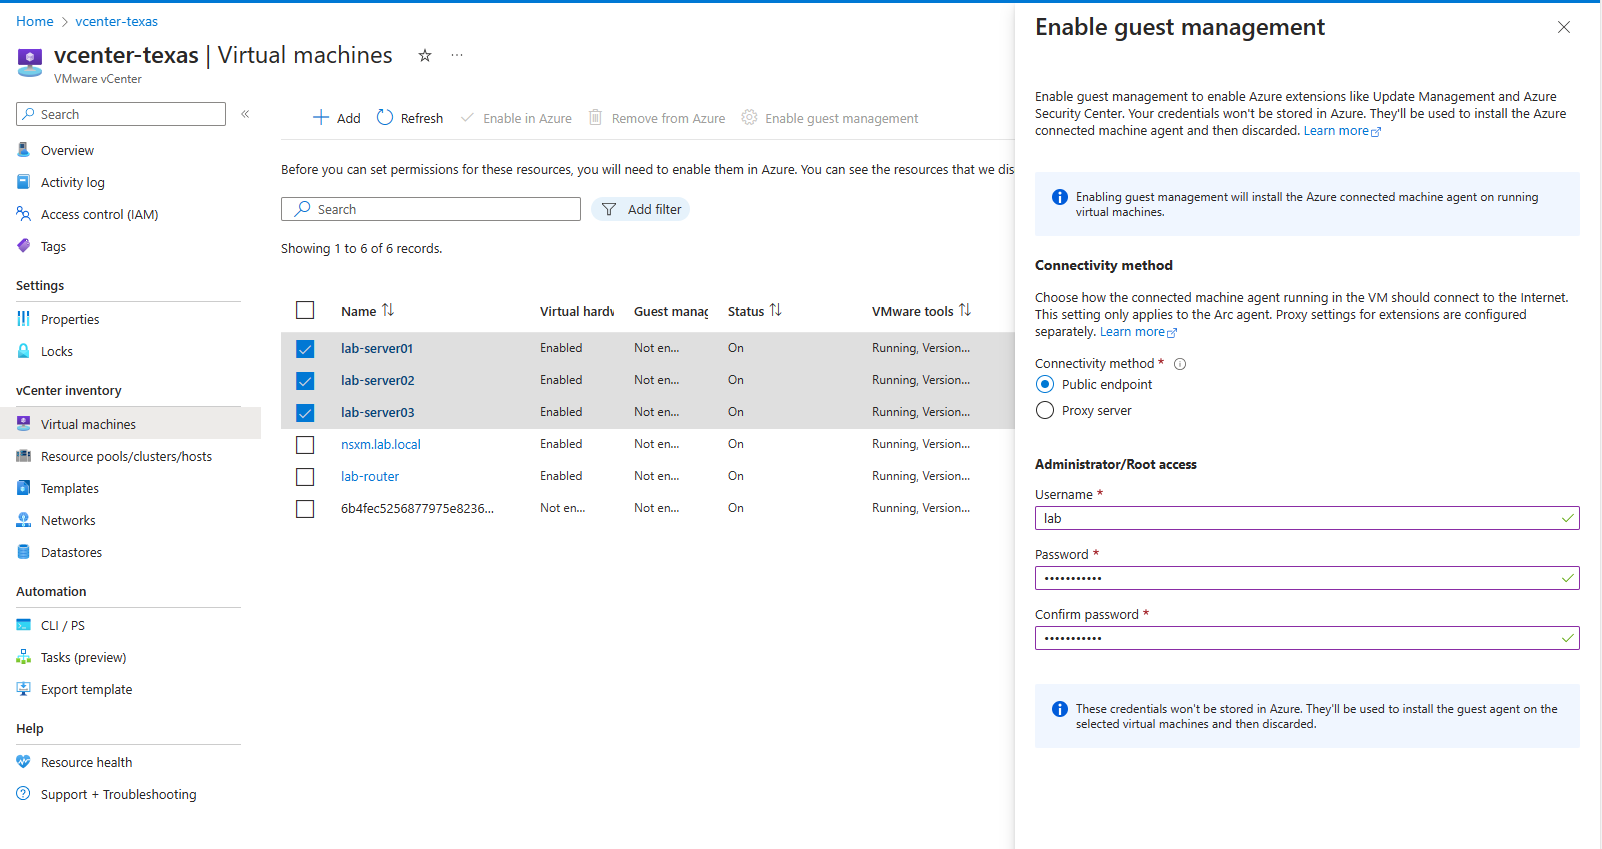
In my environment I only have a few deployed VM’s. I will enable 2 of them now and then later, enable guest management once these machines have been enabled for Azure.
Just like before, I selected the resources I want to enable, click enable in Azure. I will then assign the subscription and resource group. Here I will click the check box to enable guest management. Then I will assign it a connectivity method, as you can see only Public endpoint and Proxy is available. I need to check if Private Endpoint will be available. I will enter the user name and password then click enable.
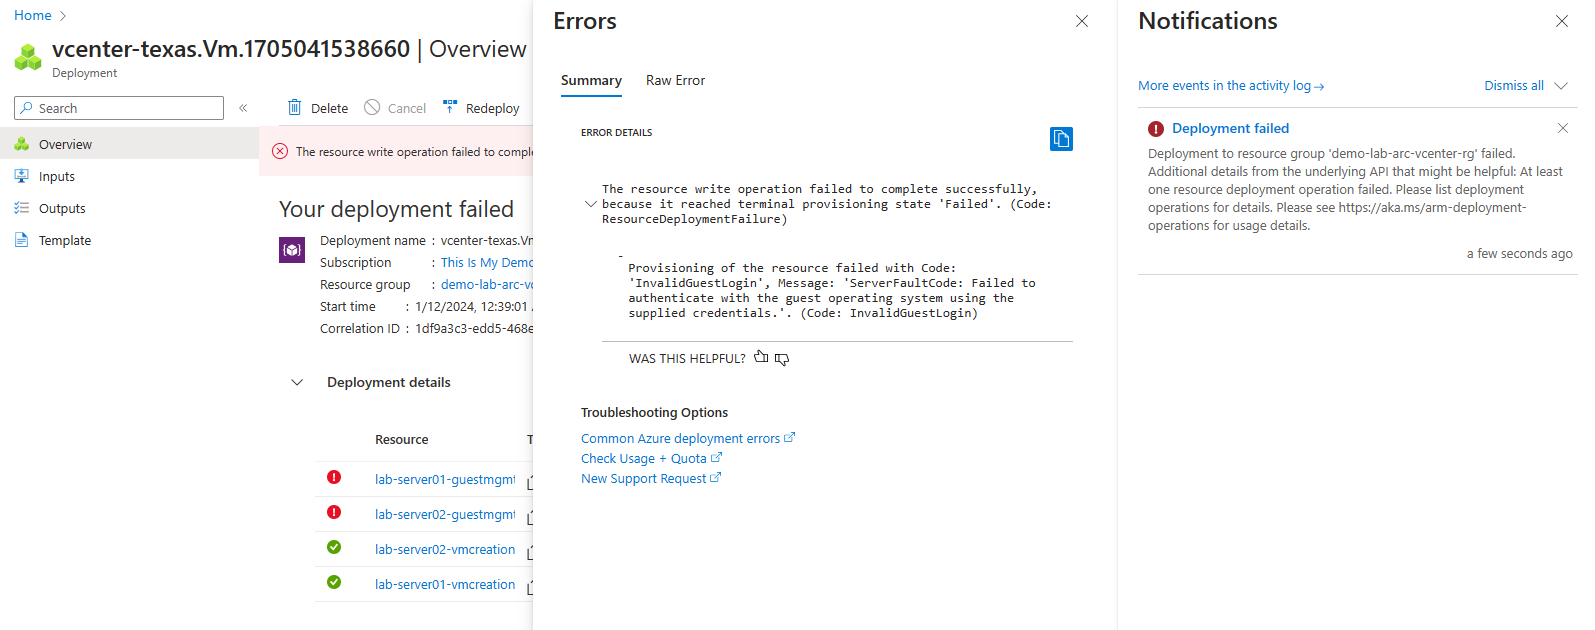
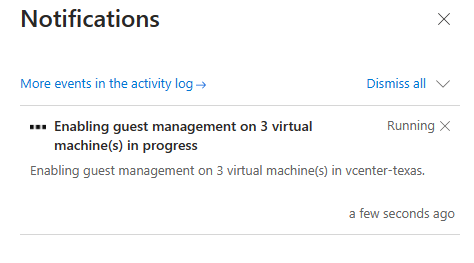
So all my machines are now enabled for Azure however, the 2 that I told to enable guest management failed to enable guest management. From the errors, I can see that I must have fat fingered the password or the user.
So all are enabled as shown below. Not to go in and enable guest management here soon.
We can do this just as easy as we did when we tried to do it after enabling these resources for Azure. The following Microsoft Learn documentation, Manage VMware VMs in Azure through Arc-enabled VMware vSphere, also will show us how.
The steps are pretty much the same as above except instead of clicking Enable in Azure, I will click Enable guest management. Then enter in the user and password.
Now we wait…
And again I got a failure message.These are Linux boxes by the way. I need to do something special on the VM’s before I enable them for guest management. The information is noted on the above shared MS Docs.
If you’re using a Linux VM, the account must not prompt for login on sudo commands. To override the prompt, from a terminal, run sudo visudo and add
ALL=(ALL) NOPASSWD:ALL to the end of the file. Make sure to replace . If your VM template has these changes incorporated, you won’t need to do this for the VM created from that template.
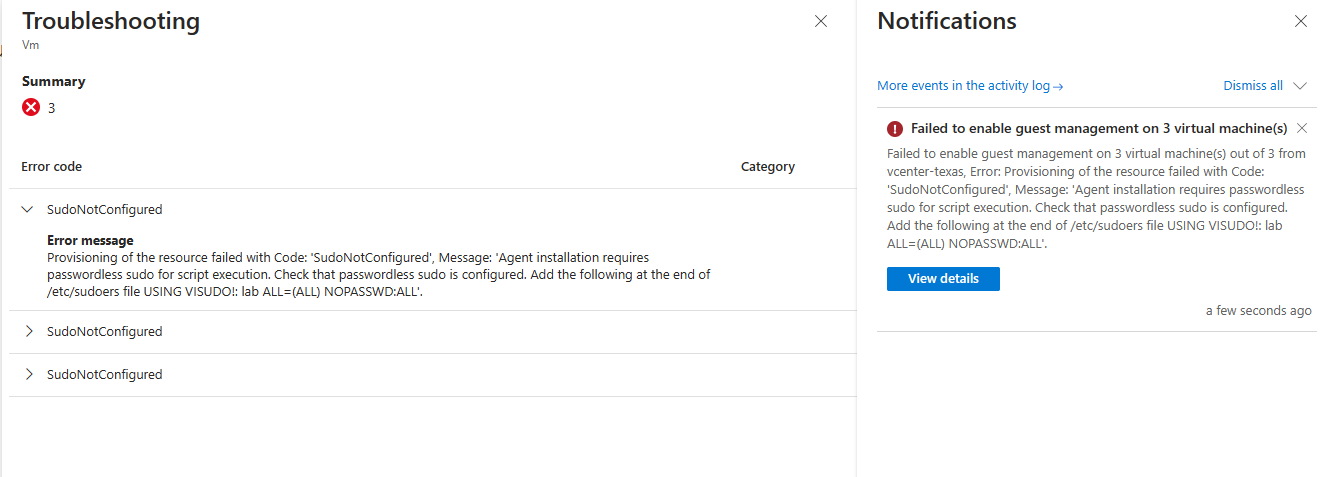
So I will do that since it is only three VM’s and then continue on.
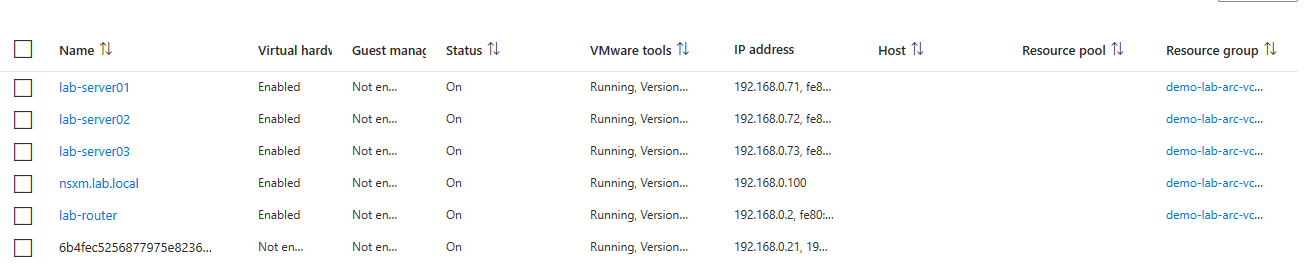
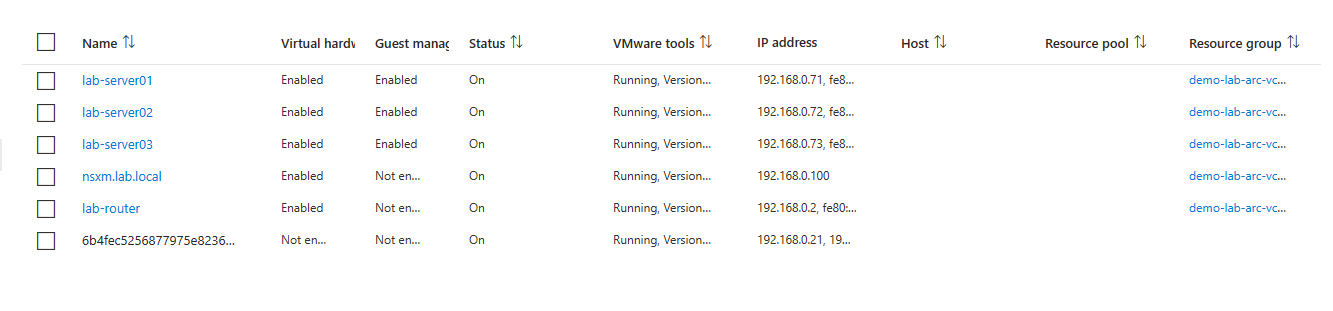
Now my VM’s are guest enabled and I can manage them from Azure.
From here, we can manage these VM’s as if they were just another Azure resource. We can enable things like VM Insights, assign Azure Policies, install Azure Extensions, also include them in Azure Update Manager. We can also include them in Defender for CLoud and Microsoft Sentinel and other Azure Services.
Next Steps
So what else can we do??? We can configure RBAC to provide self services in order for others to manage their own VM’s and also deploy VM’s from the portal. We can deploy VM’s to our vCenter from the Portal using built in templates that we enabled for Azure.
There is also other Azure services that we can look at as well now. How about AKS running on vCenter? That will open a lot of other Azure Services that we could run all using Arc services like Azure Arc-Enabled Kubernetes, Azure-Arc enabled data services, and more.
Final Thoughts
My final thoughts are this. This is a great solution to provide management of your vCenter environment from the perspective of managing your VM’s through the Azure Portal. The biggest difference between just using Azure Arc-enabled servers vs Azure Arc-enabled VMware for VSphere is with the later we can also deploy VM’s to our vCenter from the portal as if it was another resources in Azure. We can also do a little more by starting and stopping the VM’s, adding network interfaces, updating disk, etc. That is a little more than what we could do just using Azure Arc-enabled servers.
I know I will be blogging more about this soon. Not sure what about but I am thinking more in the lines of AKS on VMware and managing that using Azure Arc-enabled Kubernetes. I think I may dig deeper into the Azure Update Manager along with configuring Defender for Cloud and Sentinel to secure these workloads running on our on prem vCenters. Digging into regulatory compliance and more that can all be done from the Azure portal.
