Setting Up Entra Permissions Management
Get your hands dirty with Entra Permissions Management
This post will be a walk through on how to quickly setup Entra Permissions Management for the first time. One of the best ways to try our Entra Permissions Management is to start a trial and just jump in. The Identity product group has a nice little user guide out there on Microsoft Learn Trial user guide: Microsoft Entra Permissions Management. There are also other ways to get your hands dirty with Entra, you can always reach out to my company and have us do an Entra PM multi-cloud risk assessment analyzes Azure and multi-cloud permissions risk.
For now, I will just walk you through how to start your Entra Permissions Management journey.
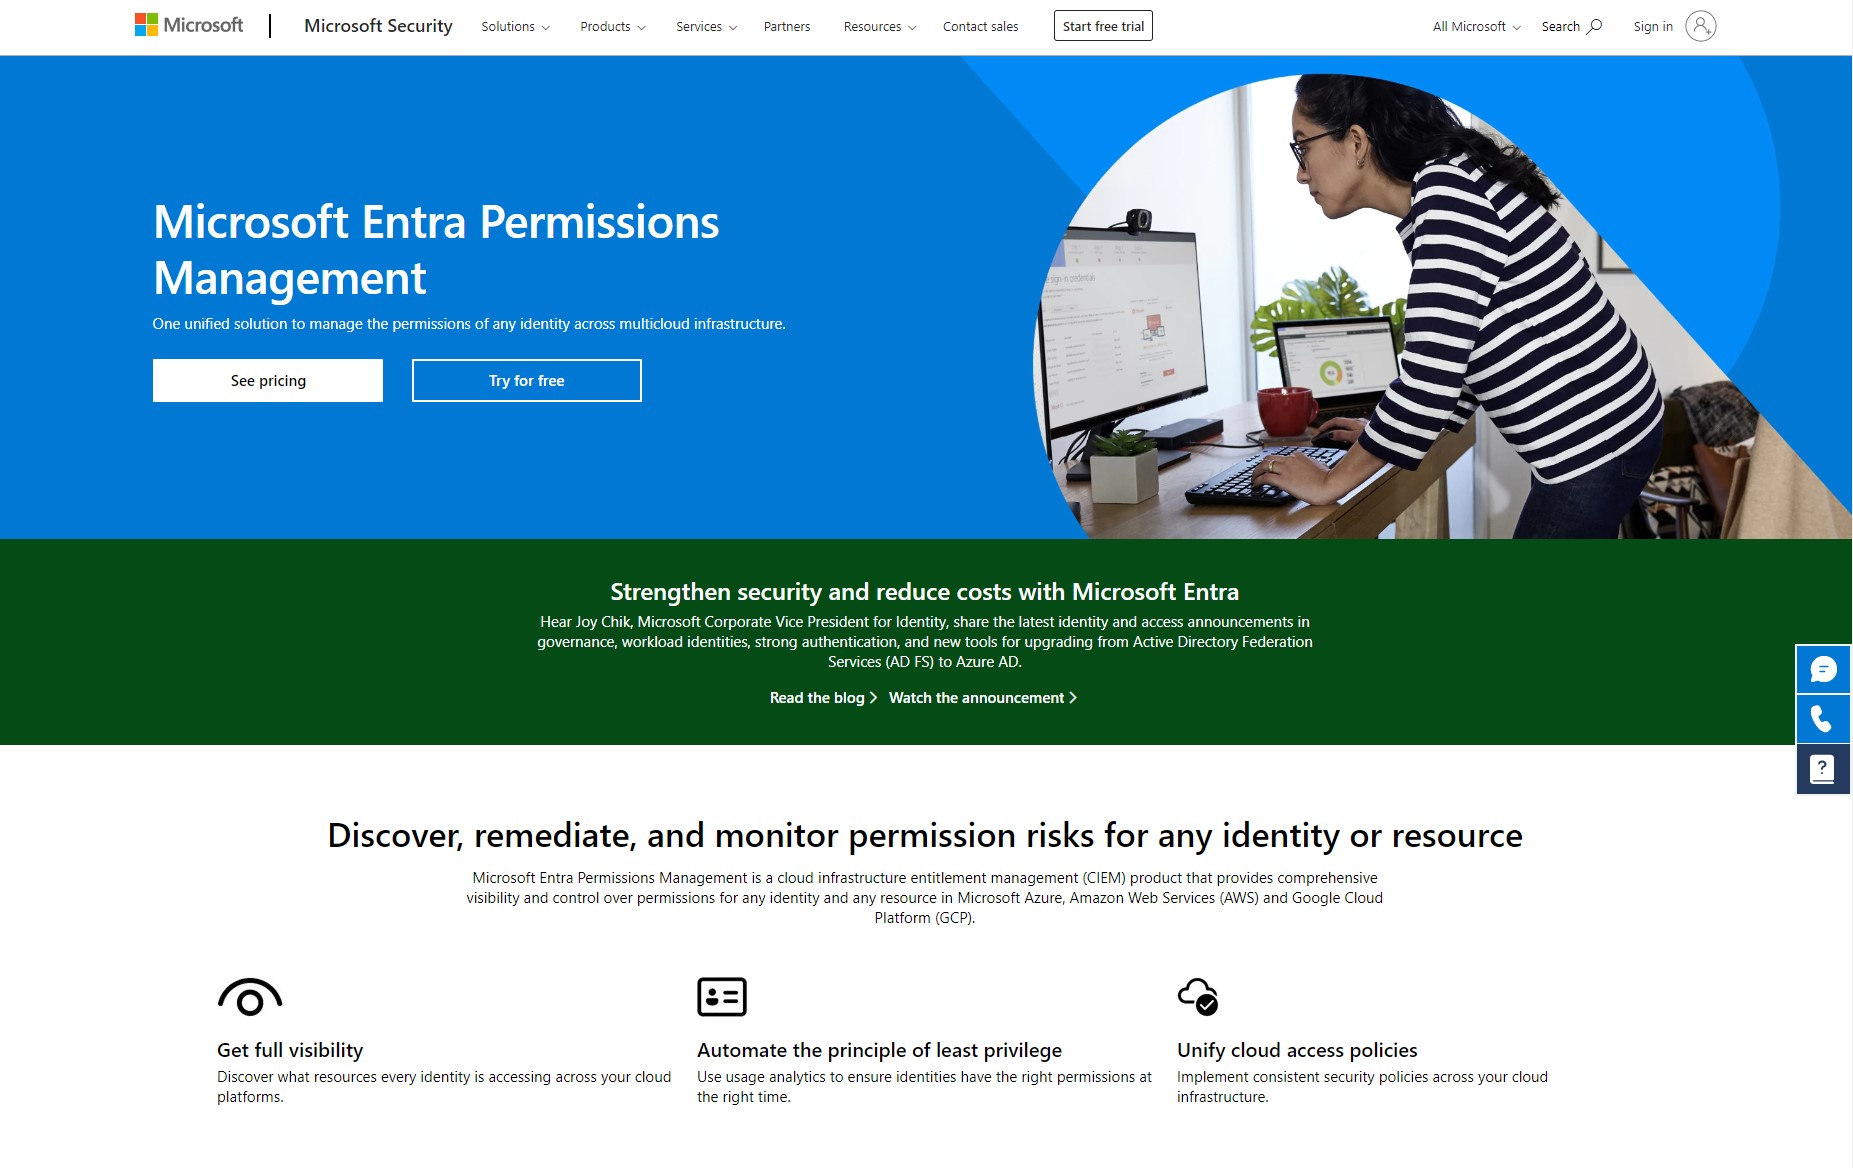
What is Microsoft Entra Permissions Management?
Microsoft Entra Permissions Management is a cloud infrastructure entitlement management (CIEM) product that provides comprehensive visibility and control over permissions for any identity and any resource in Microsoft Azure, Amazon Web Services (AWS) and Google Cloud Platform (GCP). Microsoft Entra Permissions Management is one solution among many multiclouid identitiy and access products
The entire product family includes:
- Azure Active Directory
- Microsoft Entra Permissions Management
- Microsoft Entra Verified ID
- Microsoft Entra Workload Identities
- Microsoft Entra Identity Governance
Setting Up Permissions Management
Before we being there are a few things that are needed in order to setup a trail for Permissions Management.
- An Azure AD Tenant
- Be a Global Administrator or have access to a user that is a Global Administrator
- Have not already had a trail of Permissions Management enabled and expired.
Starting the 90-day trial
There are a few different ways to start the trial. I will talk about three of them.
- From the Entra Permissions Management Website
- From the M365 Admin Portal
- From Azure Active Directory Portal.
From THe Entra Permissoins Management Website
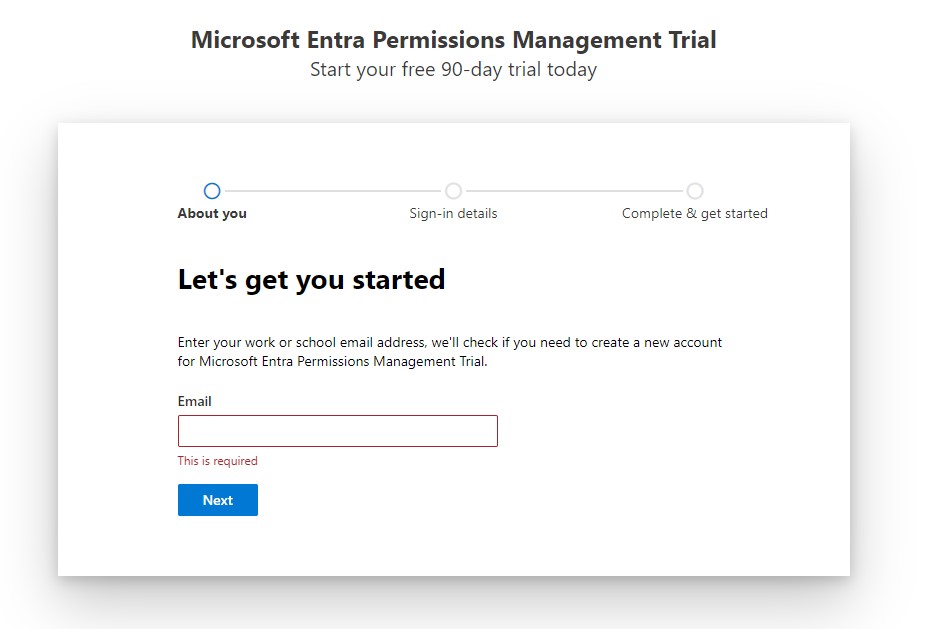
The first way is to go to the Entra Permissions Management web site and click on the Try For Free button.
It will then prompt you for to enter an email address. Enter your work account that belongs to the tenant that you will be using to try out Entra.
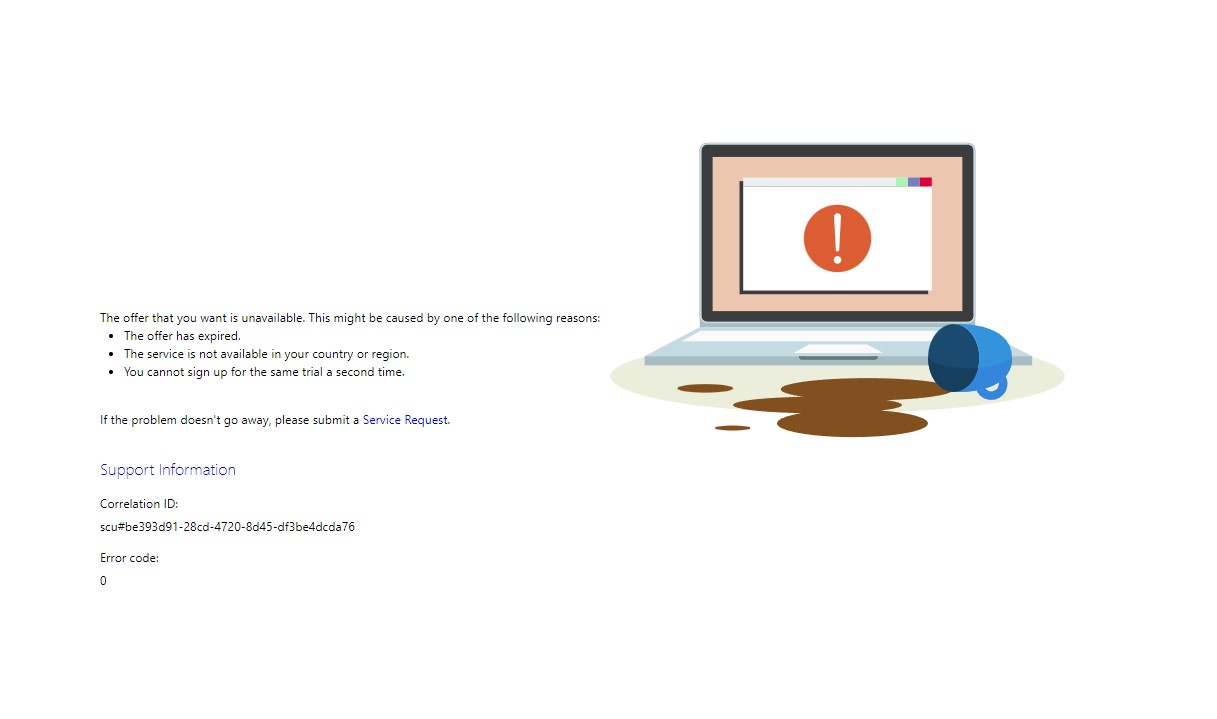
If you tenant already has had a trial, or a trial is currently going then you will see the next screen.
From the M365 Portal
You can also sign up through the M365 admin portal by going to Purchase Services.
Select Entra Permissions Management under Security and Identity
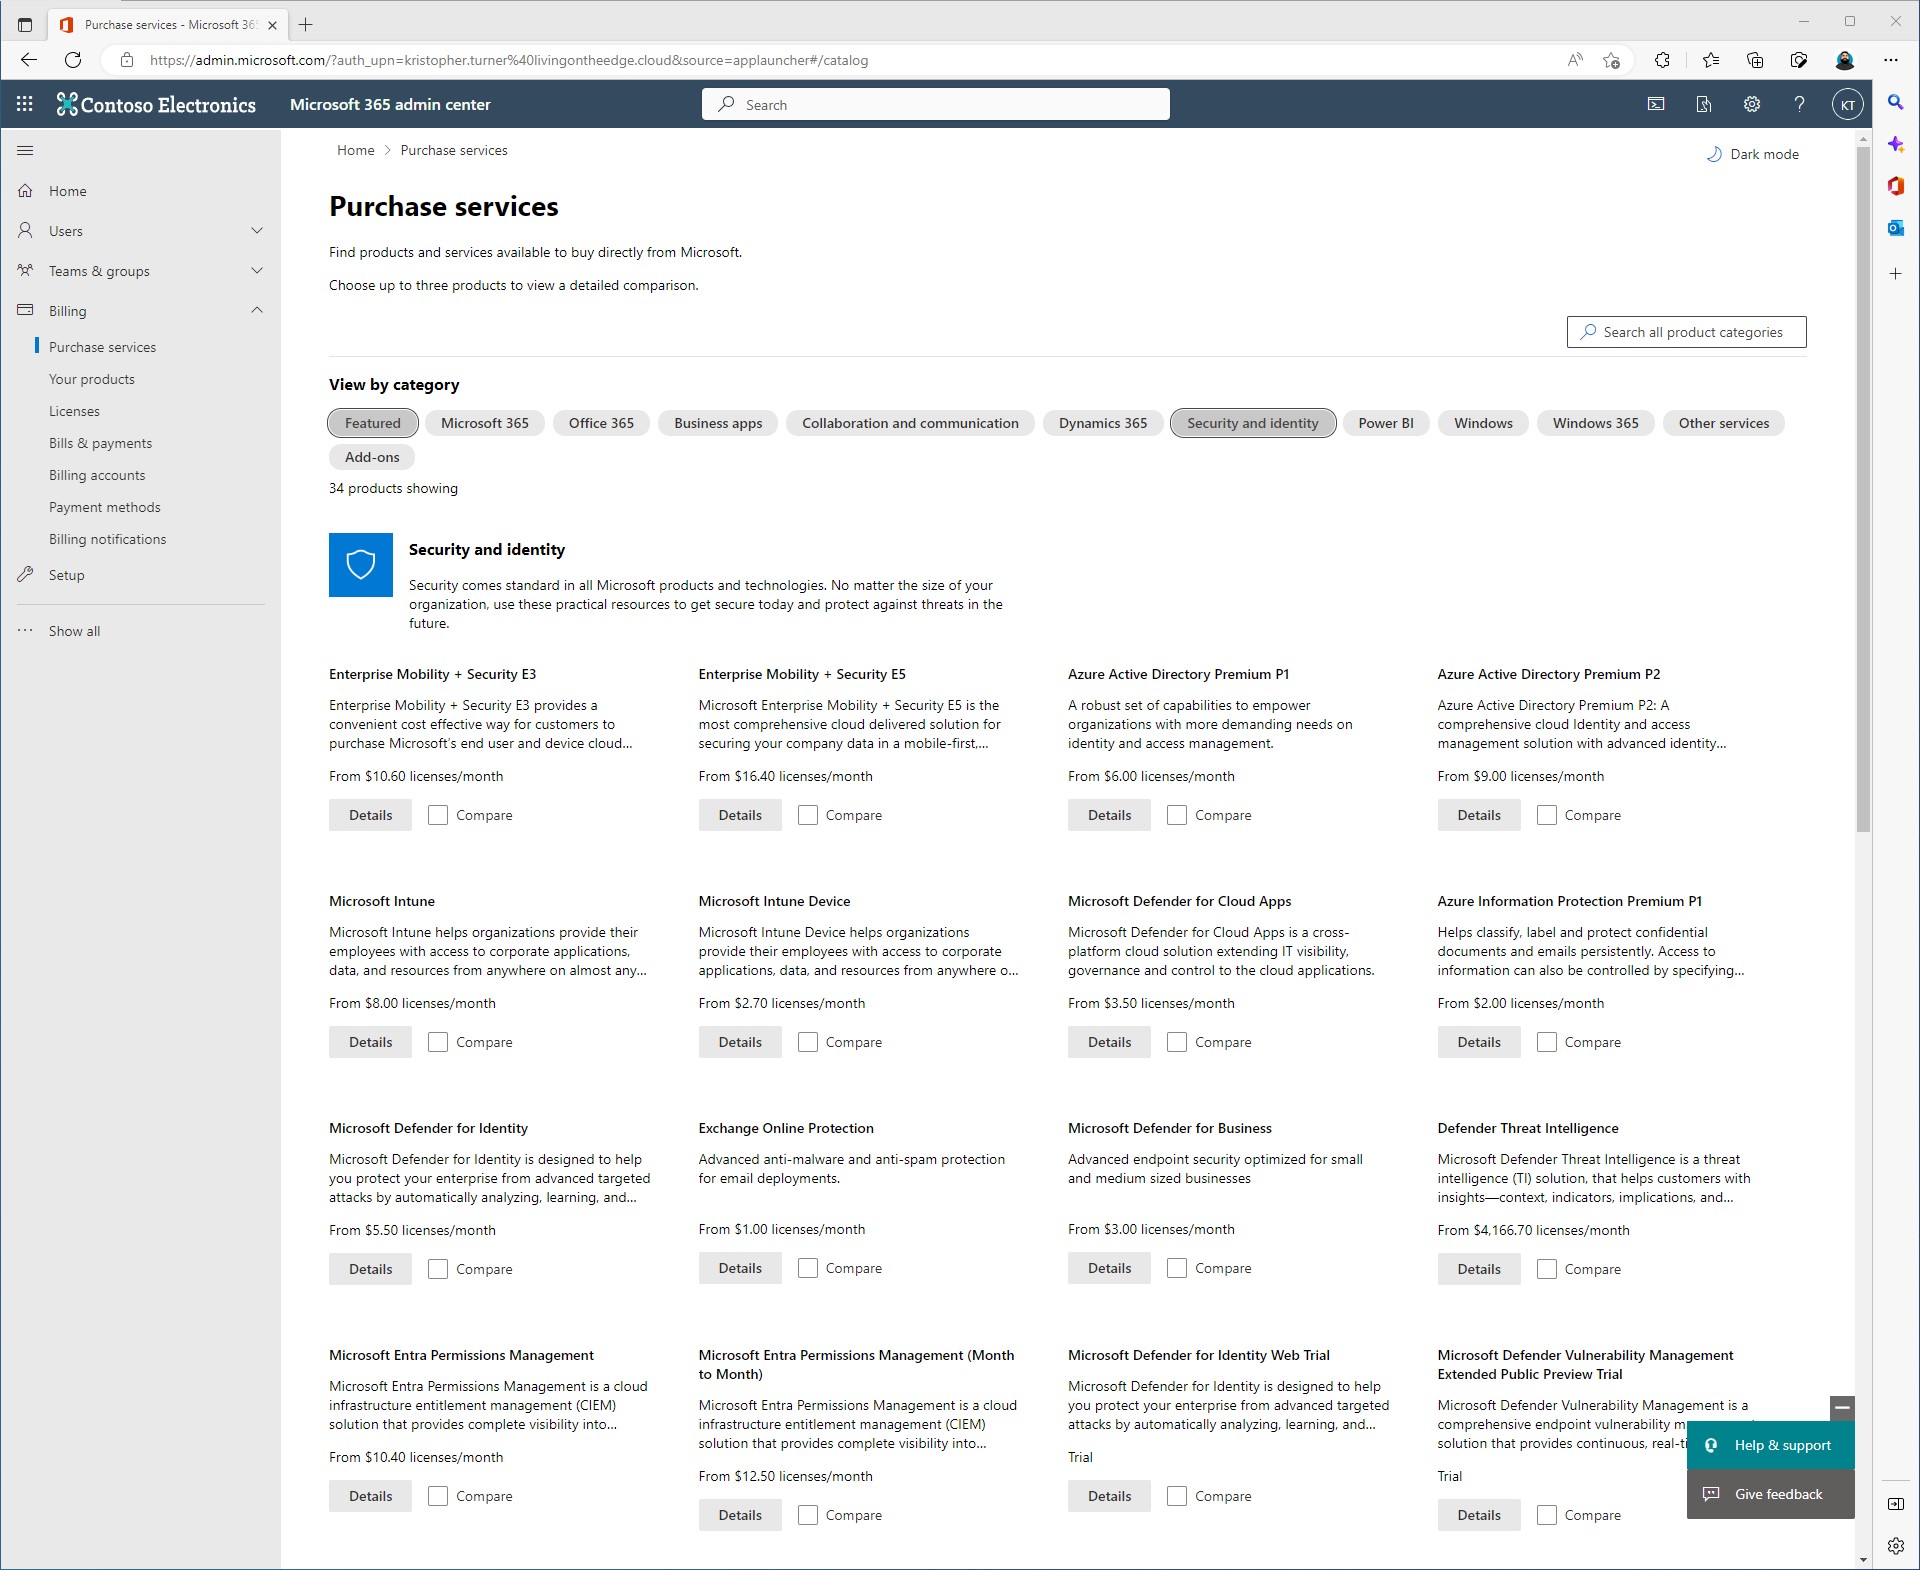
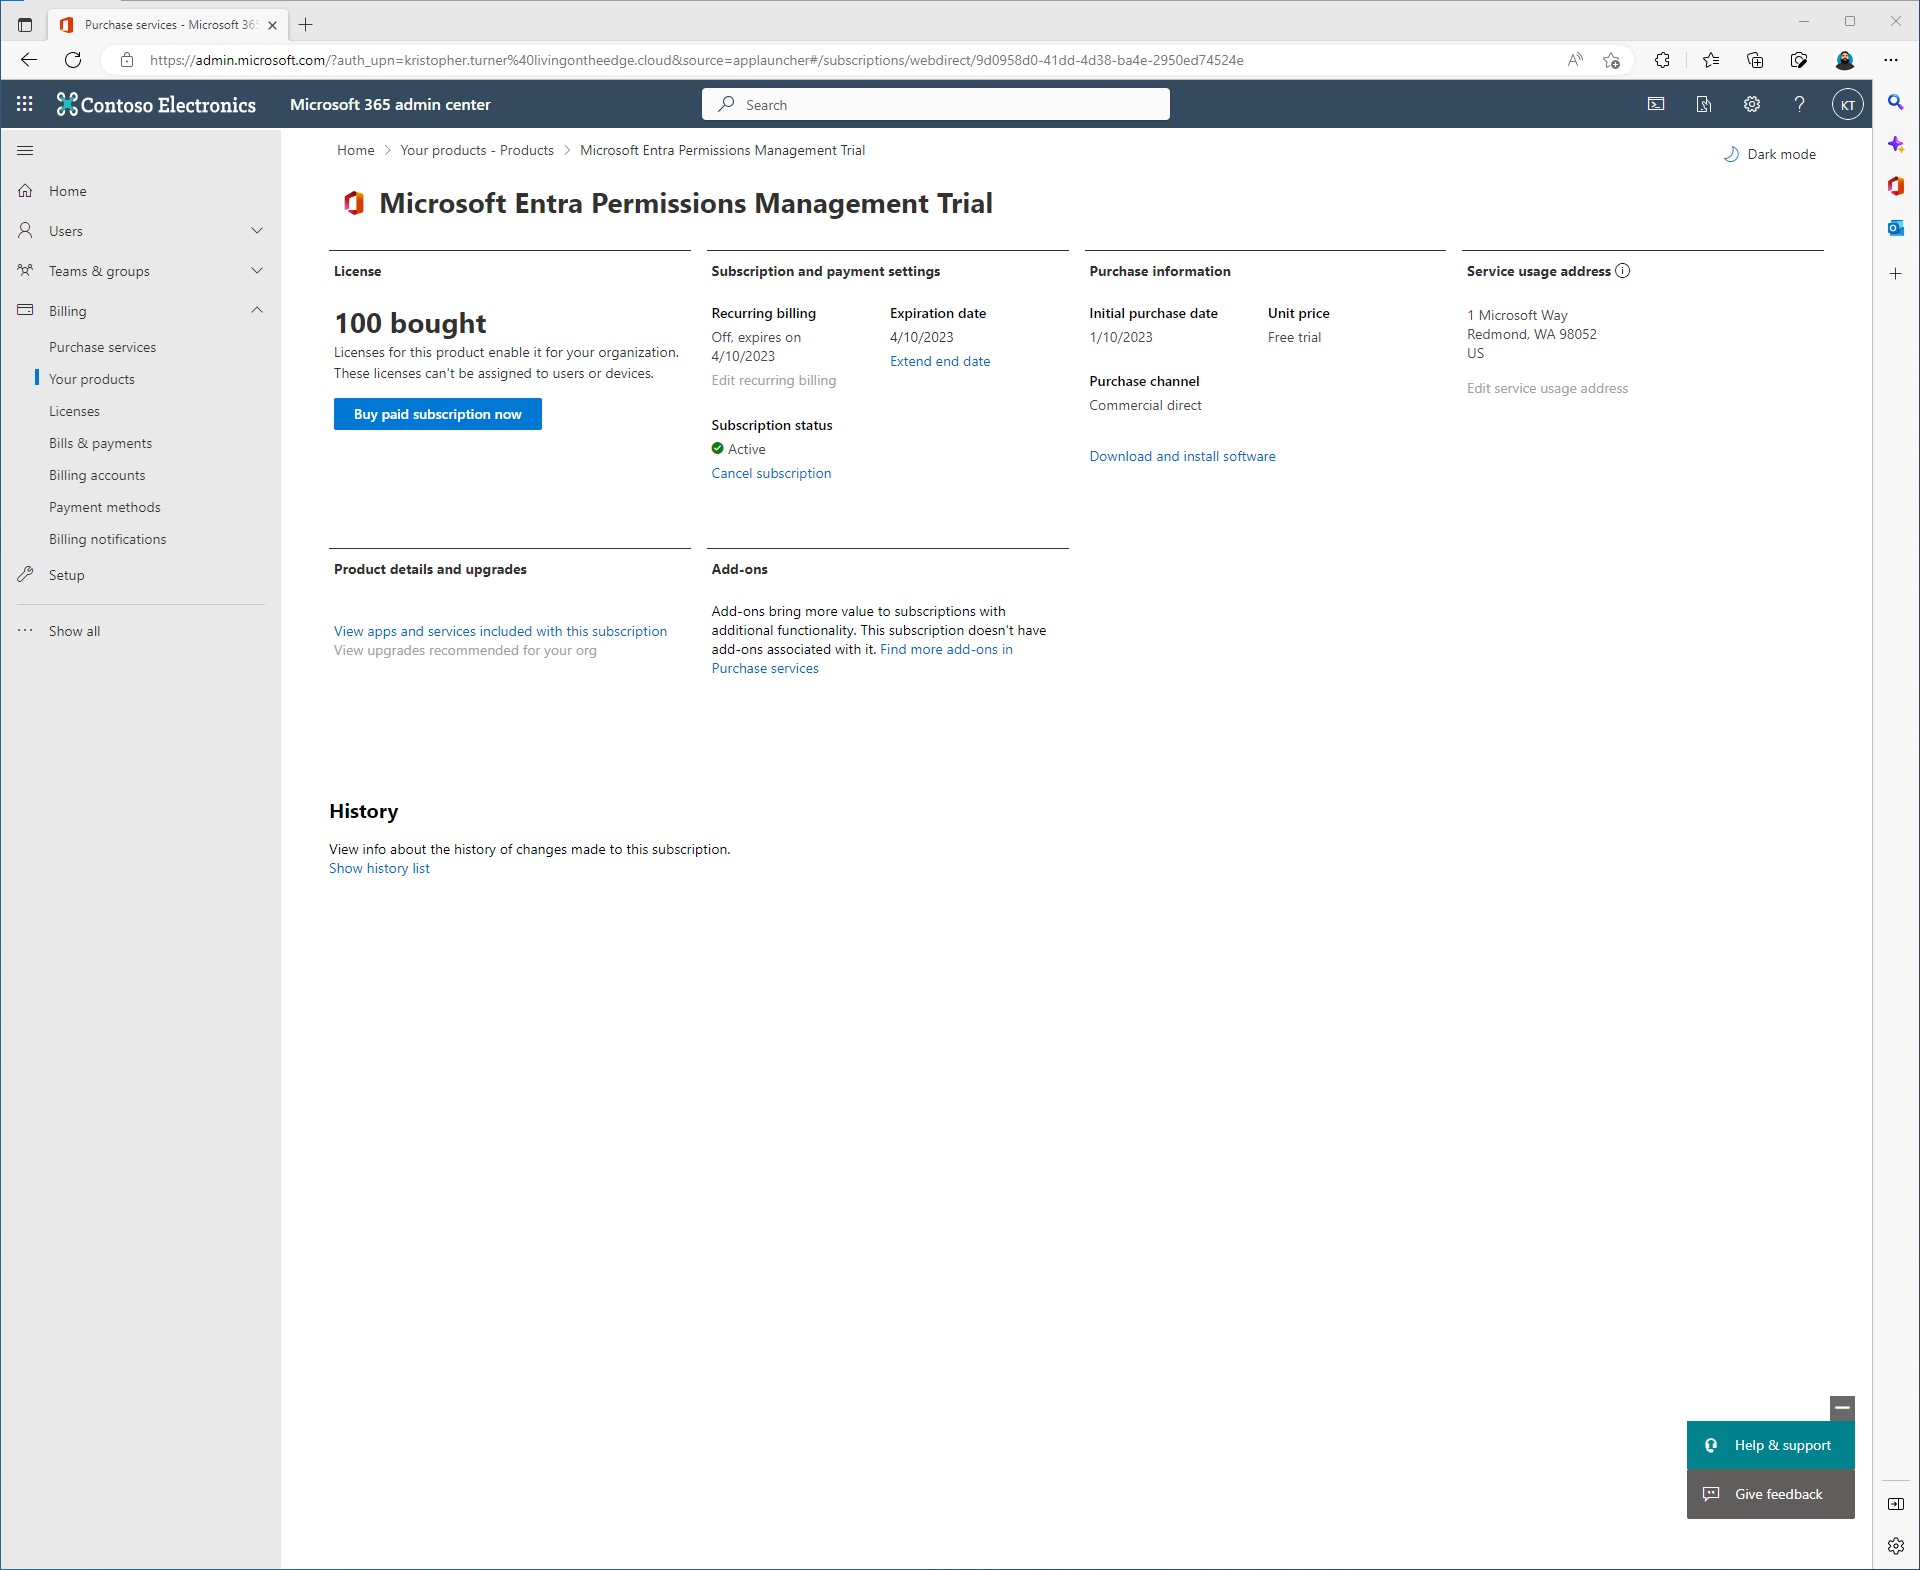
At this point you should have an option to start the trail. On my tenant, I already have the trail activated so all I can do is hit manage.
 5
5
Once the trail has been started you can come back here to manage it.
From Azure AD Portal
In the Azure AD portal, select Permissions Management, and then select the link to purchase a license or begin a trial.
- Go to Entra services and use your credentials to sign in to Azure Active Directory.
- If you aren’t already authenticated, sign in as a global administrator user.
- If needed, activate the global administrator role in your Azure AD tenant.
- In the Azure AD portal, select Permissions Management, and then select the link to purchase a license or begin a trial.
Configure Data Collection Settings
Once you have signed up for the trial. The first screen that launches is the Data Collectors dashboard.

We will be onboarding an Azure Subscription. Select Azure under the Data Collectors tab. There are three options that we can choose from.
- Automaticlly manage
- Enter Authorization Systems
- Select Authorization Systems
Option 1 allows subscriptions to be automaticlly detect and monitored. Option 2 we will have the ability to specify certain subscriptions to manage and monitor. Option 3 will allow us to specify the authorization system where we will later select subscriptions to monitor.
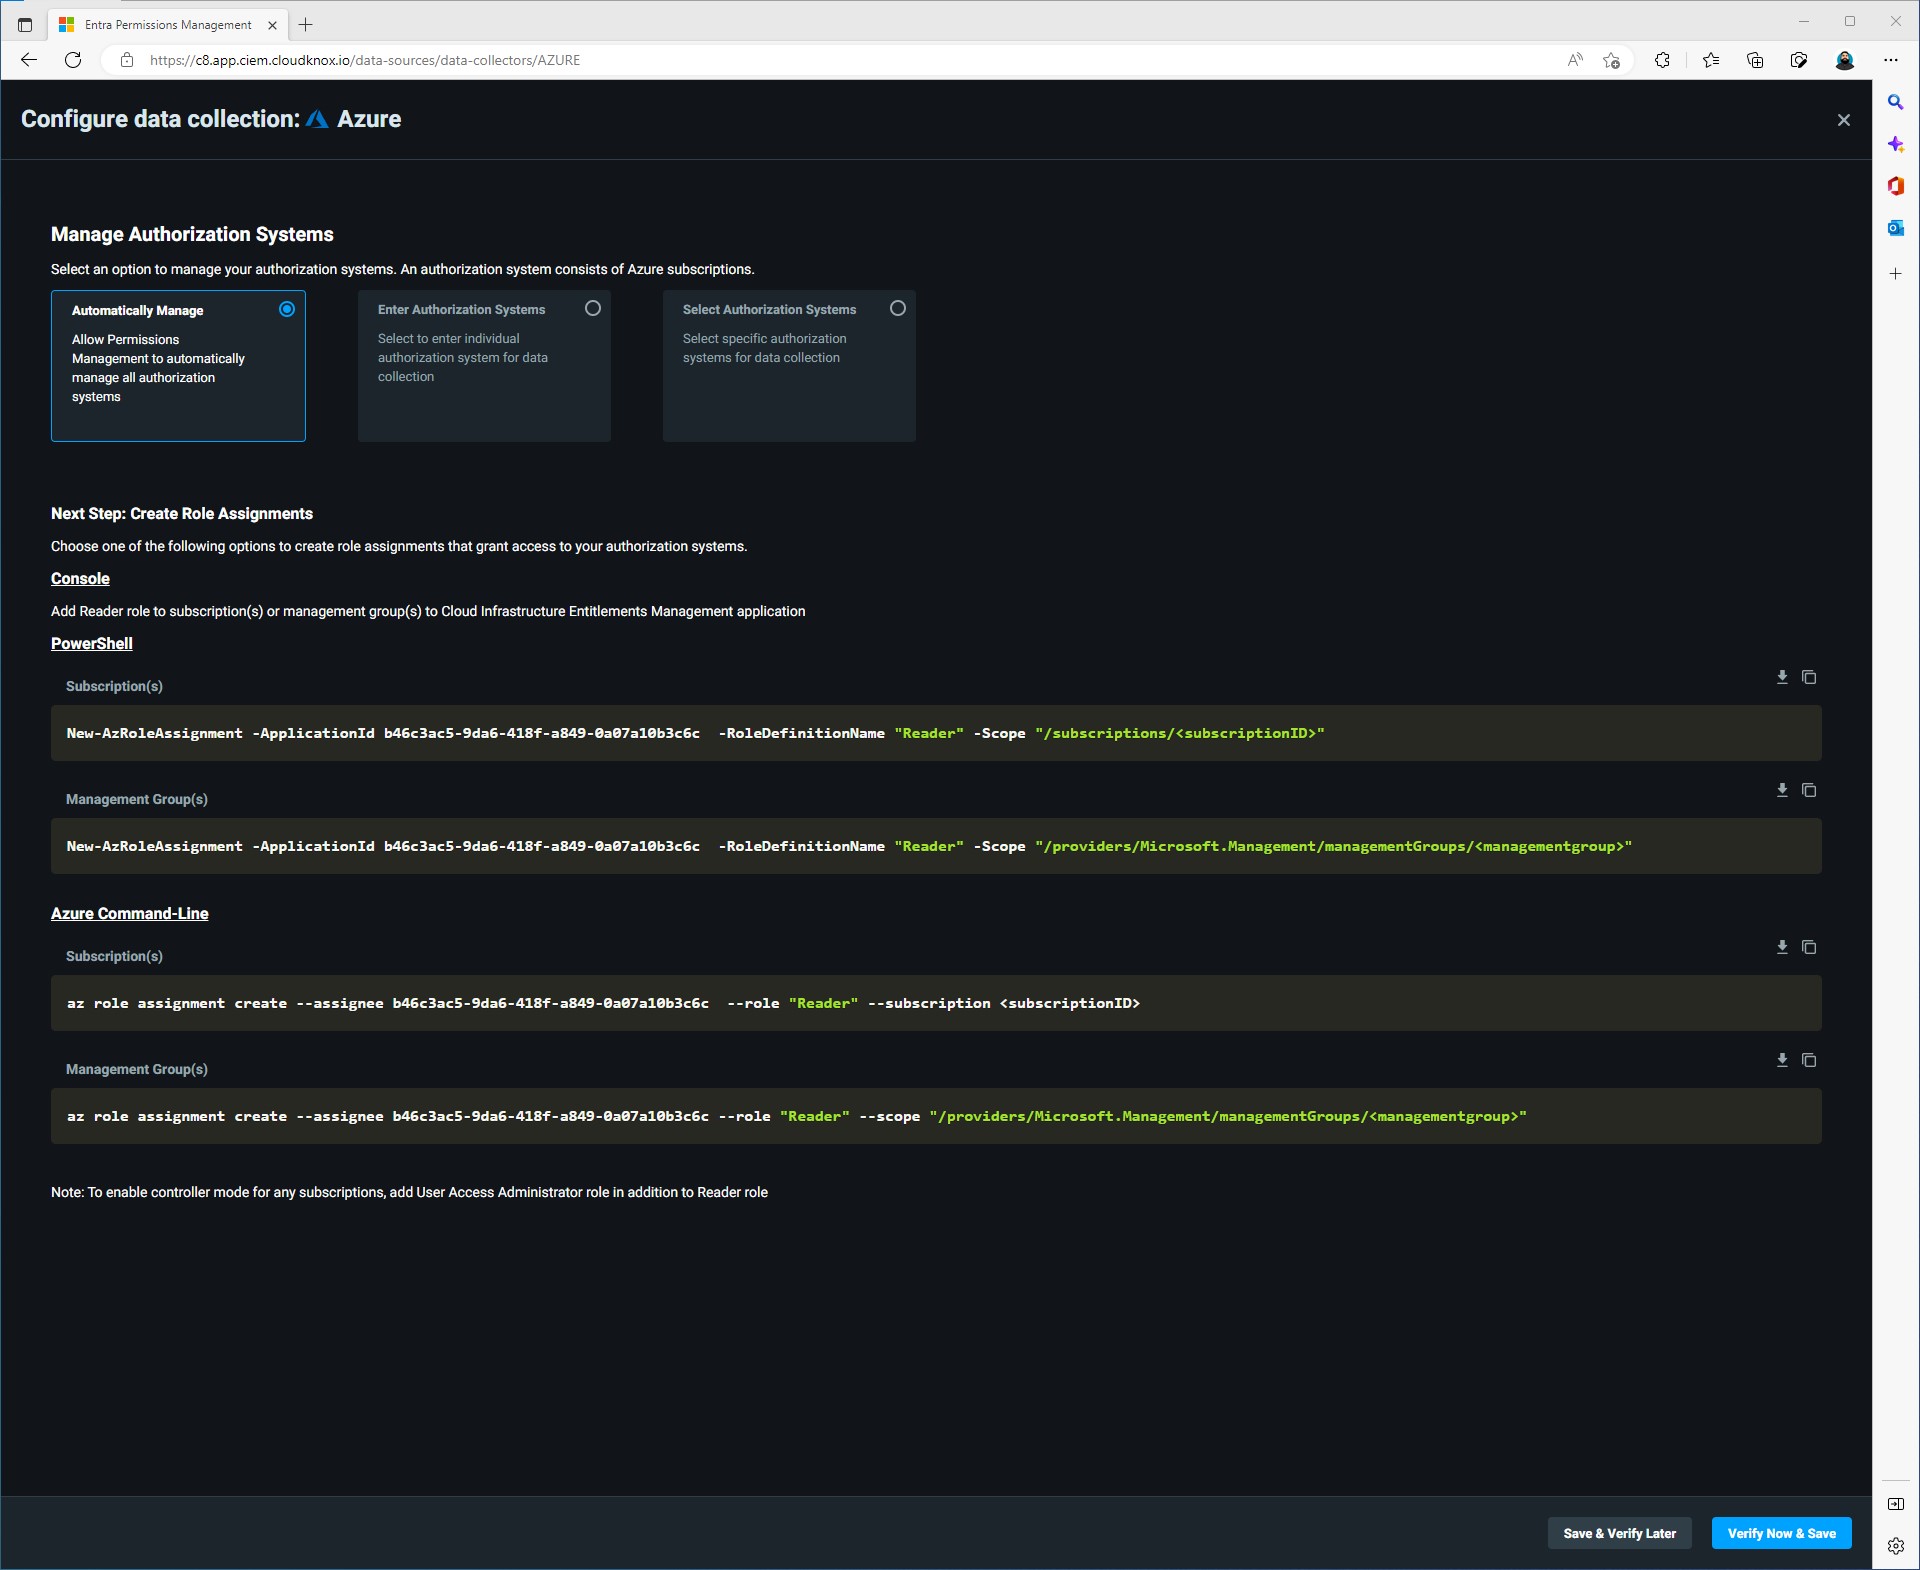
Since this is just collecting data at this point I will always go with Option 1.
First thing is to create the role assignments. This can be done three ways:
- Via Console
- Via PowerShell
- Via Azure Command Line
I am going to do this via PowerShell and target the Root Management Group. In order to target the root management group the user configuring this needs to have the correct roles assigned.
New-AzRoleAssignment -ApplicationId b46c3ac5-9da6-418f-a849-0a07a10b3c6c -RoleDefinitionName "Reader" -Scope "/providers/Microsoft.Management/managementGroups/<managementgroup>"
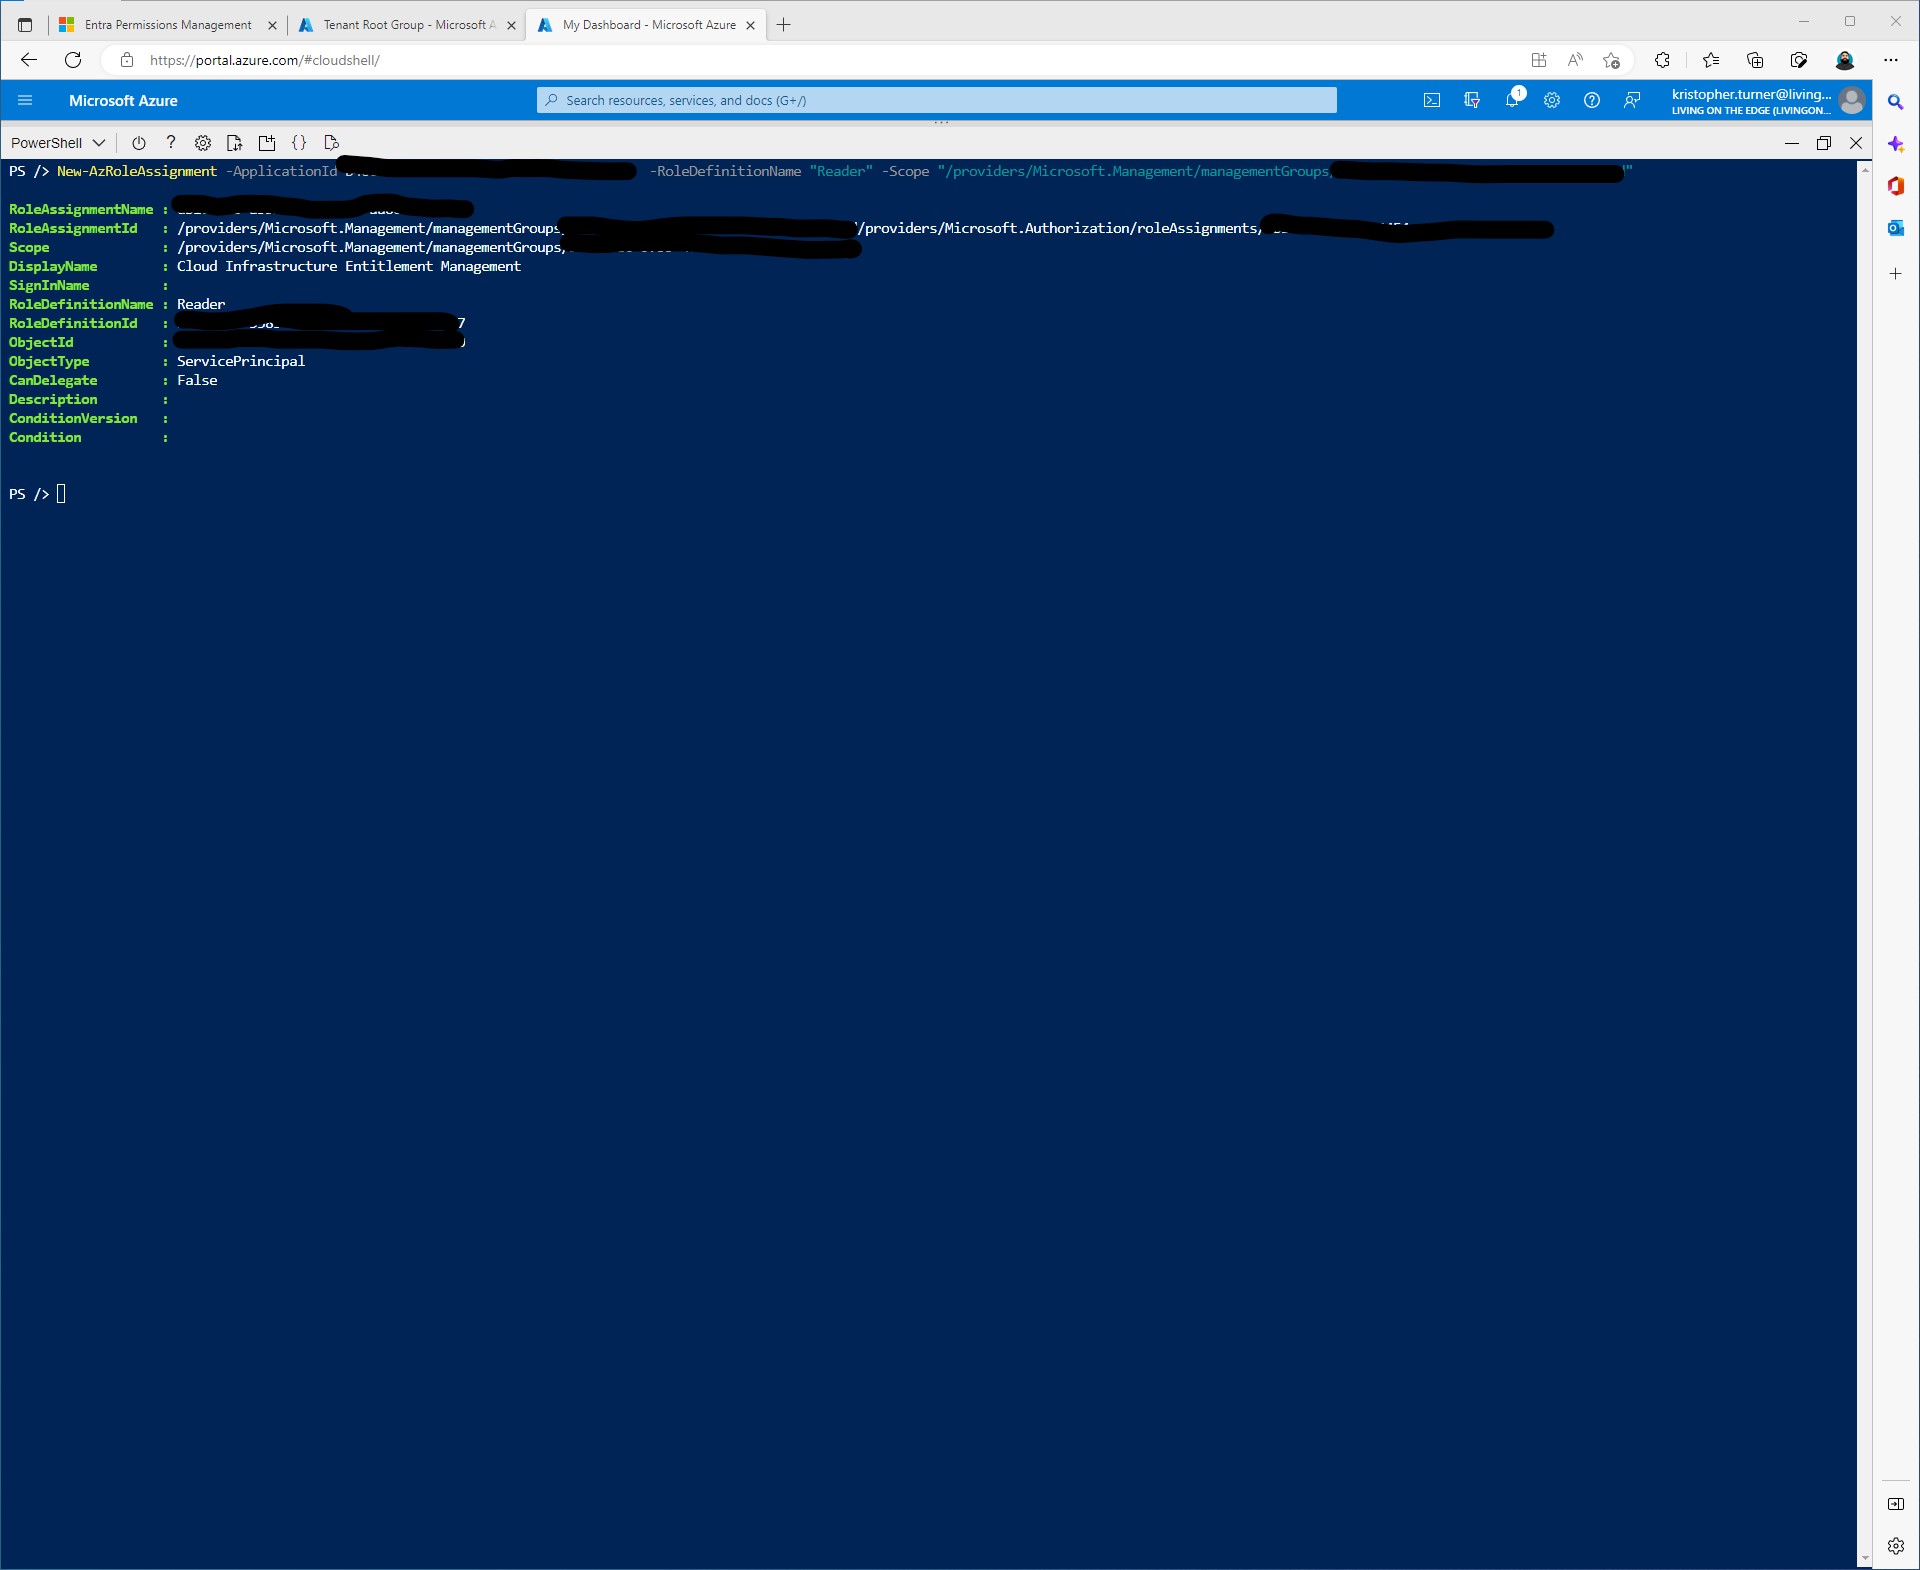
Once the role assignment has been grated access to the authorization system we can continue by click Verify Now & Save.
From the Dashboard you can now check the progress of the collector that was just created.
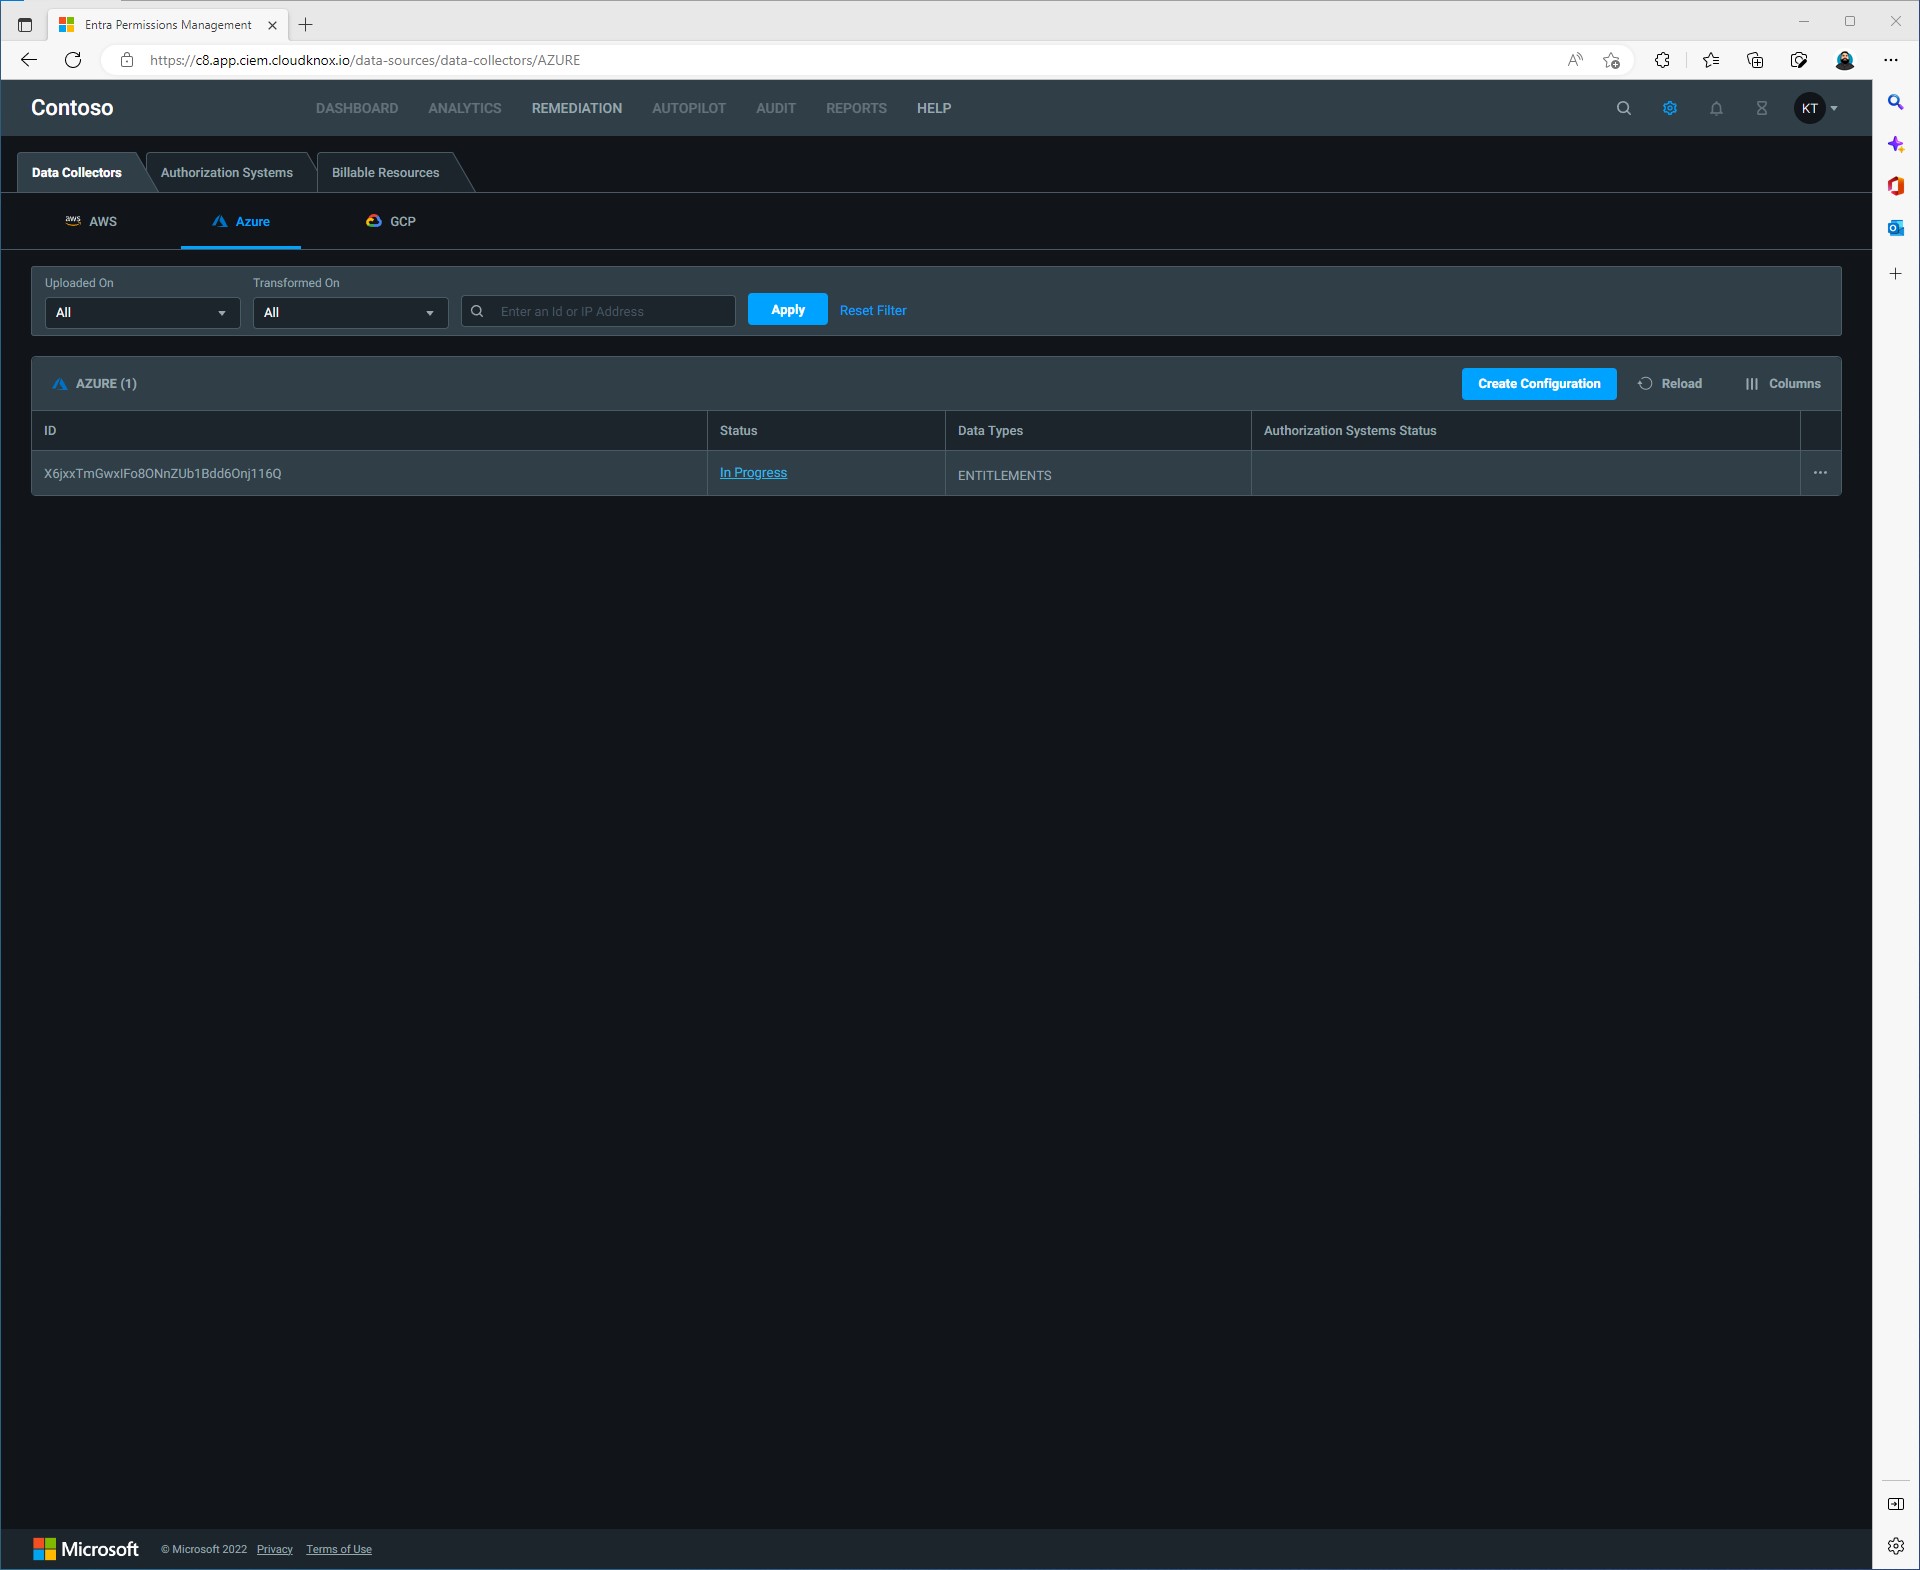
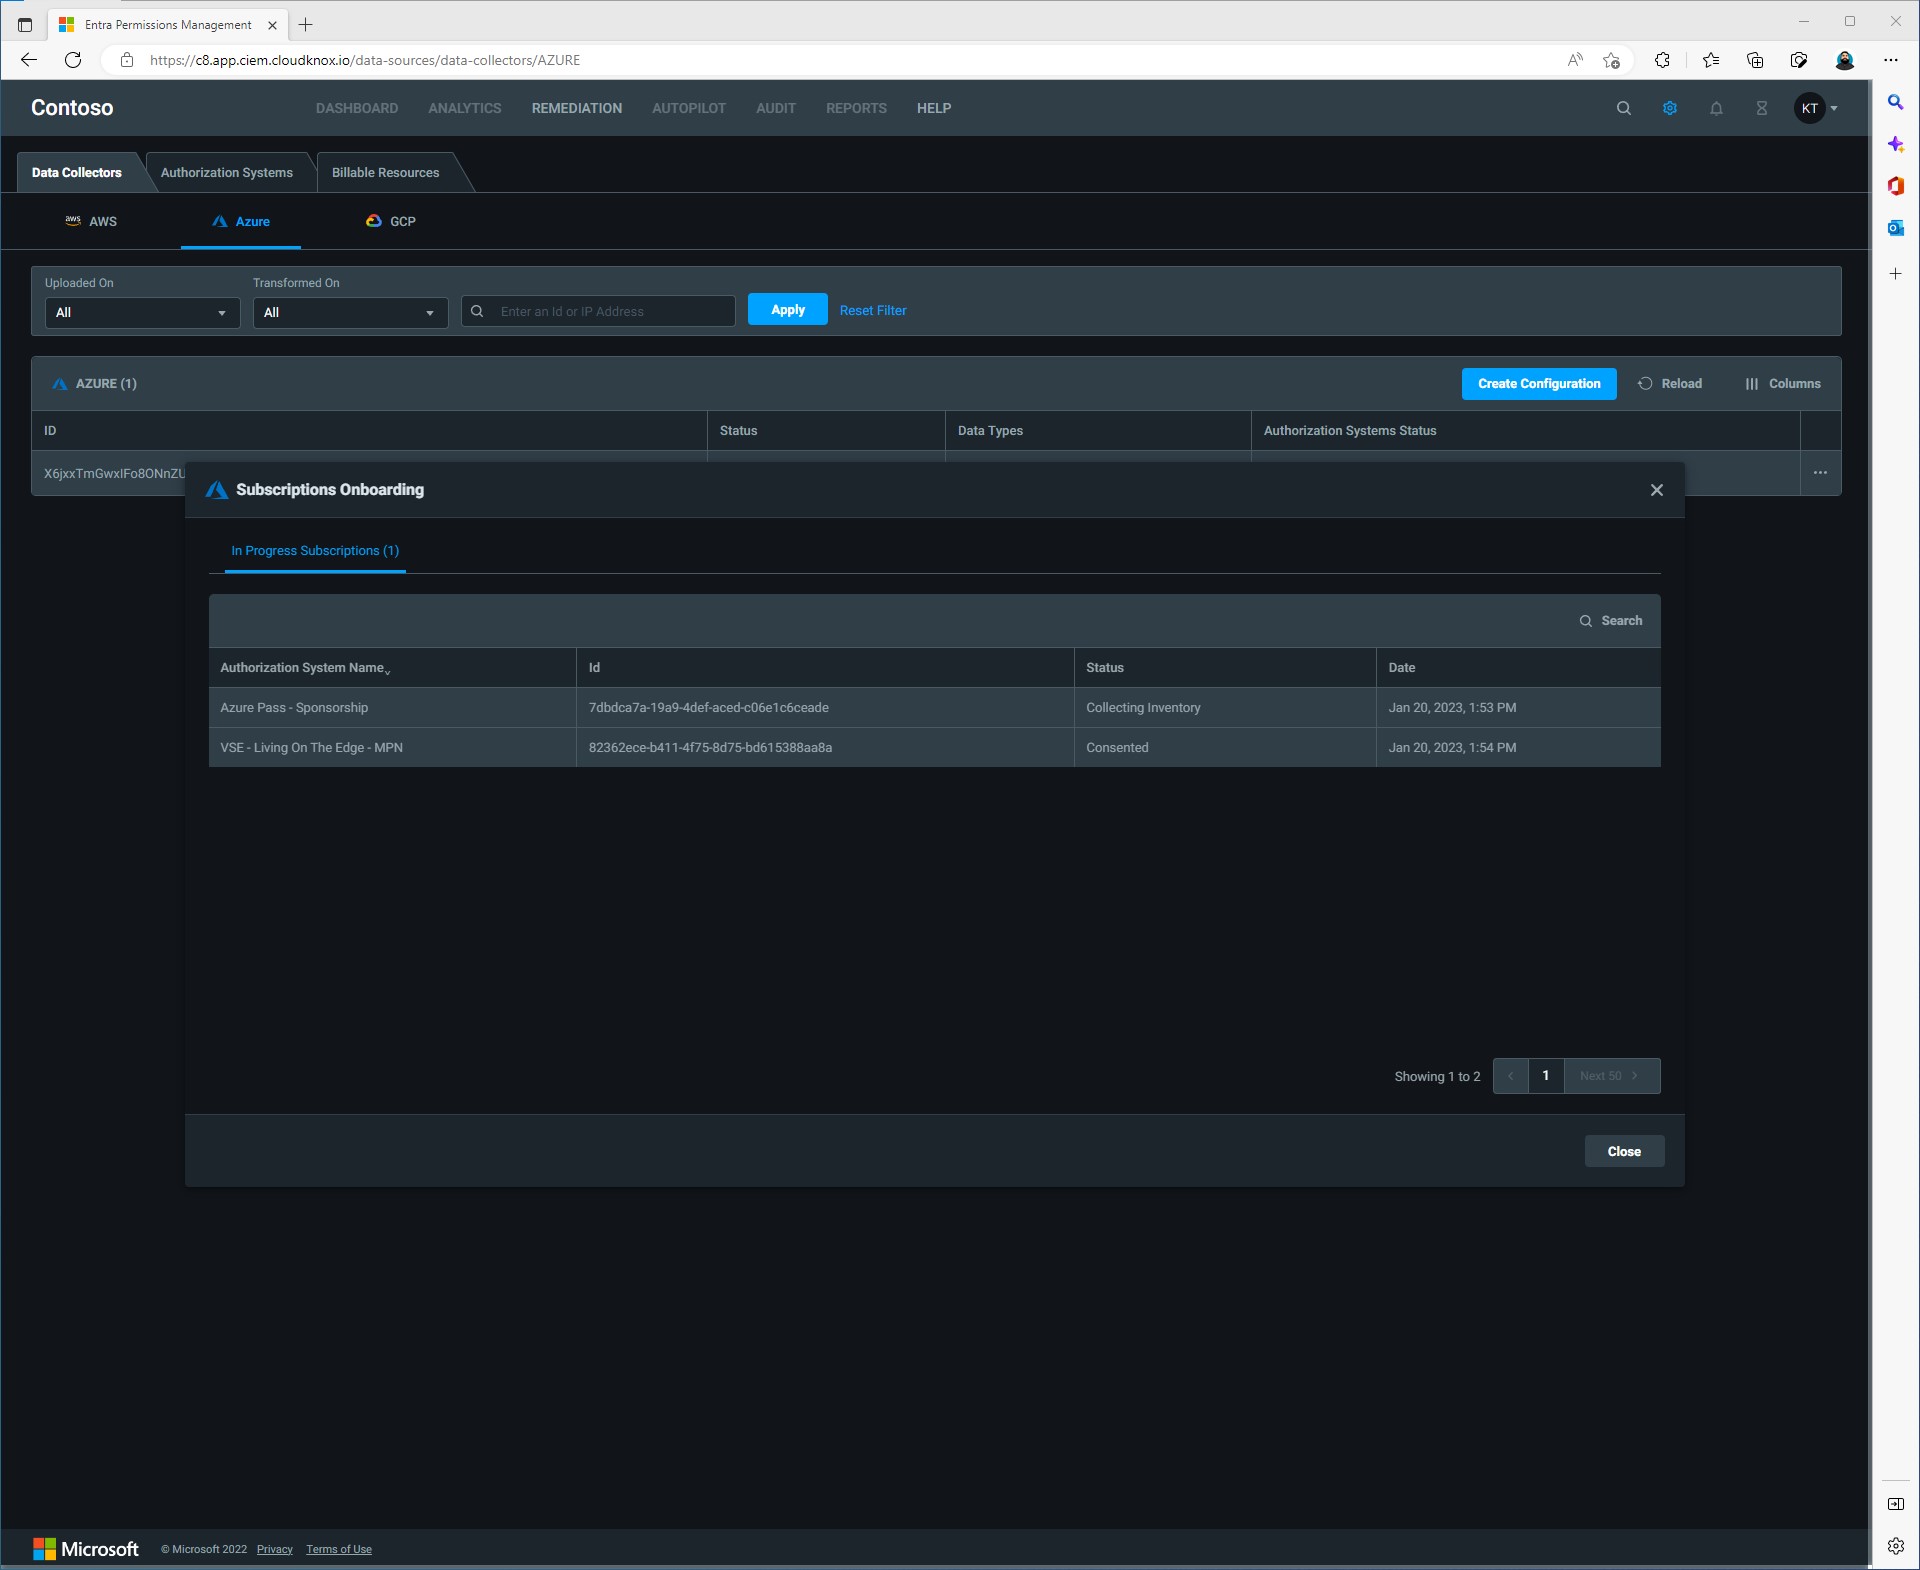

After a few minutes all the discovered subscriptions should be in a status of “Onboarded”. Now that our data collector has been setup, we can go back to the Entra Permissons Management dashboard.
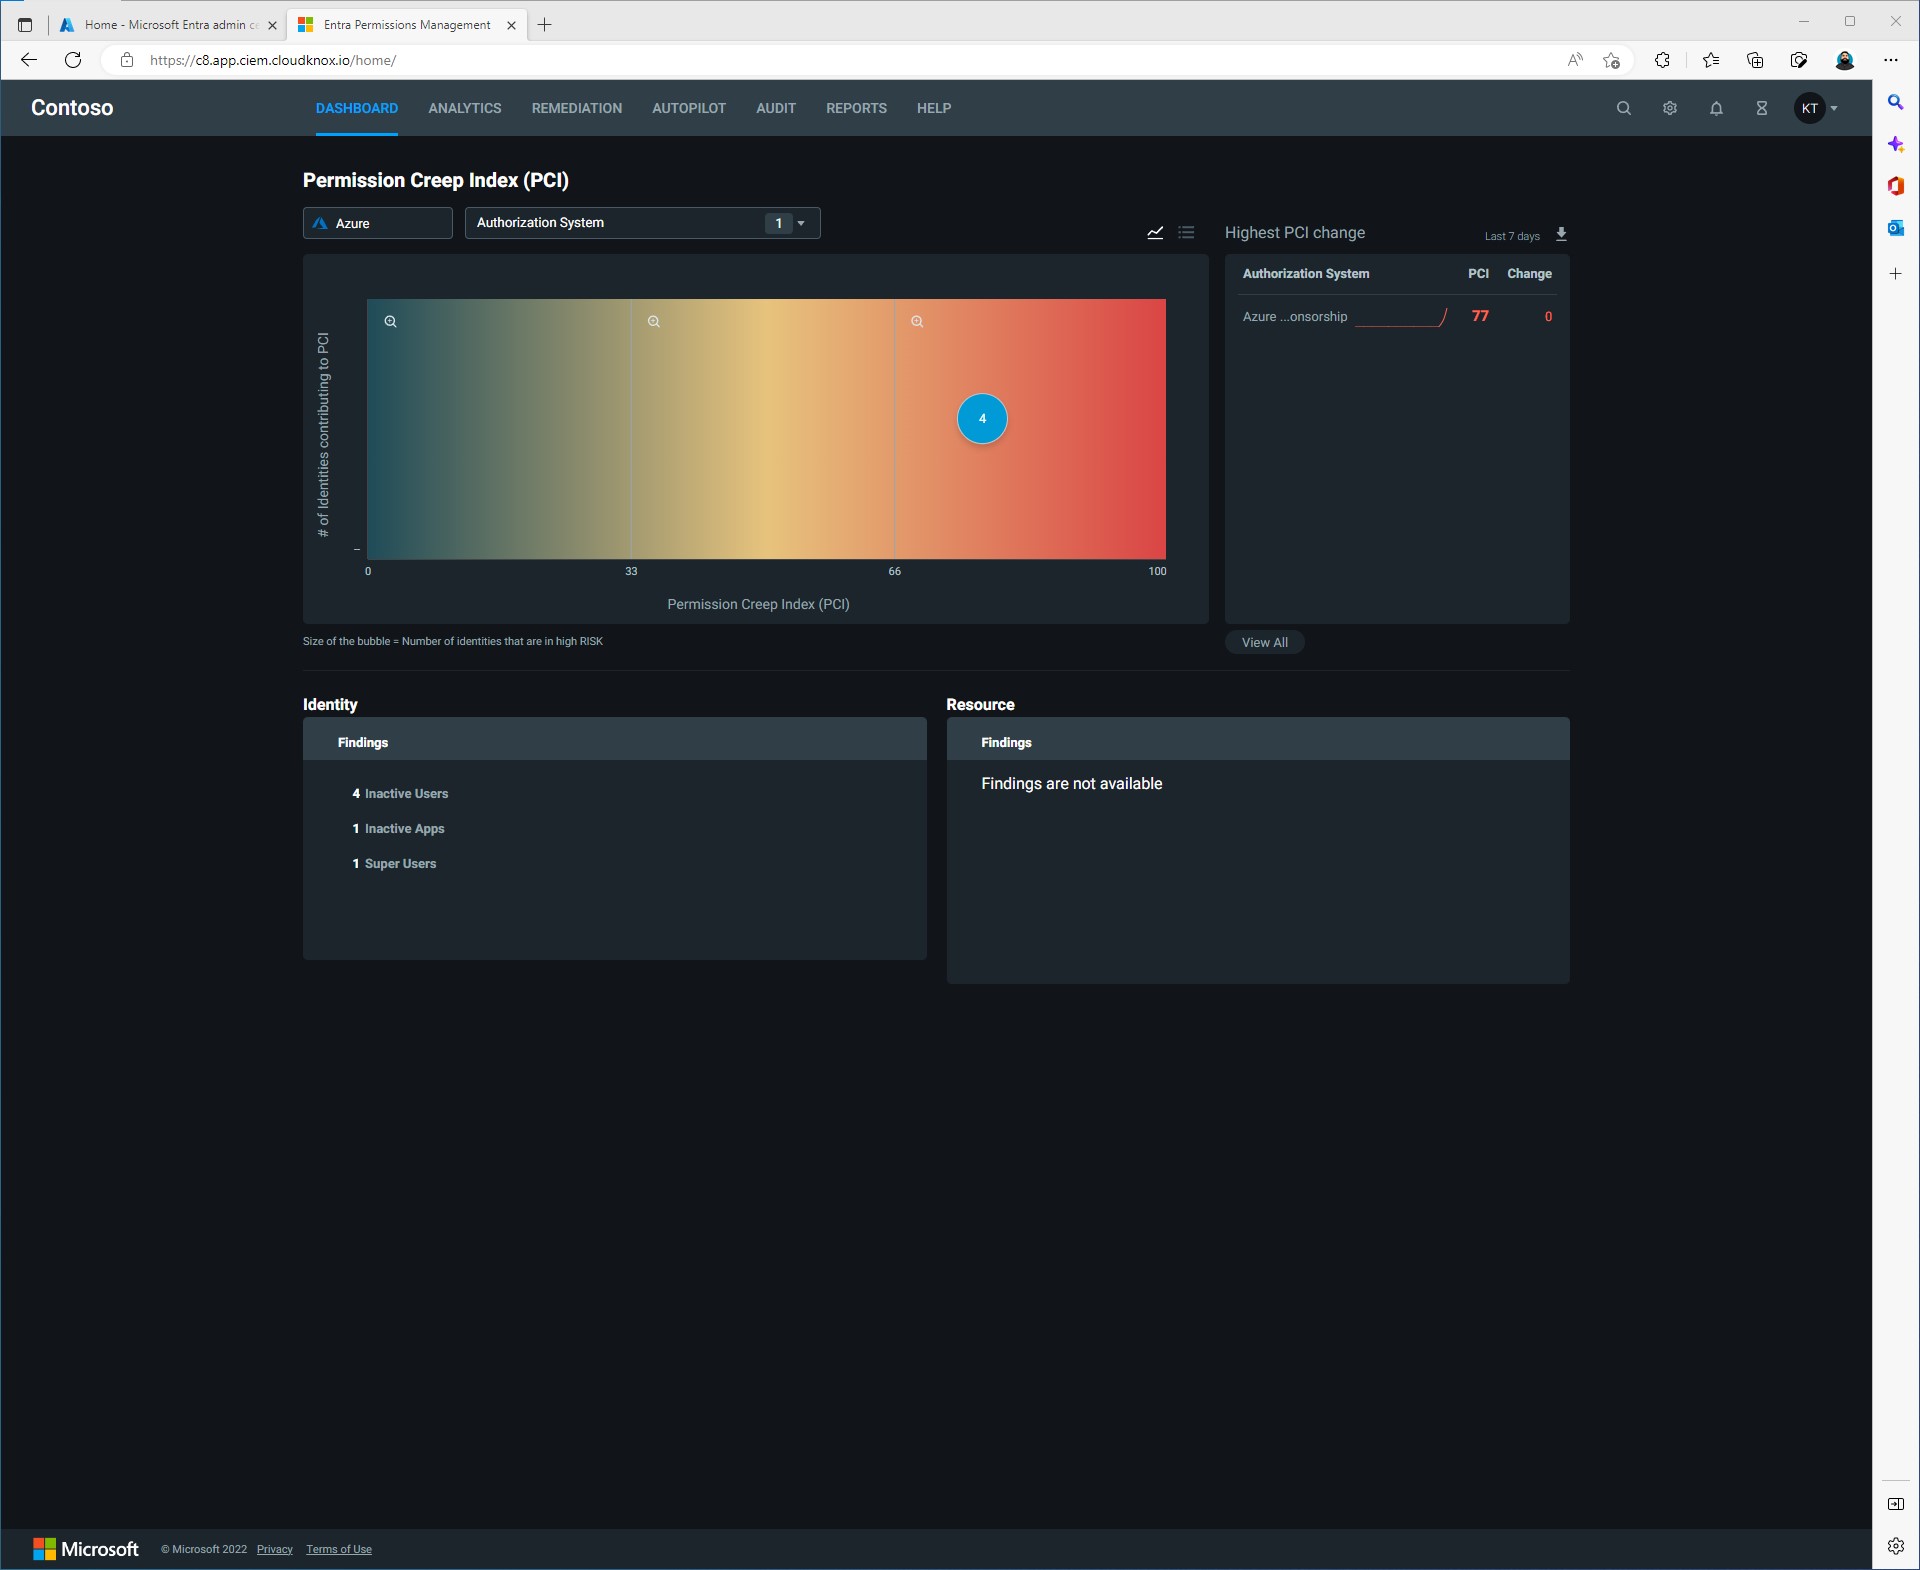
So now we have successfully signed up for Entra Permissions Management and we have successfully onboarded our Microsoft Azure Subscriptions. There is so much more to do at this point.
- Onboard GCP projects
- Onboard AWS accounts
- Discover and Assess
- Remediate & manage
- Monitor & alert
All these will come as I blog more about Microsoft Entra Permissions Management. For now this blog was just focusing on how to setup Entra Permissions Management. I am excited to share more about what Entra Permissions Management can do for you and your origination. Not even just Entra Permissions Management but the entire Entra family of products.
I think my next blog will be showing how to configure a data collector for a Google Cloud project.
